





How to Grow Autoflowers: A 2026 Step-by-Step Guide
You've probably got the same thought a lot of home growers start with. You want your own stash jar on the shelf, you're tired of dispensary lines, and paying tax on every pickup gets old fast. You don't want a hobby that turns into a second job, either.
That's why autoflowers make so much sense. They cut out a lot of the fussy stuff, keep the timeline tight, and let you focus on a simple goal: healthy plants, solid buds, repeatable results.
Why Autoflowers Are Your Ticket to a Homegrown Supply
Autoflowers align with common home growing methods. You want something reliable, not a project that demands constant adjustment, endless gear upgrades, and a dozen conflicting opinions from internet growers who all swear their method is the only right one.
The big win is simplicity. Autoflowering cultivars flower based on age, not on a change in light schedule. That means you don't have to flip to 12/12 and babysit timing the way you would with photoperiod plants. If you want the clean version of the basics, this autoflower seed guide is a useful starting point.

Why they work for busy growers
Autoflowering cannabis plants complete their entire lifecycle from seedling to harvest in 8 to 12 weeks because they begin flowering automatically based on age, usually around 3 to 5 weeks after germination, rather than needing a change in light cycles. That fast pace can allow multiple harvests in the time it takes for one traditional crop, according to this cultivation comparison.
That timeline changes the whole vibe of home growing. You're not staring at a tent for months wondering if you've got time to fix every small mistake. You're running a short, focused cycle, learning quickly, and getting better each round.
Practical rule: Autoflowers reward calm, consistent growers. They punish constant tinkering.
They also line up well with what most hobby growers want:
- Less schedule stress: You don't need to manage a flowering light flip.
- Faster payoff: You can go from seed to trimmed buds in a short window.
- Cleaner learning curve: Fewer moving parts means it's easier to spot what's working and what isn't.
- More momentum: Short runs make it easier to improve from one grow to the next.
The trap most beginners fall into
A lot of “expert” advice makes autoflowers sound more complicated than they are. You'll see people arguing about advanced nutrient stacks, aggressive training, and niche gear before a new grower has even sprouted a seed.
That's backwards.
If you want to learn how to grow autoflowers, don't start by chasing every optimization trick. Start with a single reliable path. Good environment, final pot from day one, gentle handling, steady light, no unnecessary stress. That's what gets you to harvest with buds you'll be proud to smoke and share.
Autoflower vs Photoperiod: Side by Side
Photoperiod plants usually stay in vegetative growth until the light schedule shifts to 12/12, while autoflowers move into bloom without waiting for that change. Photoperiods give you more room to shape height and structure, but they also ask you to keep one eye on the timer. Autos are more fixed, which makes the run easier to fit around ordinary life.
That difference shows up in real planning. A grower who wants to stretch veg, train harder, or hold a plant in place for a while usually has more room to do it with photoperiods. A grower who wants the plant to follow its own clock gets that with autos, and that can be a relief when you do not want the crop tied to a light-flip decision.
The speed gap is part of why autos keep getting attention. Our autoflowering vs photoperiod guide frames photoperiod plants as the slower, more adjustable option, while autos are the quicker route from seed to finish. That shorter cycle matters in a home grow where space is tight and you want a clear endpoint instead of a long veg phase that keeps expanding.
Recent production research adds another layer to the conversation. In a New York greenhouse study, autoflower varieties were measured at 99.13 mg/g THC, each plant was estimated to produce about 2.1 g of THC, and a projected crop of 450 plants was estimated at 943.98 g, or 0.94 kg of THC (Springer study). The same study also found labor took up 52% of total costs in autoflower production, compared with 34% in photoperiod production. That tells you short-cycle growing can save calendar time while pushing more of the burden onto hands-on work.
Bottom line: photoperiod cultivars usually win on size and control, autos win on speed and predictability. For a home setup, that tradeoff can be exactly what you want.
Setting Up Your Autoflower Grow Space
A good autoflower setup doesn't need to be fancy. It needs to be stable. Most bad grows come from unstable basics, weak airflow, soggy roots, poor light discipline, and a grower trying to fix everything at once.
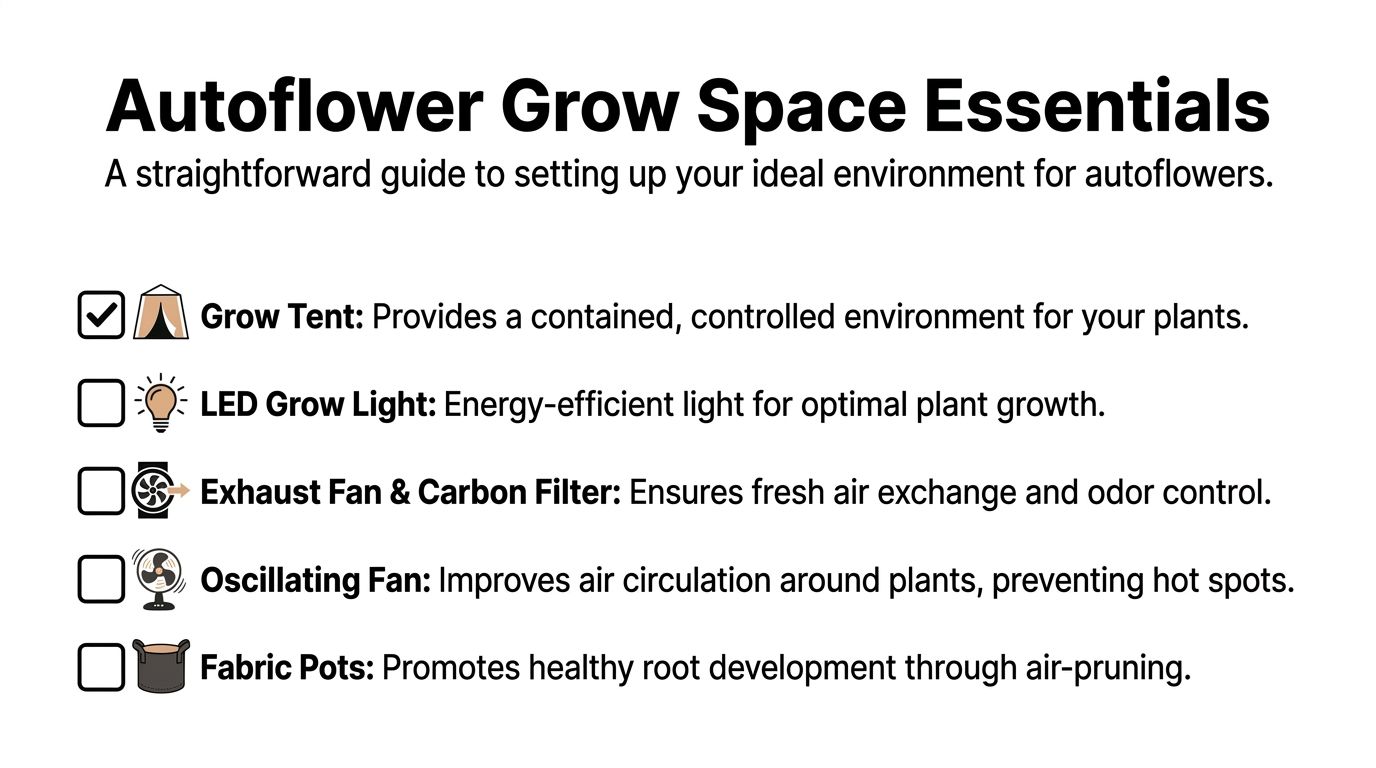
Start with the boring gear that matters. A tent, a quality LED, an exhaust fan with carbon filter, an oscillating fan, and fabric pots. That's the foundation.
The simple setup that works
Use this as your default shopping list:
- Grow tent: Keeps the environment contained and easier to control.
- Full spectrum LED: Gives steady light without the extra heat headaches of older lighting.
- Exhaust fan and carbon filter: Pulls stale air out and keeps odor under control.
- Oscillating fan: Moves air around the canopy so you don't get hot, stale pockets.
- Fabric pots: Help roots breathe and reduce the chance of soggy soil hanging around too long.
- Light soil mix: Keep it airy, not dense or muddy.
- pH tool: If your pH is off, feeding gets messy fast.
One quick note on the light cycle, because people love to overcomplicate it. Autoflowers can handle long light schedules, and if you want a clean breakdown of options, this autoflower light schedule guide lays it out well.
The environment numbers worth following
You only need a few target ranges in your head.
For optimal results, growers should start seeds in their final 7 to 11 liter container, use a soil blend with 30% perlite, keep pH between 6.0 and 6.5, hold the environment at 70 to 85°F (21 to 29°C), and keep humidity around 65 to 70% for seedlings, lowering it to 40 to 50% during flowering, based on these autoflower yield best practices.
That one sentence covers most of what matters. If you ignore half the noise online and just hit those basics, you're already ahead of a lot of first runs.
Here's the quick version:
| Setup factor | Reliable target |
|---|---|
| Container | Final pot, 7 to 11 liters |
| Soil mix | Add 30% perlite for aeration |
| pH | 6.0 to 6.5 |
| Temperature | 70 to 85°F |
| Seedling humidity | 65 to 70% |
| Flowering humidity | 40 to 50% |
A short walkthrough can help if you want to see the basics in action:
What not to do
New growers usually mess up the grow space in one of three ways:
- They go too small on airflow: The tent looks tidy, but the air gets stale fast.
- They use heavy soil: Roots hate sitting in a dense, wet block.
- They transplant later: Autoflowers don't appreciate recovery projects.
If the room feels stuffy to you, the tent probably feels worse to the plant.
Build the space once, keep it simple, and resist the urge to keep changing equipment mid-grow unless something is clearly failing.
From Seed to Sprout The First Two Weeks
The first two weeks are quiet above the soil and busy below it. That's where a lot of growers get impatient and start “helping” too much. Most of the time, that means overwatering, poking around in the pot, or handling the seedling like it needs constant intervention.
It doesn't. It needs a calm start.
A straightforward germination method
The paper towel method is still one of the simplest ways to get going:
- Place the seed between damp paper towels.
- Keep it warm, dark, and undisturbed.
- Check it daily, not every hour.
- Once you see the taproot, move it gently into the final pot.
Plant it shallow in pre-moistened soil, taproot down, and cover it lightly. Don't pack the surface down. Seedlings need soft media so they can push up cleanly.
What a healthy start looks like
A healthy seedling should stand upright fairly quickly, open its first baby leaves, and start showing fresh green growth without looking twisted or collapsed. In this stage, the root zone matters more than the canopy.
Water lightly around the seedling, not across the whole pot like you're trying to soak a full-grown plant. The container may be large, but the root system isn't. If you keep the entire pot drenched early on, you create a swamp.
- Keep it gentle: Use small amounts of water near the seedling.
- Keep it warm: Stable warmth helps root growth stay steady.
- Keep it bright, not harsh: Enough light to avoid stretching, not so much that the seedling looks stressed.
- Keep your hands off it: Don't dig around to inspect the root or re-seat the sprout.
The mindset that saves beginners
The goal in the first two weeks isn't speed. It's momentum.
You're building a root system that the plant will rely on for the rest of its short life. If a seedling looks a little slow but healthy, leave it alone. If it's stretching, adjust the light. If the soil is still wet, don't water again just because the calendar says it's time.
That restraint is one of the hardest parts of learning how to grow autoflowers, and it's one of the most valuable.
Managing Growth and Gentle Training
Once the plant starts building real structure, you've got a small window to shape it without slowing it down. Here, beginners often get baited into trying advanced techniques too early. They top too late, strip too many leaves, or bend stems like they're working on a photoperiod plant with loads of recovery time.
Autoflowers don't give you that cushion. Gentle training works. Heavy stress is a gamble.
Why LST is the smart move
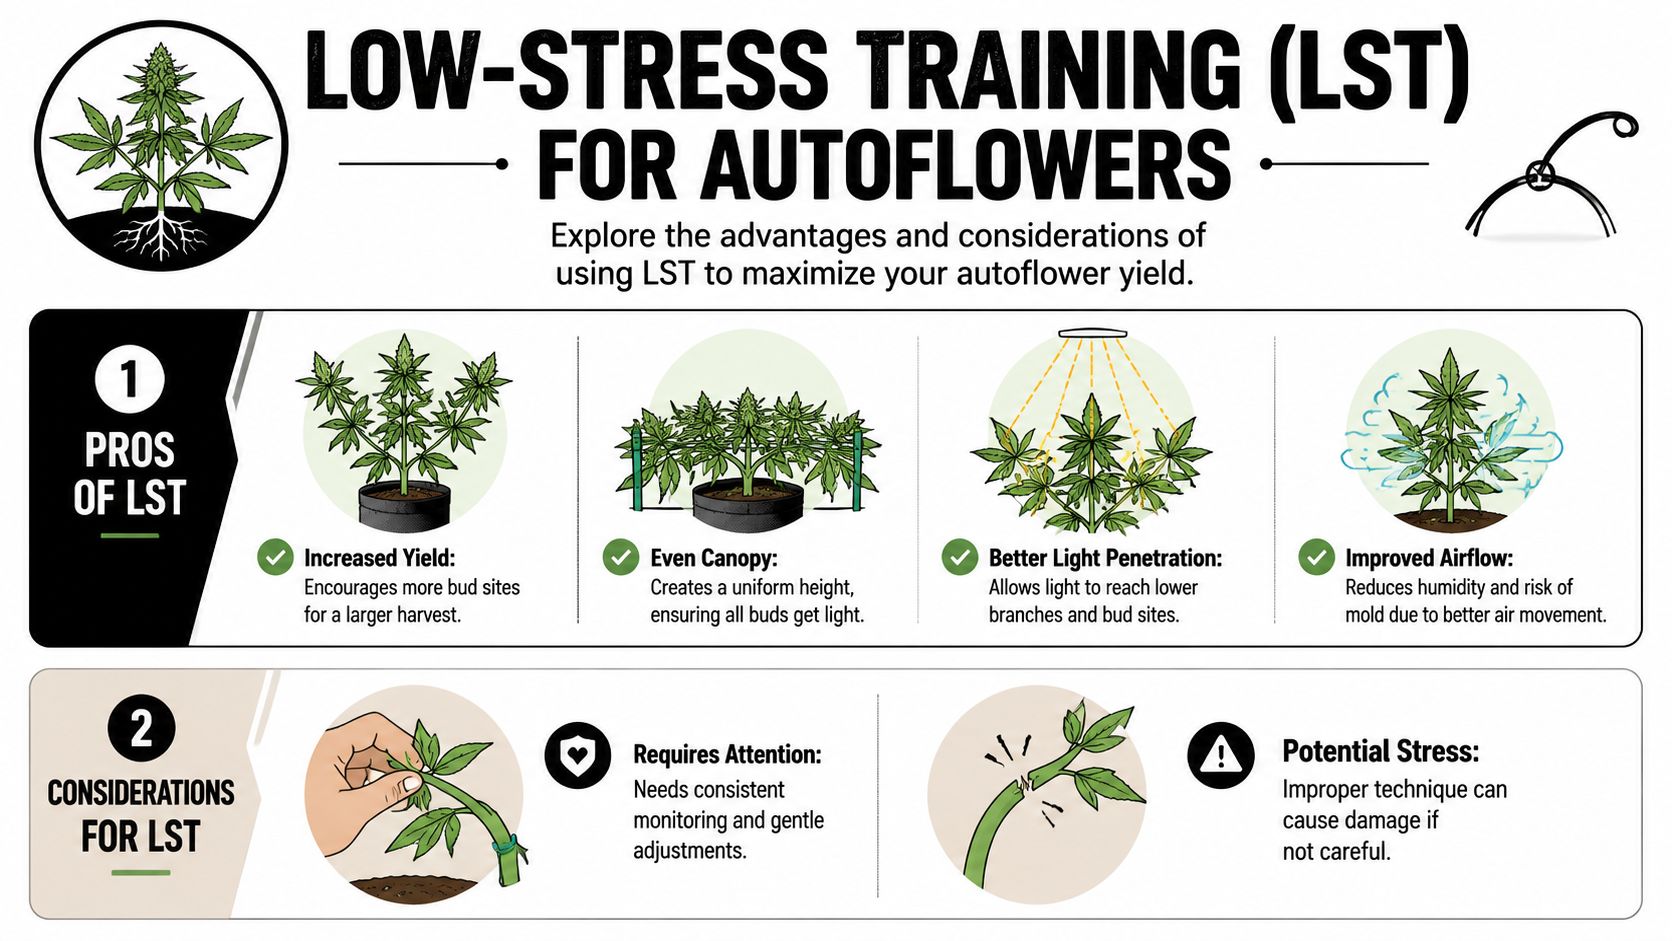
Low-stress training, or LST, means bending and tying branches so more of the canopy gets direct light. It's simple, and it suits autoflowers because it changes the plant's shape without forcing a big recovery period.
If you want a deeper walk-through, this LST guide for autoflowers is worth bookmarking.
Research shows that trained autoflower plants via LST before flowering produce bigger yields, higher THC levels, more terpenes, and denser buds than untrained plants. It also notes that the first 4 to 5 weeks are for vegetative growth, so all training should be done within that window to avoid stunting the plant during its short 8 to 10 week lifespan, based on this seed bank’s autoflower yield guide.
That lines up with what experienced home growers see in real tents. A plant spread wide with an even top usually gives you a better result than one tall central cola shading half the lower growth.
How to do it without causing problems
Start when the stem is flexible and the plant has enough structure to bend without kinking. Tie the main stem gently toward the pot edge, then keep adjusting side branches so they spread outward and upward.
A few simple rules keep LST safe:
- Start early: Don't wait until obvious flowering is underway.
- Use soft ties: Garden wire with coating, plant ties, or similar soft material works well.
- Bend in stages: You're guiding the plant, not forcing it flat in one move.
- Watch daily: Autoflowers change fast, and ties can tighten as stems thicken.
The best LST session looks boring. No snapped branches, no dramatic surgery, just a flatter canopy a few days later.
What beginners should skip
Some growers can top autoflowers successfully. That doesn't mean it's the right call for a first or second run.
Skip the ego moves:
- Topping late: Easy way to stall a plant with no time to recover.
- Heavy defoliation: Removing too much leaf slows a fast plant down.
- Constant retraining: If you're adjusting it every few hours, you're doing too much.
If your plant is healthy, expanding, and opening up to the light, leave it alone. That's enough.
Thriving Through the Flowering Stage
Flowering is where the grow starts paying you back. The plant stops acting like it wants to build a frame and starts focusing on bud production, aroma, and density. It's also where sloppy habits show up fast.
You don't need a complicated bloom strategy. You need to read the plant, ease off the things that don't matter anymore, and support the structure you built earlier.
What changes when flowering starts
Autoflower cultivars typically begin blooming automatically based on age, usually 3 to 5 weeks after germination, which removes the need to flip lights or track a 12/12 schedule for most strains, according to this autoflower growing overview.
You'll usually notice a few clear signs:
- White pistils appear: Small hairs start showing at the nodes and bud sites.
- The plant stretches: Branches push upward and the shape changes fast.
- Nutrient priorities shift: Nitrogen becomes less important, while bloom support matters more.
- Humidity needs to come down: Dense flowers and damp air are a bad mix.
For general conditions during this stage, a strong baseline is soil pH between 6.0 and 6.5, indoor temperatures of 70 to 85°F, humidity in the 40 to 60% range, and 18 to 20 hours of daily LED light, based on this autoflower environment guide.
A simple feeding mindset
By this point, the plant wants steady support, not nutrient bravado. If you're in soil, keep feed changes gradual. As flowering builds, nitrogen becomes less central and bloom nutrients matter more.
Don't chase every pale leaf with more bottles. Some fading is normal as the plant matures. What you want to avoid is swinging from underfeeding to overfeeding because you got nervous.
A clean flowering routine looks like this:
- Stay consistent with pH: This avoids fake “deficiencies” caused by lockout.
- Reduce unnecessary stress: No late topping, no hard pruning.
- Keep airflow moving: Buds need fresh air around them.
- Feed with restraint: More nutrients don't automatically mean better flowers.
The underrated edge most guides skip
A lot of beginner advice gets stuck on “less is more” feeding and leaves it there. That misses a useful detail.
Growers can support autoflowers with silica and mycorrhizal fungi. Silica strengthens cell walls, while mycorrhizal fungi help prevent taproot stagnation in the final pot. That structural support helps the plant handle nutrients more effectively and produce stronger results than generic light-feeding advice alone, as discussed in this Dave Baker video on maximizing autoflower yield.
That's worth paying attention to because flowering success isn't just about what you pour into the pot. It's also about whether the plant has the root support and stem strength to use those inputs well.
Healthy flowers come from a healthy structure first. Feeding only matters if the plant can actually use it.
Harvesting Your Buds and Solving Common Issues
Harvest is where patience finally matters more than gear. A lot of solid grows get cut early because the buds look good, smell strong, and the grower is ready to be done. That usually leaves quality on the table.
Go by the plant, not by your impatience.
What harvest readiness looks like
Use a small magnifier and look at the flowers, not just the calendar. You're watching for mature trichomes, darker curling pistils, a natural fade in older leaves, and a strong finished aroma.
A simple visual checklist helps:
- Check trichomes: Mostly cloudy with some amber means the plant is in the harvest window.
- Watch pistils: When most have darkened and curled inward, the plant is getting close.
- Notice the fade: Some yellowing in fan leaves can be part of normal finish.
- Trust the smell: Mature flowers usually carry a fuller, richer aroma than earlier buds.
Drying and curing without ruining the finish
Drying and curing decide whether your jars smell rich or flat. A rushed dry can wreck a good harvest fast.
Keep the process simple:
- Cut the plant or branches and remove the largest fan leaves.
- Hang in a dark area with steady airflow nearby, not blasting directly on the buds.
- Wait until smaller stems feel dry enough to snap rather than bend limp.
- Trim and jar the buds.
- Open the jars regularly at first so moisture can escape.
Curing is where the flower settles in. Aroma gets cleaner, the smoke gets smoother, and each cultivar starts showing its real character. This is the part that turns “homegrown” into something you want to bring out with friends.
Three common problems and the easy fixes
Most first runs don't fail because of one dramatic disaster. They get dragged down by a few basic issues.
| Problem | What it usually means | What to do |
|---|---|---|
| Droopy leaves in wet soil | Overwatering | Let the pot dry more between waterings |
| Pale or blotchy leaves | pH or feeding issue | Check pH first before adding more nutrients |
| Weak lower growth and crowded canopy | Poor light spread or airflow | Adjust training, open the canopy, keep air moving |
One more practical note on containers. Autoflower plants can reach 2 to 3 times the diameter of their pot, and a 7 to 10 gallon container is considered ideal for maximizing plant size, though smaller pots can speed flowering while larger pots may push harvest later, according to these autoflower pot size tips.
That trade-off matters. Bigger root space can help, but only if your environment and watering habits are already under control. A huge pot won't save a grower who keeps the medium soaked.
Harvesting well is half observation and half self-control.
If you've made it this far, you already know the true secret behind how to grow autoflowers. Keep the process simple, avoid the obvious mistakes, and let the plant do what it's built to do.
If you're ready to put this into practice, Botanist Seeds makes it easy to compare cultivars for your space, your experience level, and the kind of grow you want to run. Use the comparison tool, find a cultivar that fits your setup, and keep your first run simple enough to finish strong.












