Top 4 Inch Inline Duct Fans: 2026 Buyer’s Guide
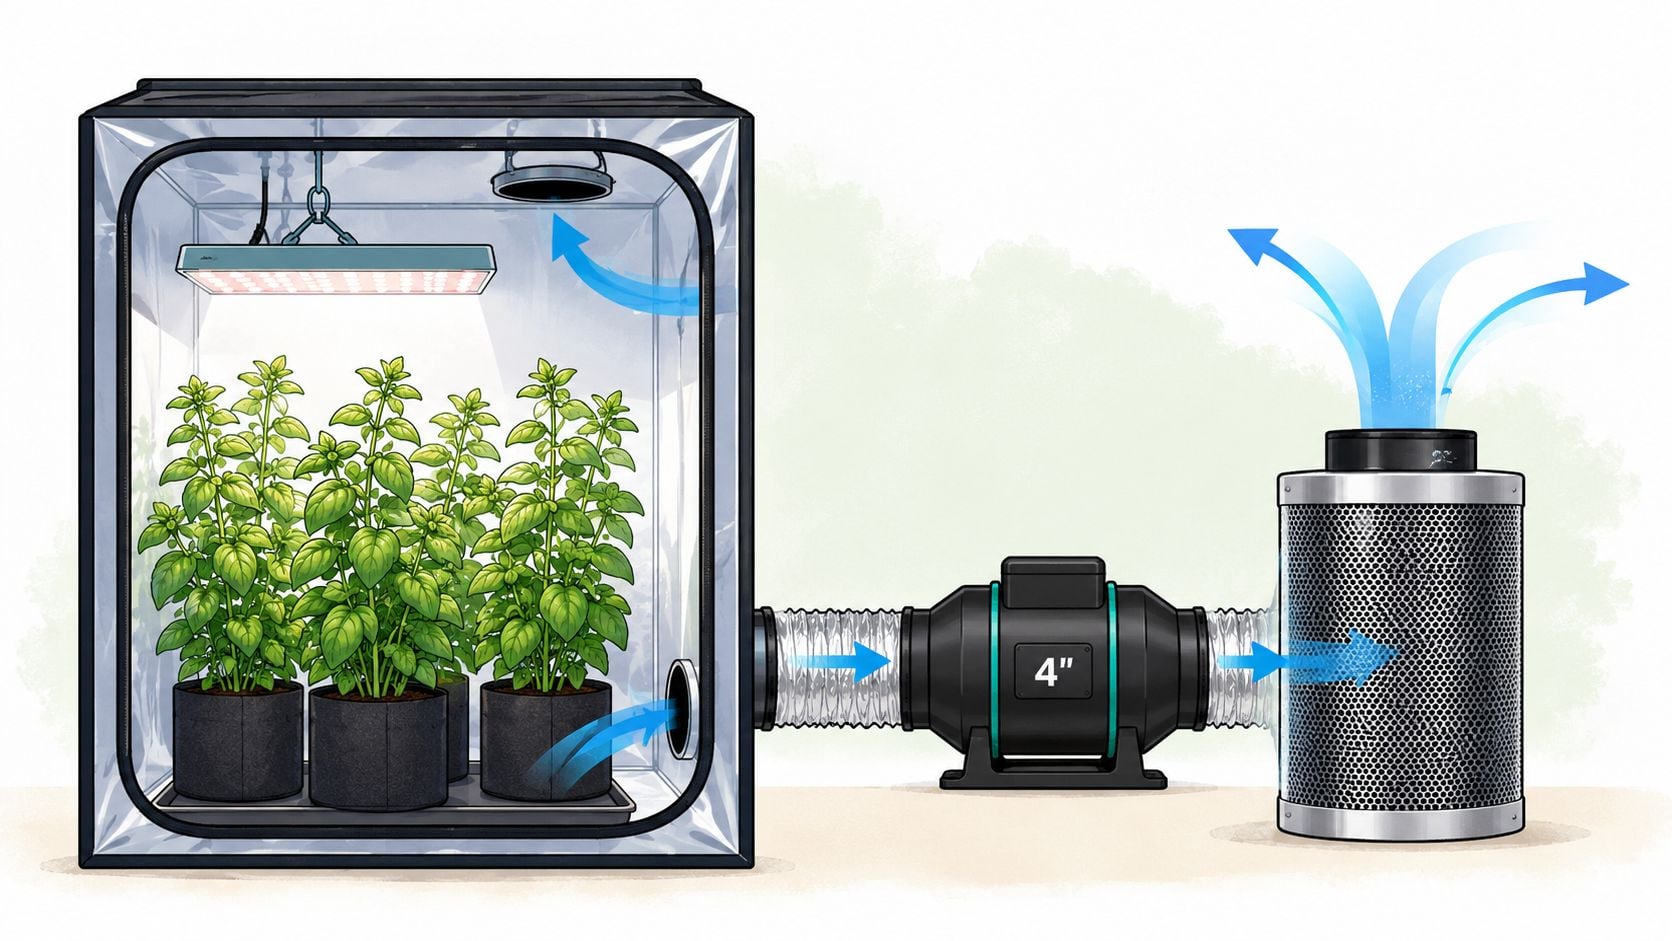
If you've ever set up a tent, hung a light, and then realized the air inside feels heavy a few hours later, you already know why ventilation matters. The right 4 inch inline duct fan keeps a small home grow steady, quiet, and a lot less stressful to run, especially when you're trying to protect your cultivars from heat spikes, stale air, and that damp feeling nobody wants in a tight space.
A 4 inch inline duct fan is usually the sweet spot for a compact tent, closet, or small room because it can move enough air without taking over the whole setup. That matters when you want a clean, manageable grow with good airflow, less odor buildup, and a setup that still leaves room for lights, hanging gear, and your actual plants.
Why a 4-Inch Fan Is Your Grow Tent's Best Friend
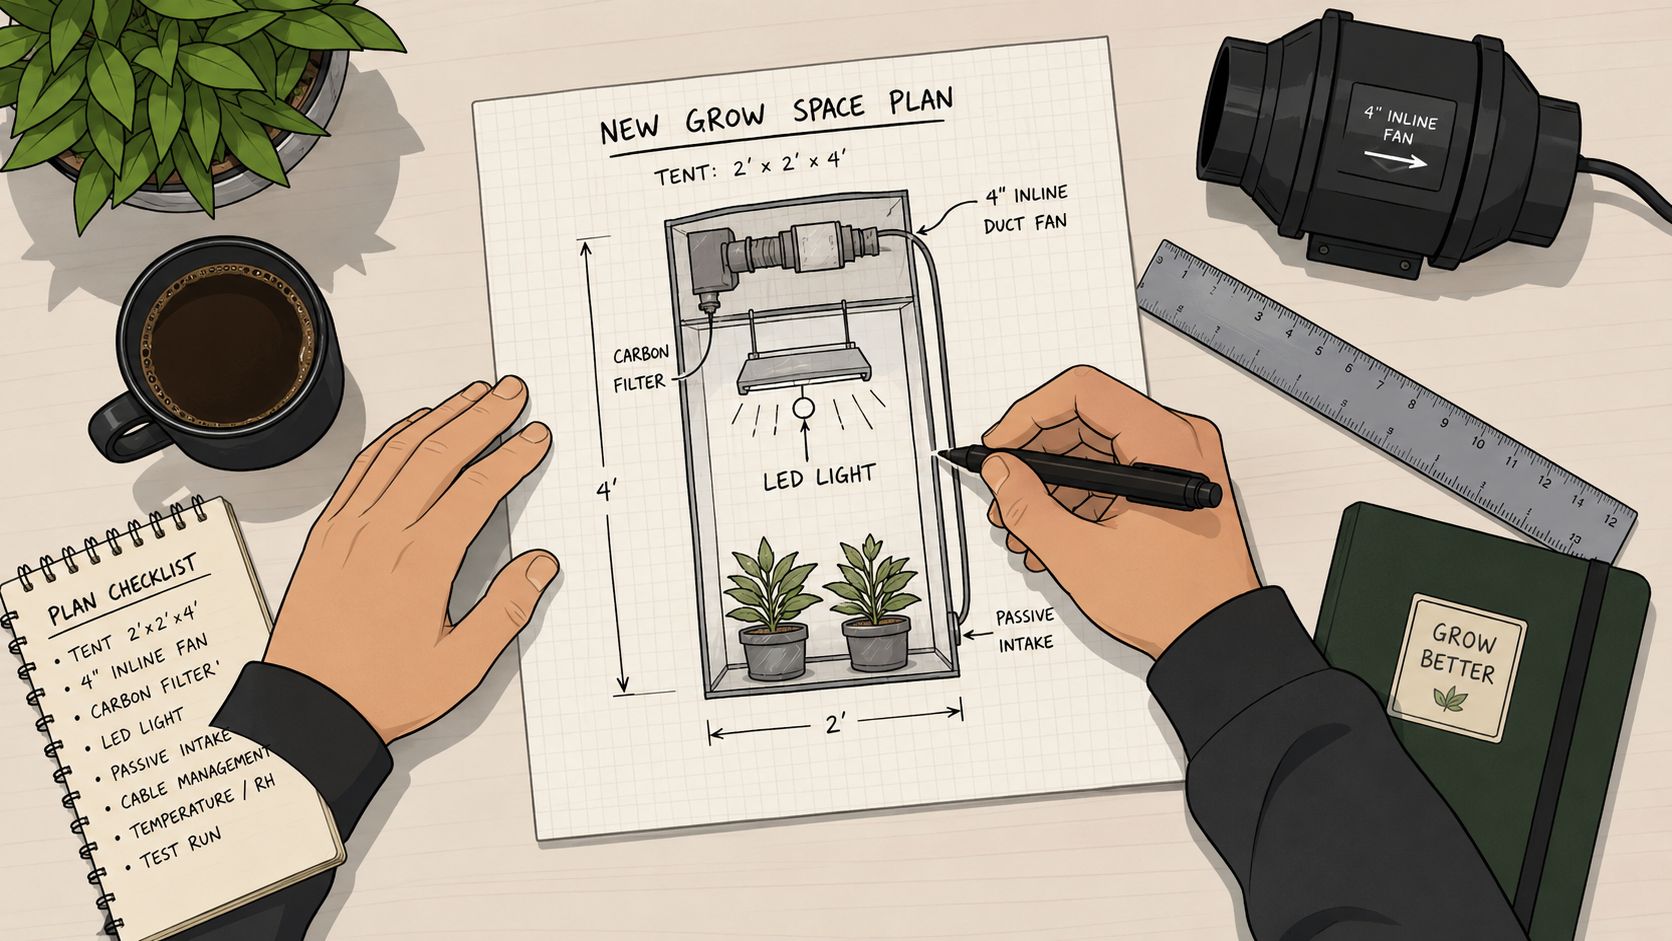
A small tent can look finished the moment the light goes up, but the grow still isn't ready until air is moving properly. Heat from LEDs, humidity from watering, and stagnant pockets around the canopy all build up fast in a compact space. A 4 inch inline duct fan gives you a simple way to keep that environment stable without turning the room into a wind tunnel.
The three jobs that matter most
First, the fan helps pull warm air out before it stacks up near the top of the tent. That keeps the space from getting stuffy and gives your cultivars a better shot at staying consistent through the day.
Second, it helps manage moisture. In a tight home grow, humidity can climb faster than people expect, and that's where airflow starts doing real work instead of just sounding like another gadget.
Third, the fan brings in fresher air so the space doesn't feel spent. You're not just exhausting air, you're keeping the whole tent cycling in a way that supports strong growth and a cleaner smell profile.
Practical rule: if your tent feels warm, humid, or stale after the light has been on for a while, airflow is one of the first things to fix.
A 4 inch inline duct fan also fits the kind of setup most hobby growers run. A 2×4, 3×3, or closet grow usually doesn't need a giant fan, it needs a well-matched one that can move air through a short run of ducting without fighting the layout. That's why a fan in this class is often the most sensible starting point, especially if you're trying to keep the grow tidy and easy to live with.
If you're building from scratch, a complete kit can make the planning easier, and our grow tent kit guide is a useful reference point for that kind of compact setup. The main goal is simple, you want your fan to support the space instead of becoming another thing you have to work around.
Calculating Your Real CFM Needs
A fan that looks strong on paper can disappoint once it has to pull through a carbon filter, bends, and a length of ducting. The key question is not how the box reads, it is how much air the fan still moves after your setup puts up resistance.
Start with the grow space itself. Measure the tent or room volume, then decide how aggressively you want to exchange the air based on the way the room runs, not on a clean spec sheet with no load on it.
Published 4-inch fan data gives a useful reality check. Similar units can run from about 100 CFM at 1,850 RPM to 195 CFM at 2,500 RPM, while noise climbs from roughly 26–31 dB to about 30 dB as output goes up, which shows how airflow and sound rise together in this size class (Cool Components inline duct fan benchmark).
Static pressure is the part that usually gets ignored.
Every elbow, filter, long duct run, and grille adds resistance. A fan that looks plenty strong on paper can feel underpowered once it has to push air through a restrictive path, and that is where many growers end up frustrated with a setup that should have worked.
A better habit is to size for the whole path, not just the room. One buying guide recommends building in a 20% margin for duct resistance because airflow drops once bends and filters are in the line (Sylvane inline duct fan buying guide).
A simple planning order keeps the decision honest.
- Measure your space: get the tent or room size first.
- Map the airflow path: count bends, filters, and duct length.
- Choose for the load: pick a fan that still delivers useful airflow after resistance is added.
If you are adding a carbon filter, do not shop right at the edge of the spec. Leave headroom so the fan still has enough pull once the filter is installed.
The AC Infinity CLOUDLINE A4 is a solid example of why that matters. Its published specs put it up to 165 CFM at 324 Pa of static pressure, with an EC motor, a 10-speed controller, and a listed noise level of 29 dBA. That mix makes the buying logic clear, airflow matters, but pressure handling matters just as much in a small ducted system (AC Infinity CLOUDLINE A4 specifications).
For setup planning, the Botanist Seeds VPD chart is a useful companion, because airflow, heat, and humidity all affect each other in a real grow room.

A No-Fuss Guide to Fan Installation
The easiest installs are the ones that plan for vibration before the fan ever starts spinning. A 4 inch inline duct fan can be mounted inside the tent, outside the tent, or even just outside the grow area if the duct run makes sense, but the primary priority is keeping it secure and isolated from the frame. A fan that's bolted rigidly to poles usually sounds louder than it needs to, even when the motor itself is decent.
Where to place it
Inside the tent is simple, and it keeps the system compact. Outside the tent can make maintenance easier and can free up hanging space, but it also means you need to think harder about the duct path and the space around the unit.
Either way, the fan should be supported, not hanging by the duct alone. That setup strains the connections and often adds vibration where you don't want it.
What works better than rigid contact
Use straps, hooks, or a hanging kit so the fan doesn't touch the tent poles directly. Soft mounting helps cut down the buzz that travels through the frame, and that matters more than people think when the grow is in a bedroom, apartment, or shared room.
A few practical details make the install cleaner:
- Keep the duct path short: Every extra turn adds resistance.
- Use tight clamps: Loose joints leak air and make the fan work harder.
- Route the cord cleanly: A messy cord path becomes a snag point later.
- Avoid sagging duct: A drooping run creates drag and weakens flow.
The other thing worth doing is checking the fan orientation before you commit. Inline fans can be set up to pull or push, but the best choice depends on your filter position and the path you want air to follow. If you're using a restrictive filter, many growers prefer to pull through the filter so the fan handles the load in a controlled way.
One 4-inch booster fan is marketed specifically for ducts and vent systems with a controller and pressure switch, which is a good reminder that real-world installations depend on pressure handling and control, not just raw motor speed (AC Infinity pressure-switch booster fan). That's the kind of detail that separates a neat setup from one you keep tweaking every week.
A clean install feels better every day
Once the fan is mounted correctly, the whole tent usually feels more solid. Less shake, fewer rattles, fewer little problems that pile up into noise or airflow loss. That's the payoff for doing the install right the first time.
Pairing Your Fan with Filters and Ducting
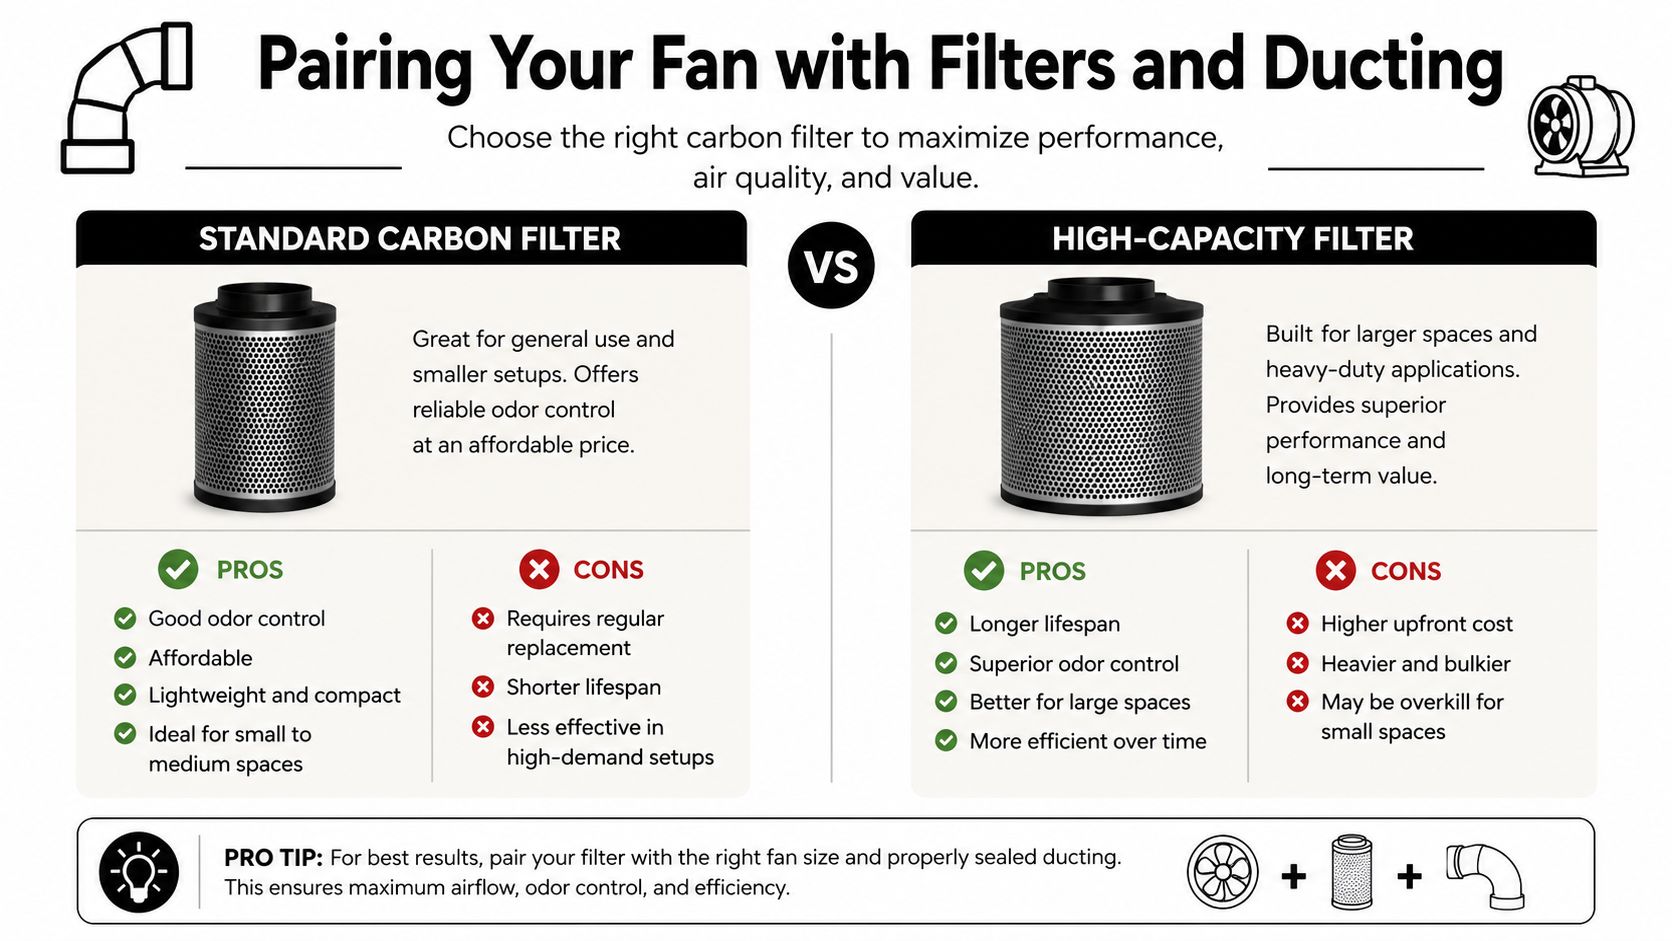
A fan never works alone. The fan, filter, and ducting act like one system, and the common mistake is buying each part as if it stands on its own. A fan that looks strong on paper can lose its edge fast if the filter is too restrictive or the duct run adds too much drag.
Carbon filter fit matters more than brand hype
If odor control matters, the filter has to match the fan's real output, not just the number on the product page. A filter that creates too much resistance can flatten airflow and leave the tent warmer and more humid than you expected.
The safest approach is to give the filter some headroom and account for the pressure loss from elbows, bends, and a long exhaust path. A practical comparison of carbon filters also helps show why 4-inch setups need more attention to layout than a quick spec check suggests, because duct size and resistance shape real performance more than branding does (HVAC Tactician on duct diameter choices).
Flexible ducting vs rigid ducting
Flexible ducting is easy to route, so most home growers start there. It works well in tight spaces, but it can add drag if it's kinked, too long, or left hanging without support.
Rigid ducting gives a cleaner airflow path and usually holds its shape better. It takes more planning, though, and it is harder to fit in a cramped tent where you need to work around lights and frames.
The trade-off is simple.
- Flexible ducting: easier to install, easier to route, more forgiving.
- Rigid ducting: better airflow path, more stable shape, less convenient in tight spaces.
A good middle ground is to keep the main run as straight as possible and use flexible sections only where the bend is unavoidable. That keeps the system practical without turning it into a maze.
Different fan classes point to the same lesson
Specs from a few 4-inch fans make the point clearly. One model is listed at 100 CFM and under 30 dB, another at 200 CFM for removing heat, humidity, and smoke, and a third at 195 CFM, 2500 RPM, 28 W, 0.45 A, and 30 dB with removable duct ends and a 5.9-foot cord (VIVOSUN 4-inch inline booster fan), (VEVOR 4-inch inline duct fan), (iPower 4-inch inline ventilation fan). Those numbers are useful, but they only matter once you factor in the filter load, the duct path, and how much noise you can live with in the room.
If you want a broader look at odor control in a home grow, our guide to air purifiers for cannabis is a useful companion read. It can help with the room environment, but it does not replace a properly matched exhaust system.
How to Make Your Inline Fan Super Quiet
A loud grow fan usually starts as a small annoyance. A few days in, though, the hum, rattle, or rushing air can be the thing that makes a tent feel hard to live with. The motor gets blamed first, but the noise often comes from vibration, loose ducting, and air moving too hard through a cramped path.
Start with vibration, not volume
If a fan is cinched hard to the tent frame, the frame can carry that hum through the whole setup. Soft mounts, rubber isolation, or bungee-style hanging cut that contact point and keep the noise from spreading.
Air speed matters just as much. Smaller ducts usually sound louder because the air has less room to move, so a compact setup can end up noisier than a larger, slower one. A careful install usually beats raw fan power.
Quiet setups usually come from better mounting, not from chasing the biggest fan spec.
The simplest quieting moves
- Use vibration grommets: They keep the frame from acting like a speaker.
- Insulate the ducting: Acoustic wrap or insulated flex helps soften rushing noise.
- Run the fan lower when possible: A speed controller often drops noise more effectively than moving to a bigger, louder fan.
- Set the fan on something stable: A solid surface cuts down on chatter and rattles.
A controller gives you room to tune the sound instead of living with one fixed setting. The AC Infinity CLOUDLINE A4 is a good example of that approach, with an EC motor, a 10-speed controller, and a low-noise design that growers often like for quieter rooms. The VIVOSUN 4-inch fan points in the same direction, with a design that keeps noise targets low for this size class.
The bigger point is simple. Quiet gear gets used the way it should. If a fan is easy to live with, you keep it running at the right level. If it gets annoying, people turn it down too far, and that can create more heat, odor, and humidity problems later.
Simple Maintenance for Long-Term Performance
A 4 inch inline duct fan can run well for a long time, but performance usually slips when dust builds up, joints loosen, or a filter starts getting tired. Keep an eye on those basics and the fan stays closer to how it performed on day one. Maintenance does not need to be a big project. A quick check now and then is usually enough to keep airflow steady and noise from creeping up.
What to check first
Start with the fan blades and housing. Dust does more than look messy, it can make a small fan feel weaker over time, and that matters more in a compact setup where airflow is already working against bends, filters, and duct length.
Then check every duct connection. A clamp that has backed off or a joint that shifted slightly can bleed off performance before the problem feels obvious in the tent.
The filter deserves attention too. If odor control starts fading or the fan sounds like it is working harder to move the same air, the filter may be adding more resistance than the rest of the setup can comfortably handle.
Quick troubleshooting when something feels off
- Airflow seems weak: Check for a kinked duct, a clogged filter, or a loose joint.
- The fan sounds louder than usual: Look for vibration against the frame or a mounting point that has gone out of alignment.
- The tent feels hotter: Make sure the exhaust path has not become more restrictive after a change to the setup.
Static pressure is the part growers often miss. Filters, bends, long duct runs, and tight layouts all make the fan work harder than the box spec suggests, so a setup can look fine on paper and still underperform in the tent. A fan with an EC motor and a controller gives you more room to adjust for those real-world losses, which is why an adjustable design can stay useful as the setup changes. The Grow Meridian CLOUDLINE A4 review shows the AC Infinity CLOUDLINE A4 as one of the cleaner examples of that approach, with its EC motor and 10-speed controller built for flexible performance rather than a single fixed output.
Noise deserves the same attention as airflow. If the fan is clean, mounted tightly, and not fighting extra restriction, it is usually easier to keep the room quiet without sacrificing the exhaust you need. That is the difference between a fan you tolerate and a fan you can forget about while the tent does its job.
A fan does not need constant attention, but it does need occasional respect. Keep the path clean, keep the joints tight, and do not wait for noise or heat to tell you something is wrong. That is how a compact grow keeps running like a proper system instead of a pile of parts.