Leaves Curling Up? a Grower’s Guide to Diagnosis & Fixes
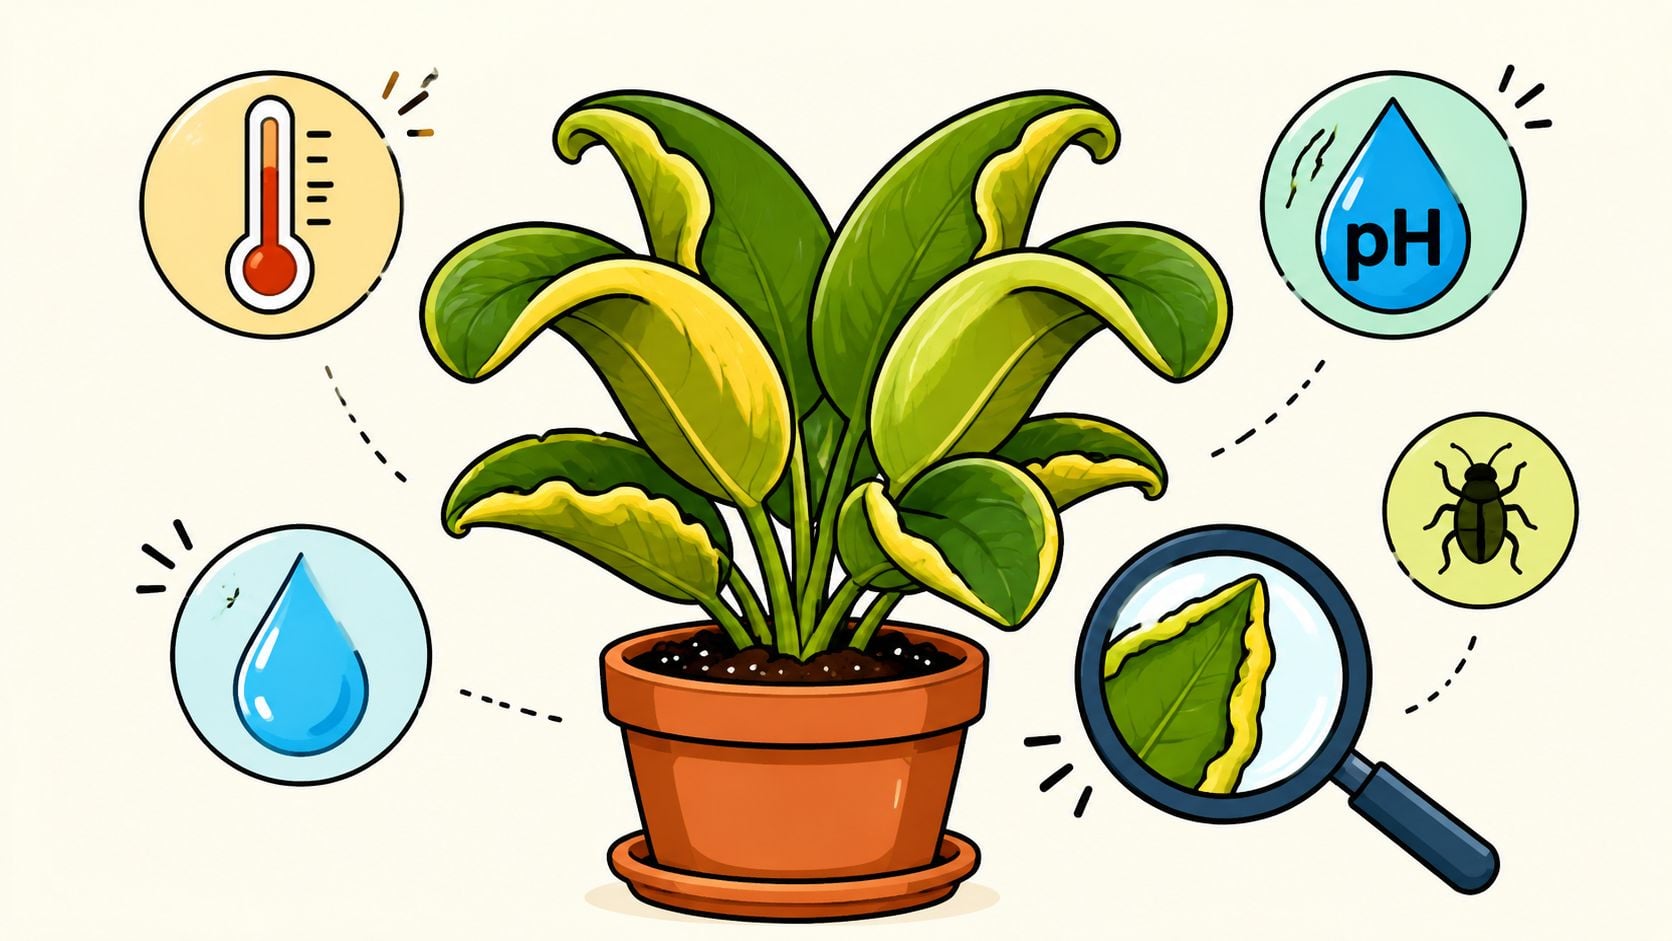
You check your plants, coffee in hand, and one canopy looks off. The leaves are curling up at the edges, the tops look a little tense, and suddenly your brain jumps to every possible problem at once.
That reaction is normal. Leaves curling up can look dramatic fast, but the fix usually gets easier once you stop guessing and start reading the plant in the right order.
Why Are My Leaves Curling Up
The first shortcut is simple. Upward curl and downward curl are not the same problem. A lot of growers lump both into “watering issues,” and that's where bad decisions start. The clean rule is this: dry soil plus upward curl equals hydraulic stress, while wet soil plus downward curl equals root dysfunction, a distinction highlighted in this leaf curl diagnosis video.
If your leaves are curling up, you're in the right lane here. That shape usually means the plant is trying to protect itself, not give up on life. It's reducing exposed leaf surface because something in the environment is pushing too hard.
What upward curl usually points to
Most of the time, I look at these suspects first:
- Heat or intense light: Top leaves react first when the canopy is getting blasted.
- Dry root zone: The plant can't move enough water to the leaves, so the edges lift.
- Nutrient imbalance: Especially when feeding is heavy or the root-zone pH is off.
- Pests: Tiny sap suckers can distort leaves and make the whole plant look stressed.
Practical rule: Don't reach for more nutrients just because the plant looks unhappy. Curling often starts with environment, not feeding.
There's another reason growers get tripped up. Upward curl can show up before the plant looks obviously wilted. So people see a firm plant with curled edges and assume it can't be a water or heat issue. It can.
Don't diagnose from one leaf
Look at the pattern, not a single weird fan leaf.
A quick check helps:
| What you see | Most useful first thought |
|---|---|
| Top leaves curling up | Check light distance and canopy heat |
| Whole plant looks dry and leaves lift | Check the pot and soil moisture |
| Curling with burnt tips or dark green leaves | Check feed strength and pH |
| Curling with visible insects or sticky residue | Inspect for pests |
If you keep the process simple, the panic goes away. Start with the causes that are both most likely and easiest to fix. That usually means heat and light first, then root-zone moisture, then nutrients, then pests.
Your First Check Heat and Light Stress
When upper leaves curl up, I treat light and heat as the first suspect. That's not guesswork. An environmental diagnostic protocol shows top-leaf curling has an 85% likelihood of being caused by light or heat stress, and raising grow lights 3 to 6 inches or reducing intensity by 20% typically stabilizes symptoms within 3 to 5 days. It also notes that keeping temperatures at 70°F to 85°F (21°C to 29°C) and humidity at 50 to 60% reverses most heat-induced curling according to a seed bank’s guide on leaves curling up.
Use the hand test first
You don't need a complicated tool to make the first call.
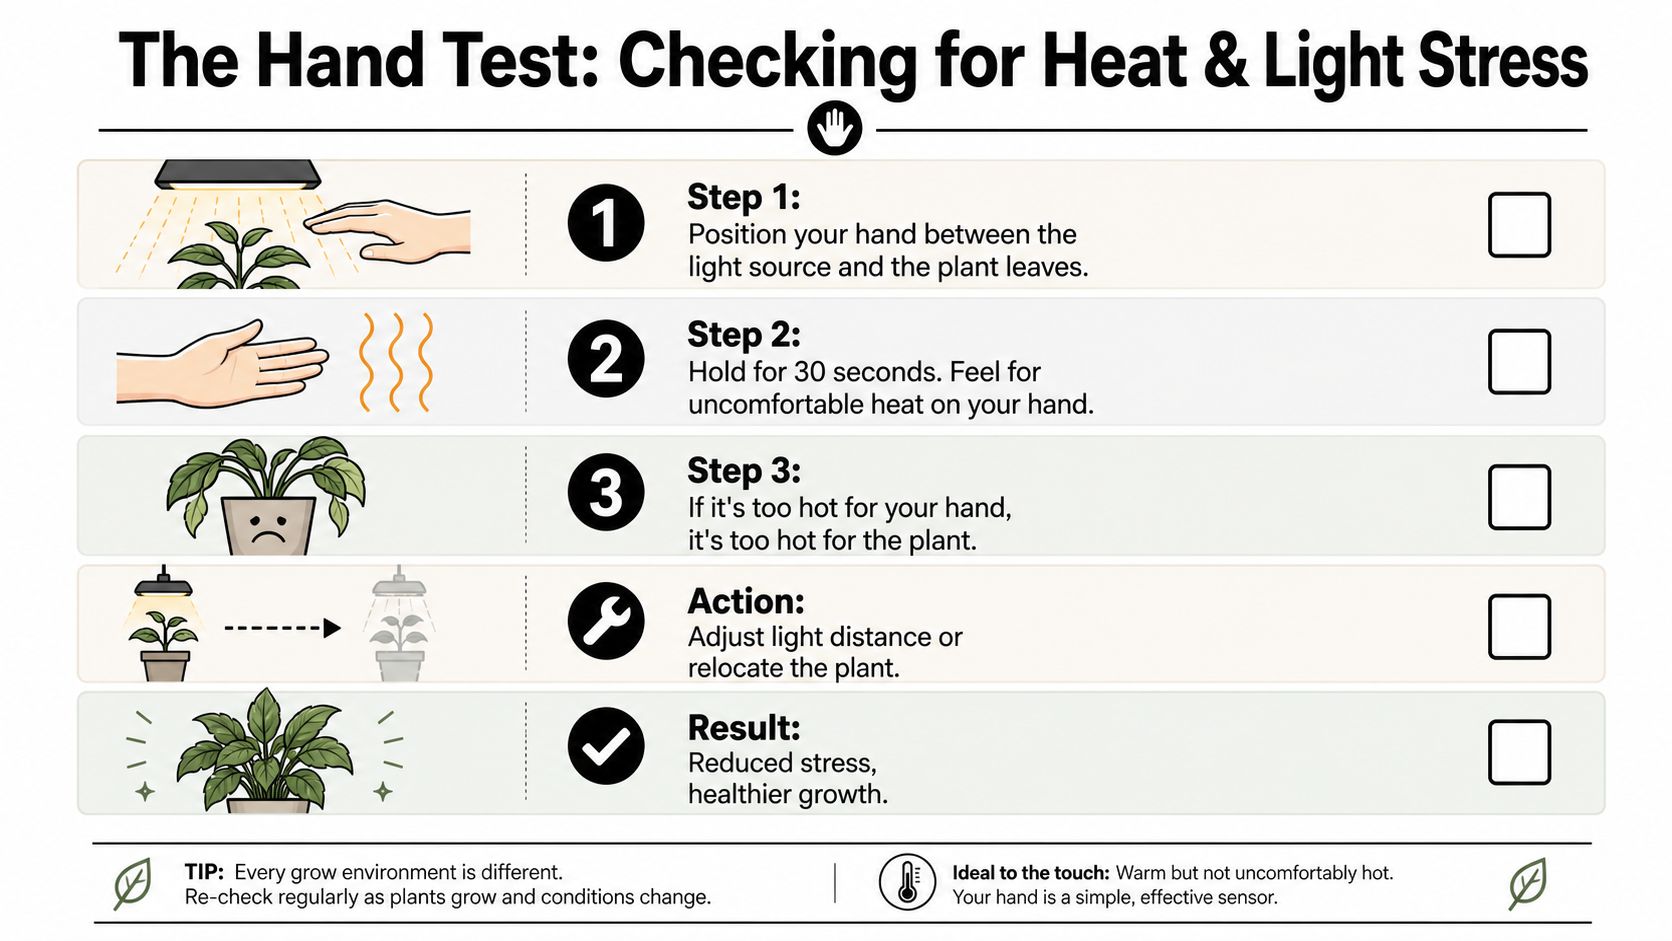
Do this:
- Place your hand at canopy level: Put it between the light and the top leaves.
- Hold it there for 30 seconds: Don't rush it.
- Pay attention to discomfort: If your hand feels uncomfortably hot, your plant feels it too.
- Adjust one variable first: Raise the fixture or dim it slightly.
- Wait and observe: Give the plant a few days before making more changes.
That “one variable first” part matters. A lot of growers move the light, change watering, add nutrients, and crank up fans all in the same afternoon. Then they have no clue what helped and what made it worse.
What actually works
A simple correction plan beats a dramatic rescue attempt every time.
- Raise the fixture: Start within the 3 to 6 inch range noted above if the canopy is too close.
- Dim before you relocate the plant: If your setup allows it, reduce output by 20% rather than making a huge move.
- Improve air movement: Point an oscillating fan across the canopy, not directly at one leaf set all day.
- Control the room, not just the light: Stable temps and humidity matter as much as fixture distance.
If you need a better handle on fixture setup, this guide to lighting for growing cannabis indoors is worth a read.
Leaves that curled from heat won't always flatten back out perfectly. What you want first is for new growth to stop worsening.
What doesn't work
Some fixes sound smart and still backfire:
- Dropping temperature too hard: Big swings stress the plant more.
- Blasting fans straight at the canopy: That can dry leaf edges and confuse the diagnosis.
- Feeding more because growth looks stalled: Heat stress often slows uptake. More feed can pile on.
The best recovery sign is boring. The curl stops spreading, the top growth looks calmer, and the plant resumes normal posture over the next few days.
The Art of Watering and Root Health
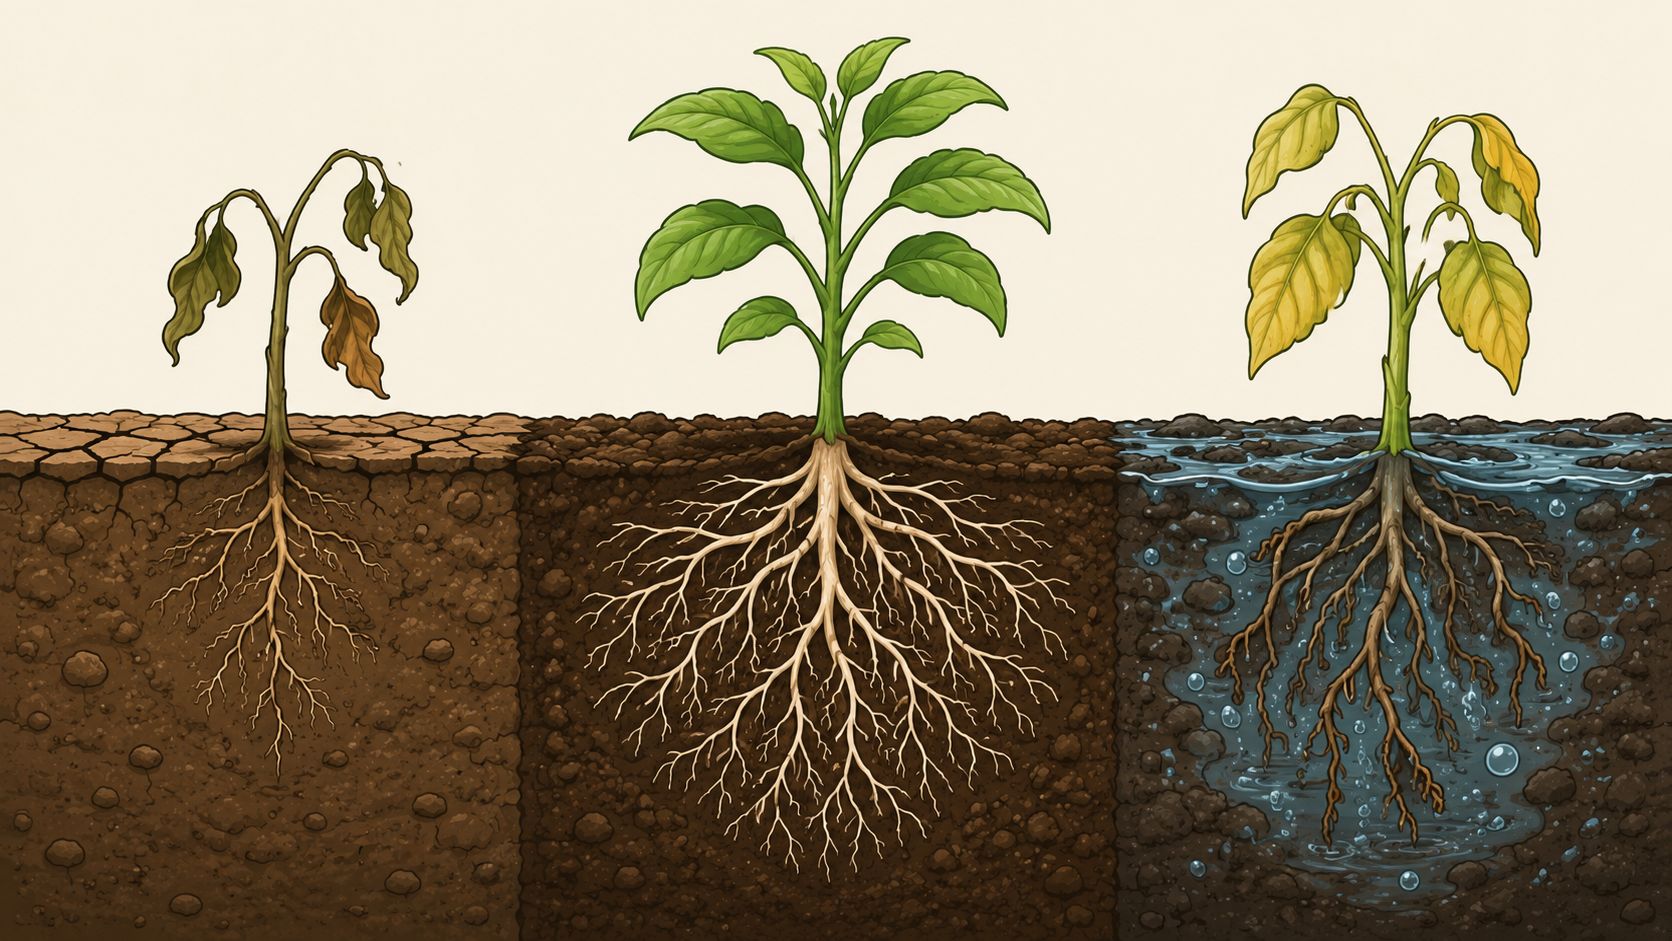
A common grow-room scene goes like this. Leaves curl up, the top of the soil looks dry, and the plant gets another splash of water. Two days later the pot is still heavy, the curl is worse, and now the roots are the underlying problem.
The upward-curl shortcut can be useful. If leaves are lifting or tacoing upward and the room conditions are already in range, check water status next. Start with the easy read. Is the pot too dry, or staying wet too long?
Rigid schedules get growers in trouble because plants do not use water at a fixed rate. A rooted plant in late veg drinks very differently from a small plant in the same pot. Pot size, airflow, root mass, and media all change the timing.
Two checks that beat guessing
Use the pot before you use a bottle.
- Lift the pot: Right after a full watering, pick it up and feel the weight. That becomes your reference point. When it gets noticeably lighter, the root zone has used a good share of that water.
- Check below the surface: Push a finger into the medium or use a moisture meter if you prefer. Surface dryness does not mean the whole container is dry.
Those two checks catch most watering mistakes early. If you want a clear routine for wetting the full root zone and letting it dry back properly, this guide on watering your cannabis plant lays it out well.
Dry roots and oxygen-starved roots can look similar
This trips people up all the time.
A too-dry plant may curl upward because it cannot keep up with water loss. A too-wet plant can also curl and stall because the roots are sitting in a low-oxygen zone. The leaf symptom overlaps. The pot condition usually gives the answer.
Light pot, dry medium, fast improvement after a proper watering. That points one way.
Heavy pot, cool wet medium, droopy or stressed posture that does not improve after more water. That points the other way.
Here's a helpful visual explainer before you make a watering call:
Daily top-offs cause shallow rooting and uneven moisture in the pot. A full watering followed by a real dry-back builds a healthier root system.
Container choice changes your margin for error
Pot type affects how fast the medium exchanges air and dries out. Fabric pots usually forgive overwatering better because the root zone gets more air. Plastic pots hold moisture longer, which can be useful in a hot, dry room, but they punish heavy-handed watering faster.
That trade-off matters. In a dry environment, fabric can mean more frequent watering. In a damp room, it can save a plant from sitting wet for too long.
If leaves are curling up and the container stays soaked, work on root-zone oxygen first. Water less often, make sure runoff can escape, and let the pot lighten before the next irrigation. If the pot is feather-light and the leaves are lifting, give a full, even watering instead of a small sip.
Decoding Nutrient Burn and pH Problems
A common mistake happens right after leaves start curling up. The grower sees stress, reaches for more nutrients, and turns a small problem into a bigger one.
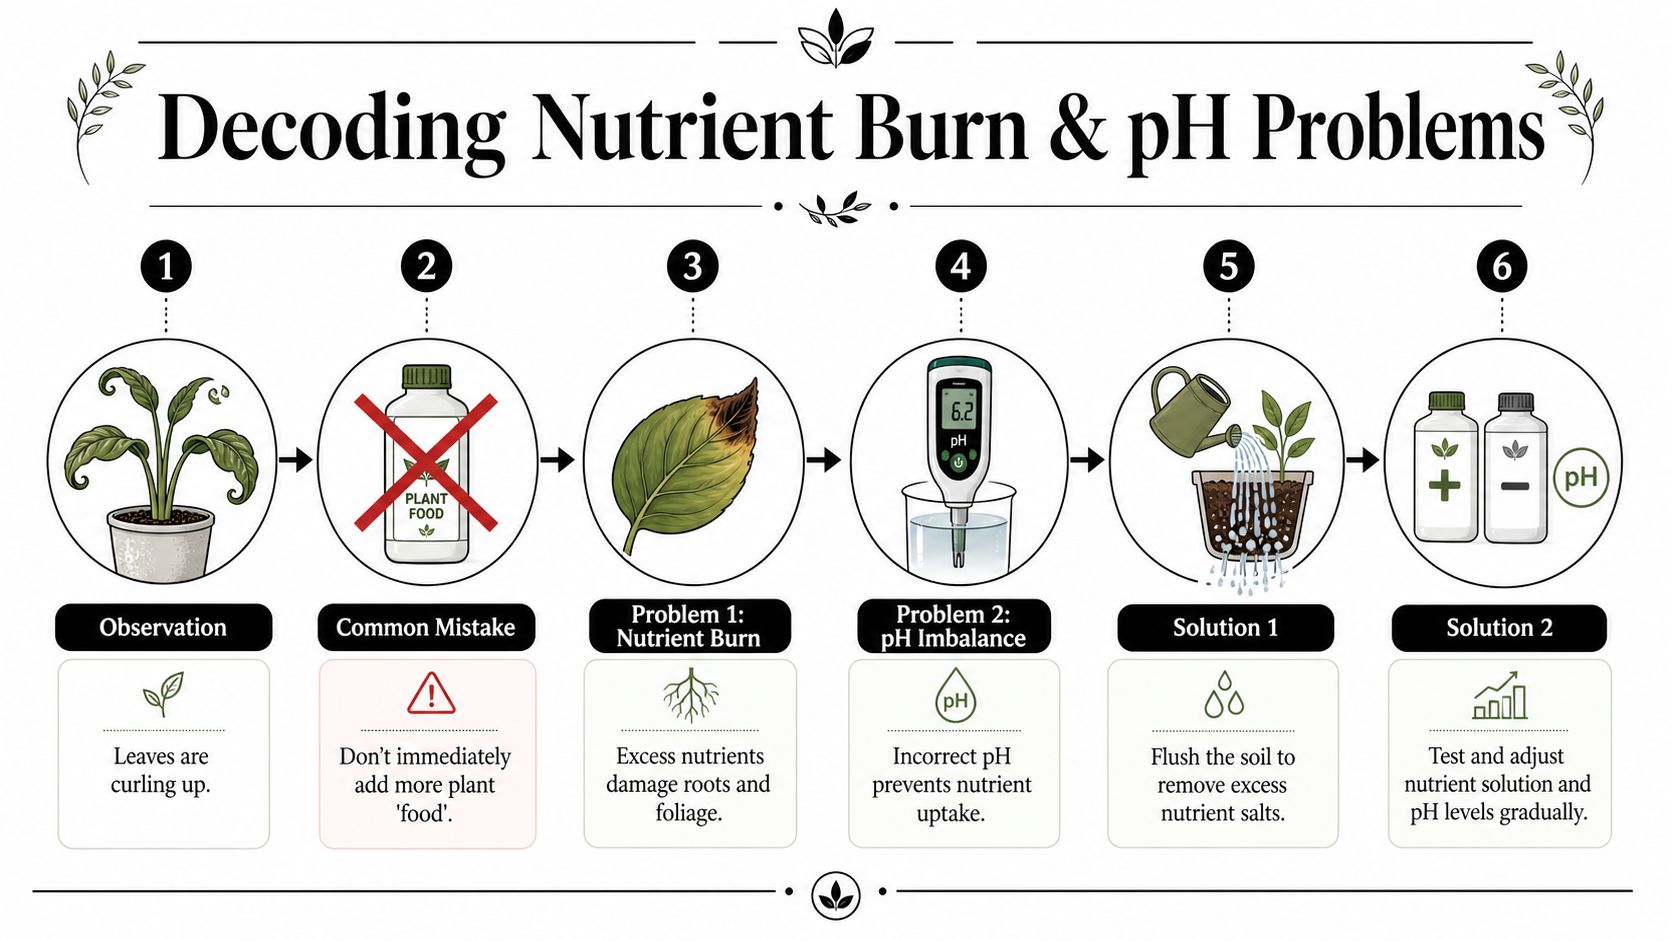
At this point in the checklist, use the curl direction as a shortcut. Upward curl with burnt tips, crispy edges, and very dark leaves usually points to excess feed or salt buildup. Downward clawing with a glossy, overfed look often points to too much nitrogen. If the plant has been getting regular feed but new growth still looks twisted or deficiency-like, check pH before adding anything else.
Poor uptake causes a lot of nutrient symptoms. The roots may be sitting in a medium that already contains enough food, but the plant cannot access it cleanly because the pH has drifted. A quick check of your runoff or slurry pH gives you a much better next move than guessing from the bottle schedule. If you need a target range, this guide on pH for cannabis lays out the numbers clearly.
What nutrient stress tends to look like
The pattern matters more than any single leaf.
| Symptom pattern | Better first move |
|---|---|
| Upward curl, burnt tips, dark leaves | Reduce feed and check for salt buildup |
| Downward clawing after heavy veg feed | Lower nitrogen and let the plant use what is already in the pot |
| Curling that looks like deficiency despite regular feeding | Test pH before increasing nutrients |
| Symptoms got worse right after a strong feeding | Flush or reset the medium, then refeed lightly |
I keep the fix simple because overcorrecting is how growers lose a week.
A beginner-safe recovery plan
- Stop extra feed for the moment: Give the root zone a chance to reset.
- Check pH first: Test the input water and, if possible, the runoff or a slurry from the medium.
- If salts are high or feeding was heavy, flush the medium: Use properly pH'd water and enough volume to get runoff.
- Drain fully: Never leave the pot sitting in runoff.
- Resume at half strength: Increase only after healthy new growth returns.
- Judge recovery by new growth: Damaged leaves rarely look pretty again.
One ugly leaf can linger for days. Fresh growth tells the truth faster.
The trade-off with feeding hard is simple. You may get faster growth in a dialed-in room, but your margin for error gets small. A plant can handle richer feed when temperature, light, watering, and root health are all in line. If one of those slips, curled leaves show up fast and the fix takes longer than the extra growth was worth.
New cultivars make this more obvious. Some eat heavily and stay happy. Others want a lighter hand from day one. Start modest, watch the leaf posture, and let the plant earn stronger feed instead of forcing it.
Pest Patrol Identifying and Treating Invaders
When the environment looks fine and watering seems reasonable, flip the leaves over. A lot of pest problems hide in plain sight because growers only inspect the top of the canopy.
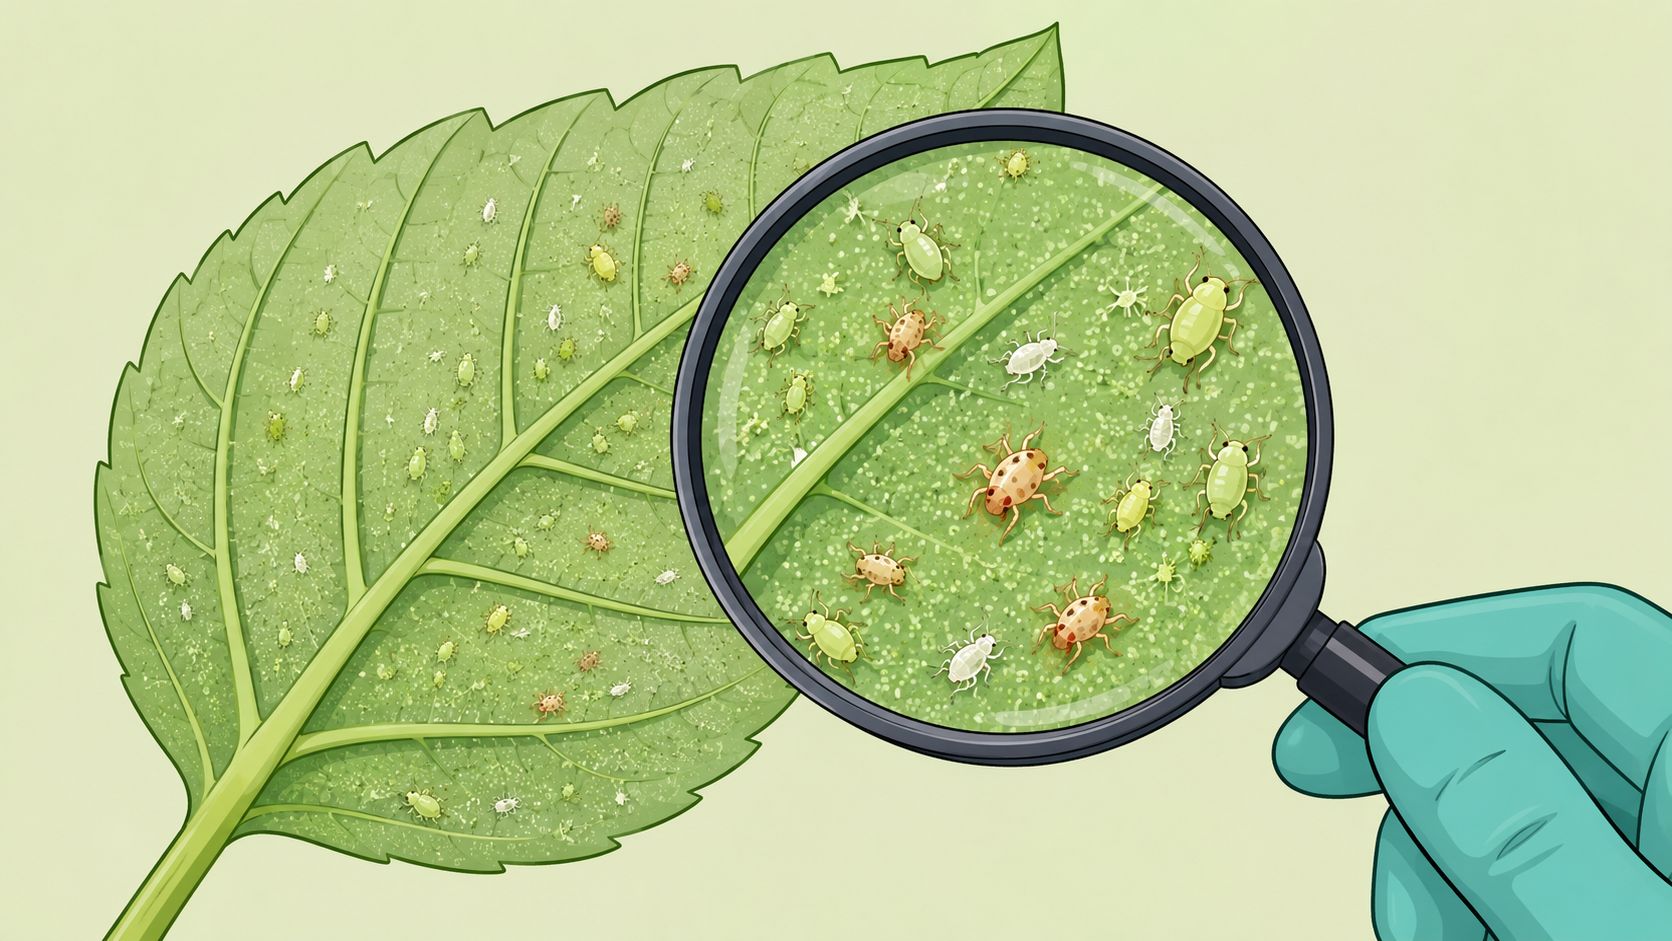
This step matters because up to 60% of leaf curling cases in crops are directly caused by pest infestations or nutrient deficiencies, with aphids and whiteflies identified as primary attackers. That makes biological and nutritional stress the first place to look when curl doesn't fit a simple heat or watering pattern.
Where to look and what to look for
Check the underside of several leaves from different parts of the plant. Don't inspect one top fan leaf and call it a day.
Look for:
- Aphids: Soft-bodied insects clustered along stems and leaf undersides
- Whiteflies: Tiny pale insects that lift off when disturbed
- Sticky residue: Often a sign sap-feeding pests have moved in
- Speckling or distortion: Feeding damage can twist or deform new growth
If you catch them early, simple treatments usually beat harsh ones.
Start gentle, then escalate only if needed
For home grows, I prefer targeted, low-drama options first:
- Insecticidal soap: Useful when you need direct contact control
- Neem-based products: Often chosen for early, manageable infestations
- Leaf-by-leaf removal: Practical on a small grow if the issue is still localized
- Isolation: Move the affected plant away from the healthiest ones if possible
Don't spray randomly with the lights blasting overhead. That's how leaf damage gets added to the original problem.
If the curl comes with twisting and distortion that doesn't improve after environmental corrections, consider outside contamination too, including herbicide drift rather than assuming every problem started inside your tent or garden.
Some cultivars also naturally show a bit of upward curl, especially under strong growth. If the plant is otherwise vigorous, keep an eye on new growth before you declare war on imaginary pests.
Prevention and Picking Resilient Cultivars
Prevention is mostly about consistency. Keep your light intensity reasonable, avoid wild swings in temperature, and water based on the pot instead of a fixed schedule. Most ugly leaf issues get a lot less common when the root zone and canopy stay stable.
Your seed choice also removes a lot of avoidable friction. Feminized cannabis seeds have a 99.9% effectiveness rate in producing female plants, which makes planning your space and harvest much simpler for home growers, as noted in this feminized seed overview. If you want a quicker run, autoflower cultivars are great for tight timelines. If you want more room to shape the canopy and chase larger plants, feminized photoperiod cultivars give you that flexibility.
There's no perfect option for every setup. There is a better match for your setup. Small tent, simple routine, and fast turnaround, autoflower cultivars make sense. More control, more training, and a longer veg window, feminized cultivars are usually the better fit.
A calmer grow starts with stable genetics and realistic expectations. That's how you spend less time troubleshooting and more time enjoying the process, the aroma, and the satisfaction of growing your own stash without dispensary lines or extra tax piled onto every pickup.
If you're choosing between cultivars and want a simpler path to a clean, reliable home grow, check out Botanist Seeds. Their comparison tool makes it easier to match feminized and autoflower options to your space, timeline, and experience level, so you can start with genetics that fit your setup.