





Watering Your Cannabis Plant for a Better Harvest
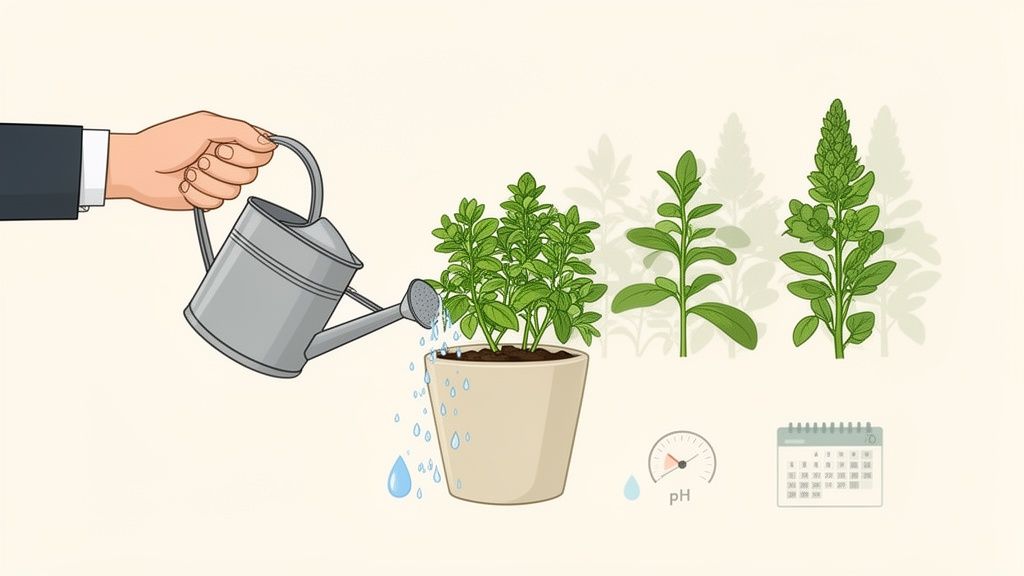
If there’s one mistake I see new growers make over and over, it’s killing their plants with kindness. More specifically, with too much water. Nailing your watering technique is hands-down the most important skill you can develop for a successful harvest. The good news? It’s not complicated. It's just about learning to listen to your plants.
The Art of Not Overwatering Your Cannabis Plant
The golden rule of watering cannabis is simple: water thoroughly, but infrequently. This might sound basic, but so many problems come from getting this wrong. The idea is to completely saturate the soil and then wait for it to become almost completely dry before you water again. This dry period is important: it forces the roots to stretch out and search for moisture, which builds a strong root system.
A strong root network is the engine of your plant. It’s what lets it pack on the dense, aromatic buds you’re after. When roots sit in constantly soggy soil, they can’t breathe. This suffocates them, stunts growth, and opens the door to problems like root rot.
Your Go-To Watering Techniques
You don't need fancy, expensive moisture meters to get this right. The most reliable tools are the ones you were born with. For years, I've relied on two simple, foolproof methods to know exactly when my plants are thirsty.
- The Finger Test: This is as low-tech as it gets. Just stick your index finger about an inch or two into the soil. If it feels dry to the touch, it's time to water. If you feel any dampness at all, hold off for another day or two. Simple as that.
- The Lift Method: Get a feel for the weight of your pot right after a good, thorough watering. Then, just lift it every day. When it feels significantly lighter, almost airy compared to when it was wet, it’s ready for its next drink.
Overwatering is a certified plant killer. Some studies show that it contributes to root rot in up to 40% of grows managed by beginners. On the flip side, consistent underwatering can easily cut your potential yields by 20-30%. The sweet spot is letting that top inch of soil dry out completely between waterings, which typically takes around 2-4 days indoors, depending on your environment. You can get more info on cannabis water usage and why it's so vital.
Here’s the most important thing to remember: A drooping plant isn’t always a thirsty plant. Droopy, heavy, and claw-like leaves are a classic sign of overwatering. Wilted, flimsy, and lifeless leaves are the real sign of thirst. Learning to spot the difference will save you a world of trouble.
By sticking to these simple checks, you can sidestep the most common mistakes growers make. Building this foundational skill ensures your chosen autoflower or feminized seeds get the best possible start, freeing you up to focus on the more exciting parts of the journey, like watching those beautiful buds stack up.
Signs Your Plant Is Thirsty vs Drowning
Telling the difference between an overwatered and an underwatered plant can be tricky, as both can cause drooping leaves. Here’s a quick reference table to help you diagnose the issue like a pro.
| Symptom | What It Looks Like (Underwatering) | What It Looks Like (Overwatering) |
|---|---|---|
| Leaves | Wilted, flimsy, and lifeless. The whole plant looks limp. | Puffy, firm, and curled down in a "claw" shape. |
| Leaf Color | Generally a uniform green, just looks sad. | May appear dark green or start to show yellowing (chlorosis). |
| Soil | Dry, cracked, and pulling away from the sides of the pot. | Dark, damp, and may have a swampy smell or green algae on top. |
| Pot Weight | Feels very light when you lift it. | Feels very heavy for its size. |
| Plant Stem | May be weak and droopy. | The stem is usually firm, even if the leaves are drooping. |
Ultimately, the "lift method" combined with a quick look at the leaves is your most reliable diagnostic tool. A light pot with droopy, limp leaves means it's time to water. A heavy pot with droopy, clawed leaves means it's time to back off and let things dry out.
Adjusting Water for Each Growth Stage
A common mistake I see new growers make is treating their plants the same from sprout to harvest. The truth is, a cannabis plant’s water needs change dramatically as it matures. What a tiny seedling requires is completely different from a big, thirsty plant packing on buds.
Think of it this way: your plant has a clear mission in each phase of its life. First, it builds its frame, and then it focuses all its energy on producing flowers. Getting your watering rhythm in sync with these stages: seedling, vegetative, and flowering: is how you set yourself up for a truly impressive harvest.
Watering Seedlings
When your feminized seeds first break ground, they're incredibly delicate. Their root systems are just tiny, fragile threads. At this point, your goal is to keep their immediate environment moist, but never, ever soaking wet.
Forget about pouring water directly. Your best friend here is a simple spray bottle. A light misting over the soil surface every day or two is all they need. This gentle approach gives those baby roots the moisture they crave without the risk of drowning them or washing away the soil. You're aiming for a consistently damp feel, not a mud puddle.
Watering in the Vegetative Stage
You'll know your plant has hit the vegetative stage when it has a few sets of true leaves and starts looking like a proper, miniature cannabis plant. This is its main growth spurt, where it's focused on building the strong stems and lush leaves that will support future buds. As you'd expect, its thirst will ramp up significantly.
Now's the time to switch from misting to actual watering. This is where learning the "lift the pot" method really pays off. When it's time to water, do it thoroughly. Soak the medium until you see about 10-20% of the water running out the bottom of the container. Then, simply wait until the pot feels noticeably light again before you water next. For context, a plant in a 3-gallon pot during veg might need about a half-gallon of water every 3-4 days.
This simple infographic is a great visual reminder of the basic process.
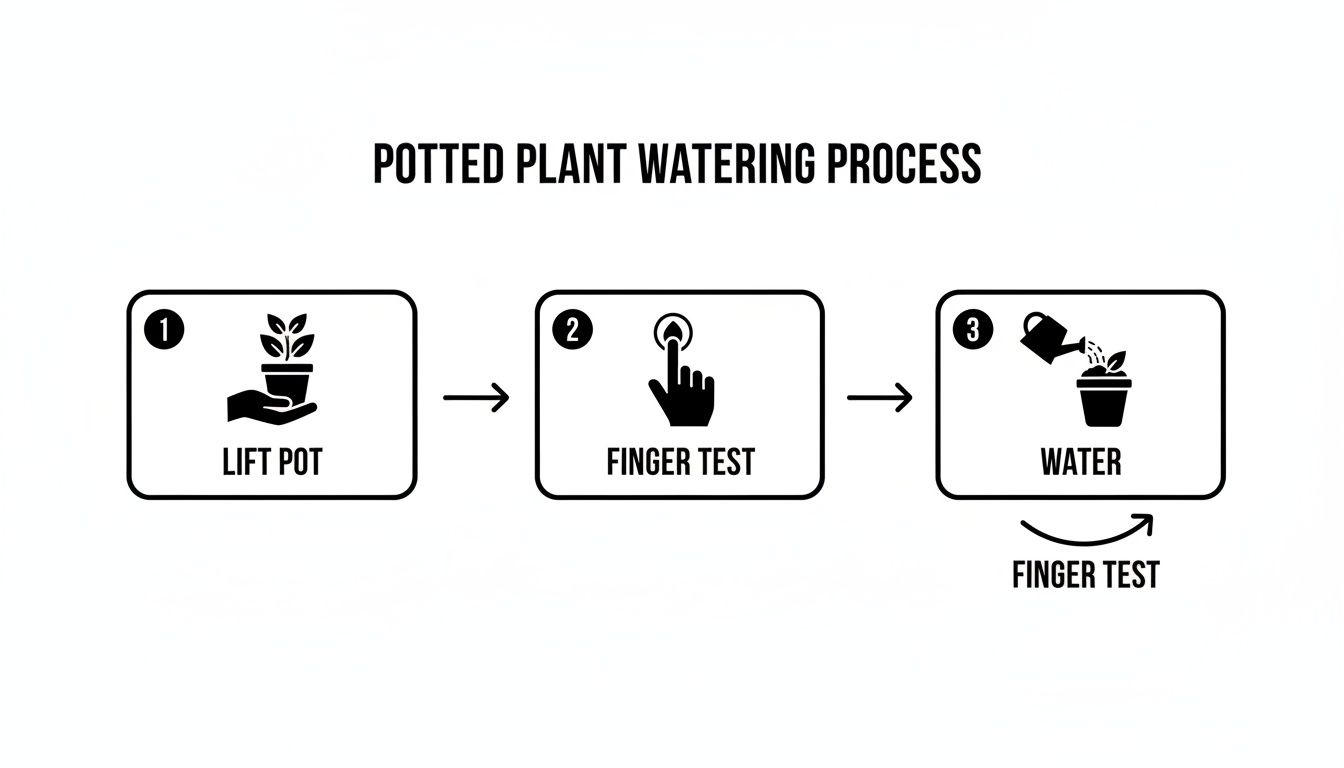
These three checks: lifting the pot, feeling the soil, and then watering: are the absolute foundation of a solid routine you can rely on.
Watering in the Flowering Stage
Welcome to the main event. During the flowering stage, your plant's demand for water will hit its absolute peak. It's working overtime to develop those dense, aromatic buds we're all after, and proper hydration is critical for that process. Consistent watering is what helps transport all the essential nutrients your plant needs to reach its full potential.
Don't be surprised if a large plant in a 5-gallon fabric pot starts chugging a gallon of water or more every couple of days, especially during the height of flower. The same rules apply: water generously when the pot feels light and the soil is dry. Staying consistent is important here, as any major swings between drought and flood can stress the plant and negatively impact your final yield.
Data from indoor grows, which account for over 60% of production, really shows this shift. A seedling might only take 4-8 ounces every few days, whereas a flowering plant can easily demand 1-2 gallons weekly. Getting this right can boost your final yield by a massive 20-40%. You can learn more about how water impacts the market for cannabis cultivation.
Getting Your Water Right Without Overcomplicating Things
Let's talk about water quality. It’s a topic where you can easily get lost, with growers debating things like PPM, EC, and expensive filtration systems. Honestly, for most people growing a few plants at home, it doesn't need to be that complex.
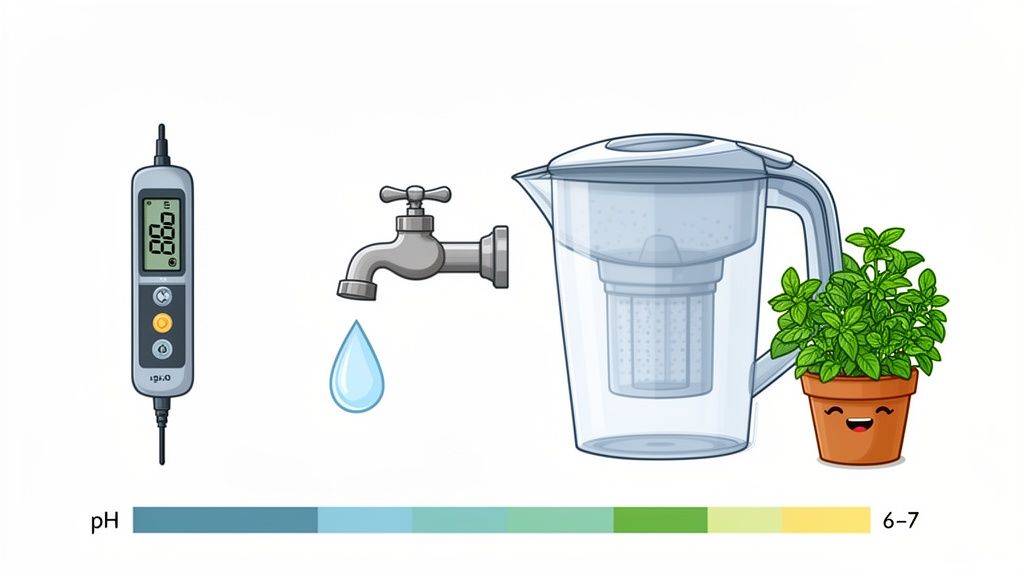
There's really only one thing you absolutely must get a handle on: your water’s pH. Think of it this way: pH is the gatekeeper for nutrients. If your pH is out of whack, your plants can't absorb the food you're giving them, even if the soil is packed with good stuff. This is called nutrient lockout, and it's one of the most common headaches for new growers. The good news? It's completely avoidable.
Why pH Is a Game Changer
Nailing your water's pH means your plants can actually use all the nutrients available to them. This directly translates to healthier, more robust growth and often leads to more impressive flower development.
You don’t need a chemistry degree to manage this. A simple digital pH pen is probably the single best tool you can buy for your grow room. Seriously. Keeping the water pH between 6.2 and 6.8 can make a night-and-day difference. Some reports even suggest this simple step can improve a cultivar’s aromatic profile while helping you sidestep common deficiencies that can impact up to 30% of home grows.
The process is simple:
- Collect the water you plan to use.
- Mix in your nutrients first (this can change the pH).
- Dip your pH pen into the final mixture.
- If the number is too high or low, add a few drops of a "pH Up" or "pH Down" solution, stir, and test again until you're in that 6.2-6.8 sweet spot.
Tap Water vs. Filtered Water
So, does this mean you need to invest in a fancy reverse osmosis (RO) system? For the vast majority of hobby growers, the answer is a firm no. Your tap water is probably fine.
One of the easiest tricks in the book is to just let your tap water sit in an open container for about 24 hours before you use it. This gives any chlorine a chance to evaporate, which is a big plus for the healthy microbial life in your soil.
The bottom line is this: Don’t get bogged down in the technical weeds. Focus on pH first. For most growers, tap water that’s been dechlorinated and pH-adjusted will grow fantastic cannabis.
Now, if your municipal water report shows it's extremely "hard" (meaning it has a very high mineral content), you might want to look into a basic charcoal or RV water filter. But that's a step to consider down the line, not something you need to worry about from day one.
Start simple. Master your pH. Give your plants the key to unlock their food, and they'll reward you for it. For a much more detailed breakdown, take a look at our complete guide on the importance of pH for cannabis plants.
How to Fix Common Watering Mistakes
Even the most seasoned growers run into problems. You walk into your grow room one day and see it: droopy, sad-looking leaves. Don't panic. This happens to everyone, and learning to read the signs is a skill every grower needs to master. Let's walk through how to diagnose the issue and get your plants happy again.
The two biggest culprits, overwatering and underwatering, can look deceptively similar. Both cause leaves to droop, but the way they droop tells a completely different story. Nailing this diagnosis is the key to a quick fix.
Overwatered vs. Underwatered: Telling the Difference
When a plant is overwatered, its leaves get heavy and stiff. They're so full of water they can't support themselves, so they curl downward from the stem, forming a classic "claw" shape. The leaves themselves feel firm and turgid. Your first and best clue, though, is the weight of the pot: it will feel surprisingly heavy for its size. This is a clear sign the roots are sitting in a bog and can't get any oxygen.
An underwatered plant, on the other hand, looks limp and lifeless. The leaves will be soft, flimsy, and wilted, hanging down from lack of water pressure. The whole plant just looks sad and exhausted. If you lift the pot, it will feel light as a feather, and you might even see the soil pulling away from the sides of the container.
Pro Tip: The fastest way to tell the difference is to lift the pot. A heavy pot with clawed leaves means overwatering. A light pot with wilted, soft leaves means it's thirsty. This simple test is more reliable than just looking at the leaves.
Getting Your Plants Back on Track
Once you know what you’re dealing with, getting back to normal is usually straightforward. The trick is to be gentle and patient to avoid stressing the plant any further.
Fixing an Overwatered Plant
Your only job here is to help the soil dry out so the roots can breathe again.
- Stop watering immediately. Seriously, put the watering can down. Don't even think about it until the top few inches of soil are completely dry to the touch.
- Boost the airflow. If you're growing indoors, point a small fan toward the base of the plant, aimed at the soil's surface. This helps speed up evaporation.
- Just wait. It can take several days for the plant to perk back up. The hardest part is resisting the urge to do something. Let nature take its course.
Reviving an Underwatered Plant
The goal is to rehydrate the entire root ball without causing a flood or shocking the system.
- Water slowly and thoroughly. Don't just dump a gallon of water on it at once. Give it a small amount, let it soak in for a few minutes, then add a bit more. Continue this process until you see about 10-20% of the water running out of the bottom drainage holes.
- Try bottom-watering. This is a great trick for severely dry plants. Place the entire pot in a saucer or tray filled with a few inches of pH-balanced water for about 30 minutes. The soil will wick up exactly what it needs, ensuring the root zone gets fully and evenly saturated without any dry pockets.
Sometimes, a watering issue can be easily fixed with a few adjustments. But if the problem persists, it helps to have a quick reference guide.
Watering Problem Quick Fix Guide
| Problem | Key Symptoms | Immediate Action Plan |
|---|---|---|
| Overwatering | Heavy pot, firm leaves clawing downward, soil feels soggy or waterlogged. | 1. Stop all watering. 2. Increase airflow around the base of the pot. 3. Wait until the top 2-3 inches of soil are completely dry before watering again. |
| Underwatering | Light pot, limp and lifeless leaves, wilted appearance, dry and compacted soil. | 1. Water slowly until 10-20% runoff is achieved. 2. For extremely dry soil, bottom-water for 30 minutes. 3. Check plants more frequently to avoid letting them dry out completely again. |
| Nutrient Lockout | Looks like overwatering but persists after soil dries. Yellowing or spotting on leaves, stunted growth. | 1. Confirm your watering is correct first. 2. Flush the medium with pH-balanced water. 3. Reintroduce a half-strength nutrient solution once the plant recovers. |
This table should get you through most common scenarios, but remember to observe your plants closely: they’ll always tell you what they need.
When It’s Not a Watering Problem at All
What if you've done everything right with your watering schedule, but the leaves are still yellow and the plant looks miserable? Sometimes, what you think is a watering issue is actually a nutrient problem in disguise.
Symptoms like yellowing leaves can be caused by overwatering (which drowns the roots and prevents them from absorbing nutrients) but also by a nutrient deficiency or pH-imbalance causing nutrient lockout. If you've corrected your watering and the problem isn't going away, it's time to play detective. To get more info, check out our guide on what causes yellow leaves on cannabis plants. It’ll help you figure out the true root of the problem and get your feminized or autoflower plants thriving again.
Matching Your Watering to Your Pots and Medium
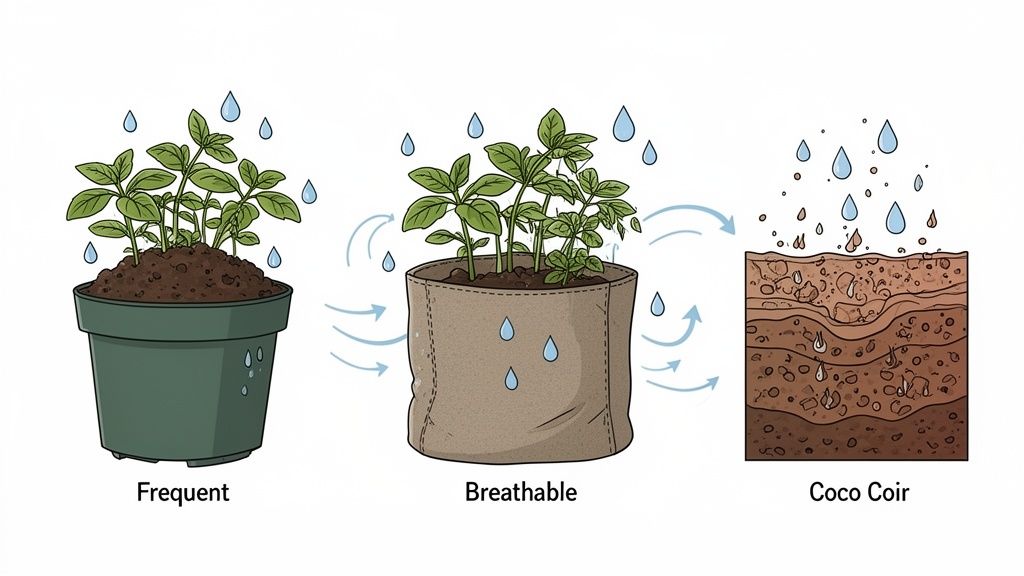
The gear you grow in has a big impact on your watering routine. Think of it this way: your container and your grow medium are a team, and you need to know how they play together to keep your plants thriving. There’s no single “best” setup: it’s all about matching the equipment to your environment and, just as importantly, your own habits.
Getting this right from the start saves you countless headaches. Let's look at the most common choices growers make and what they mean for your watering can.
Choosing Your Container
The pot itself is your first big decision. It directly controls the balance between moisture retention and the amount of oxygen reaching the roots, which dictates how often you’ll need to water.
Fabric Pots (Grow Bags): These have become a go-to for a reason. The breathable fabric is a huge advantage, making it incredibly difficult to overwater. As roots grow towards the edge, the air "prunes" them, which encourages a super dense and healthy root ball instead of a tangled, pot-bound mess. The only catch is they dry out much faster, so expect to water more frequently.
Plastic Pots: The classic, no-frills nursery pot is a solid choice, especially if you're on a budget. Because they're non-porous, they hold onto water for a lot longer than fabric. This means less watering, but it also means there’s zero airflow through the sides. You have to be more careful about overwatering and rely on the "lift the pot" test. Just make sure they have plenty of drainage holes at the bottom!
The bottom line is simple: fabric pots are forgiving if you have a heavy watering hand. Plastic pots can be a better fit if you tend to forget a watering day or if your grow room has very low humidity.
Soil vs. Coco Coir
What you fill your pot with is the other half of the equation. This is your plant’s home, determining how much water and oxygen the roots have access to between waterings.
Soil is the traditional choice for good reason. A high-quality potting mix is more than just dirt; it's amended with ingredients like perlite to improve drainage and aeration. It acts as a natural buffer, holding onto moisture and nutrients and releasing them slowly to the plant. It’s forgiving and a fantastic starting point for new growers. If you're just starting, a complete grow tent kit often includes a balanced soil mix, taking the guesswork out of your first run.
Coco coir, a popular alternative made from coconut husks, behaves quite differently. It’s an inert medium, which means it contains no nutrients on its own. It offers incredible drainage and aeration, so much so that it's almost impossible to drown your roots. Because of this, you’ll water more often, and you have to add your nutrients with every single watering. For many growers, the trade-off is well worth it for the explosive root growth and total control it gives them.
Common Watering Questions Answered
Let's tackle some of the questions I hear all the time from other growers. These are the details that often trip people up, but getting them right can make a huge difference in your final harvest. Consider this your quick-reference guide to watering with confidence.
How Often Should I Actually Water My Plant?
Forget any fixed schedule you might have read online. Watering every 2-4 days is a common suggestion, but it’s a terrible rule to follow blindly. The only right answer is to water when your plant is thirsty, and that changes based on its size, your pot, the grow medium, and the environment.
So, how do you know when it's time? You let the plant tell you.
- The Lift Test: This is my go-to method. Get a feel for how heavy your pot is right after a good watering. When it feels significantly lighter, almost airy, it’s ready for another drink. It feels weird at first, but after a week or two, it becomes second nature.
- The Finger Test: The old-school classic for a reason. Just stick your index finger about an inch or two deep into the soil. If you feel any moisture at all, hold off. If it's dry to the touch, it’s time to water.
Trust these physical cues over any calendar. They've never steered me wrong.
Is It Better to Water in the Morning or at Night?
Watering in the morning, right as the lights kick on, is the way to go. This gives your plants the entire "day" to drink up that water and use it for photosynthesis when they're most active.
Watering at night, just before the lights go out, leaves the roots sitting in cool, stagnant water. This damp, dark environment is a perfect invitation for problems like root rot and other fungal diseases. It's a simple habit to get into that pays dividends for root health.
What Is Bottom Watering and Should I Try It?
Bottom watering is a great technique, especially if you're prone to overwatering or need to rehydrate a plant that has gotten bone-dry. Instead of pouring water over the topsoil, you set the entire pot in a saucer filled with a couple of inches of your pH-balanced water.
The plant wicks water up through the drainage holes using capillary action, essentially drinking what it needs. Just let it soak for about 30 minutes or until you see the top layer of soil has become damp. It’s a nearly foolproof way to water because the plant stops taking in water once it's fully saturated.
My Water Runoff Has a Really Low pH, What Do I Do?
Seeing a low pH in your runoff when you know your input water is perfectly balanced is a huge red flag. It almost always means you have a buildup of salts and minerals in your medium, which is throwing off the pH of the entire root zone and can lead to nutrient lockout.
The solution is a soil flush. You'll need to slowly pour a large amount of plain, pH-balanced water through the pot. A good rule of thumb is to use about three times the volume of your container. For a 3-gallon pot, you’d gently run about 9 gallons of water through it. This process washes out all the excess buildup and gives your medium a fresh start. Let the soil dry out normally, and then you can get back to your regular feeding routine.
With these tips, you're much better prepared to handle one of the most critical aspects of a successful grow. Nailing the fundamentals is what leads to the pride of a stellar harvest.
When you're ready to match those skills with some world-class genetics, the team at Botanist Seeds can help you pick the perfect feminized or autoflower cultivar for your setup.
Check out the full collection and find your next favorite strain at https://botanistseeds.com.