





Yellow Leaves on Cannabis Plants: Causes, Fixes, and Prevention
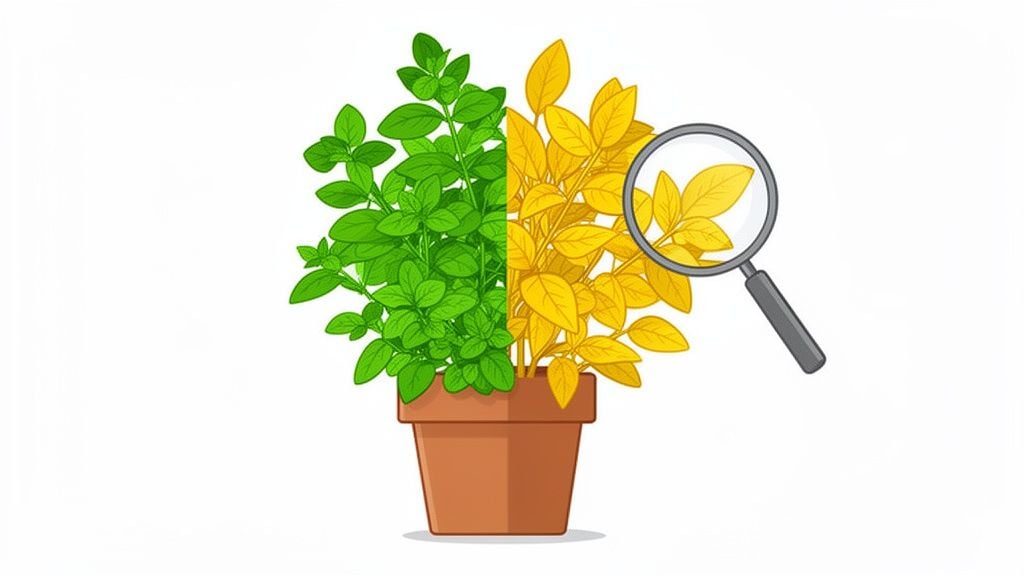
Don't panic when you see a yellow leaf on one of your cannabis plants. It’s alarming, I know, but it's rarely a death sentence. Think of it as your plant's way of talking to you, sending up a signal that something in its environment needs a little tweak.
The single biggest clue you have is the location of the yellowing. Whether the problem shows up on new growth at the top or older leaves near the bottom will tell you almost everything you need to know. It’s a common issue, and once you learn how to read the signs, it's almost always fixable.
Why Your Cannabis Leaves Are Turning Yellow
When you spot those yellow leaves, you're seeing a process called chlorosis. It's just a term for the leaf losing its chlorophyll, which is the green pigment responsible for photosynthesis: the process that turns light into energy. Without enough chlorophyll, your plant can't feed itself properly, and its health will start to suffer.
Your job is to figure out why that chlorophyll is disappearing. Is the plant hungry for a specific nutrient, or is something else preventing it from absorbing the food you're already giving it? The pattern of the yellowing holds the answer.
Before you start making changes, it helps to have a quick reference. Use this table as a starting point to match where the yellow leaves are appearing with the most likely problem.
Quick Diagnostic Chart for Yellow Leaves
| Location of Yellowing | Most Likely Cause | What It Means for Your Plant |
|---|---|---|
| Bottom of the Plant (Older Leaves) | Mobile Nutrient Deficiency (like Nitrogen) | The plant is pulling nutrients from old leaves to feed new growth. It's not getting enough from the roots. |
| Top of the Plant (New Growth) | Immobile Nutrient Deficiency (like Iron, Sulfur) | Nutrients aren't reaching the new growth. This is often a pH issue, not a lack of nutrients in the soil. |
| Random Spots or Patches | Pest Damage or Fungal Disease | Something is physically damaging the leaves, causing localized cell death and yellow spots. |
| Tips and Edges Turning Yellow/Brown | Nutrient Burn or Light/Heat Stress | The plant is getting too much of a good thing: either too many nutrients or too much intense light and heat. |
This chart is a great first step, but for a more visual guide, this simple decision tree can help you narrow down the possibilities even further.
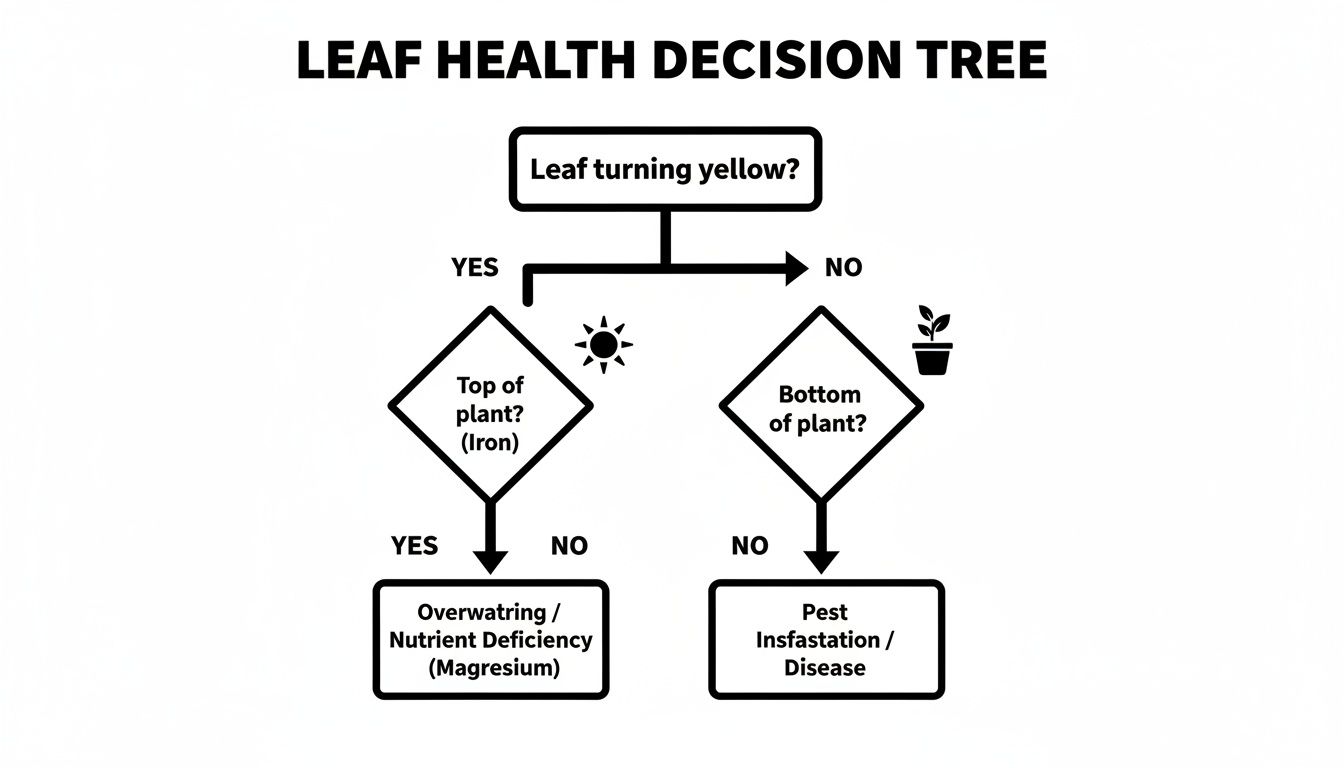
As you can see, yellowing at the bottom often points to problems with mobile nutrients like nitrogen, which the plant can move around as needed. On the flip side, yellowing at the top usually signals an issue with immobile nutrients or environmental stress.
Decoding the Clues
Before you touch your nutrient bottles or adjust your lights, just take a minute to observe your plant. A little bit of careful inspection now will save you a lot of guesswork later. Ask yourself a few key questions:
- Where did it start? Did the yellowing first appear on the big, old fan leaves at the base of the plant, or did you spot it on the fresh, delicate growth at the top?
- What does the pattern look like? Are the veins staying green while the rest of the leaf turns yellow? Are just the tips and edges looking crispy and burnt?
- How fast is it spreading? Was this a slow, creeping fade over a few days, or did the plant seem to change color overnight?
The answers create a roadmap. For instance, a slow, methodical yellowing that starts from the bottom and climbs up the plant is the textbook sign of a nitrogen deficiency: the most common hiccup for new and experienced growers alike.
Our goal here is to help you diagnose problems with confidence, not just react with guesswork. By learning to interpret your plant's signals, you can get your grow back on track and ensure a healthy, rewarding harvest.
If you’re just starting out, picking a tough, forgiving plant can make the learning curve much gentler. For some great recommendations, check out our guide to the easiest strains to grow indoors. It'll help you spend less time troubleshooting and more time enjoying the personal pride of a successful grow.
How to Fix a Nitrogen Deficiency
Seeing yellow leaves creeping up from the bottom of your plant? Don't panic. You're almost certainly looking at a nitrogen deficiency. This is, by far, the most common nutrient issue growers run into: it's practically a rite of passage, so don't beat yourself up over it.
Cannabis plants are incredibly smart about survival. When there isn't enough nitrogen available in the root zone, the plant will start pulling it from the oldest, least important leaves at the bottom. It then sends that scavenged nitrogen up to fuel the new, more critical growth at the top. This is why we call nitrogen a mobile nutrient: it can move around inside the plant, which is exactly why the yellowing always starts low and moves high.
Spotting the Telltale Signs
The visual clues are distinct, but it's a gradual process, not an overnight disaster. Here’s the classic progression you need to watch for:
- A slow fade from green to pale green: You'll first notice the lower fan leaves losing their deep, vibrant color, looking a bit washed out.
- A full transition to yellow: As the plant continues to move nitrogen, those pale leaves will turn a solid, unmistakable yellow.
- Leaves begin to wilt and drop: In the final stage, the completely yellowed leaves go soft, wilt, and will eventually fall right off the stem.
Once you’ve seen this pattern, you’ll never forget it. Letting it go, especially during the vegetative stage, will seriously stunt your plant's growth and directly impact the size and quality of your harvest. In fact, seasoned growers know that nitrogen deficiency is the number one cause of yellowing leaves, and it can slash your final yields by a staggering 30-50% if you don't address it. You can get a deeper dive into how mobile nutrients behave at Floraflex.com.
A Step-by-Step Fix
Fixing a nitrogen deficiency is pretty simple, but the real key is to be methodical and resist the urge to overdo it. Just dumping a bunch of fertilizer on the plant can lead to nutrient burn, which gives you a whole new headache with crispy, brown leaf tips. Let's solve one problem at a time.
- Confirm the Stage of Growth: First, where is your plant in its life cycle? If you're in the last two weeks of flowering, some yellowing on the bottom is perfectly normal. The plant is putting all its energy into the buds. But if you’re in veg or early flower, it’s time to step in.
- Use a High-Nitrogen Nutrient: The most direct fix is a good, balanced nutrient formula made for the vegetative stage. These are usually sold as "Grow" nutrients and will have a higher first number in the N-P-K ratio (for Nitrogen-Phosphorus-Potassium).
- Start with a Half-Dose: For the first feeding, mix your nutrients at half the strength recommended on the package. This gentle approach prevents shocking the plant and causing that dreaded nutrient burn.
- Observe for a Few Days: Give it two or three days. The already-yellow leaves aren’t going to turn green again. What you're looking for is for the yellowing to stop spreading. The new growth at the top should look healthy and green.
- Return to a Normal Feeding Schedule: If the plant has responded well and the problem hasn't progressed, you can go back to your regular feeding routine using the full-strength dose.
The goal isn't to reverse the damage on old leaves; that's not going to happen. The goal is to stop the problem from spreading and ensure all new growth is healthy, lush, and green. That’s your sign of success.
Prevention is Key
After you've got things back on track, you'll want to make sure it doesn't happen again. In most cases, nitrogen deficiency is just a simple mismatch between what the plant needs and what you're giving it.
Think of your plant in the vegetative stage like a teenager with a bottomless appetite: it’s constantly hungry for nitrogen to build its frame of stems and leaves. When it shifts into the flowering stage, its diet changes. It needs less nitrogen and starts craving more phosphorus and potassium to produce big, dense buds.
Your best defense is simply choosing the right food from the beginning. Most nutrient lines have a two-part system that makes this easy:
- "Grow" Nutrients: High in nitrogen, perfect for the entire vegetative period.
- "Bloom" Nutrients: Lower in nitrogen but high in phosphorus and potassium for flowering.
By feeding your plants the right food at the right time, you give them everything they need for a healthy, vigorous life. Taking this proactive approach will save you a ton of stress and help you pull down the kind of harvest you can be proud of.
Checking Your Watering Habits and pH Levels
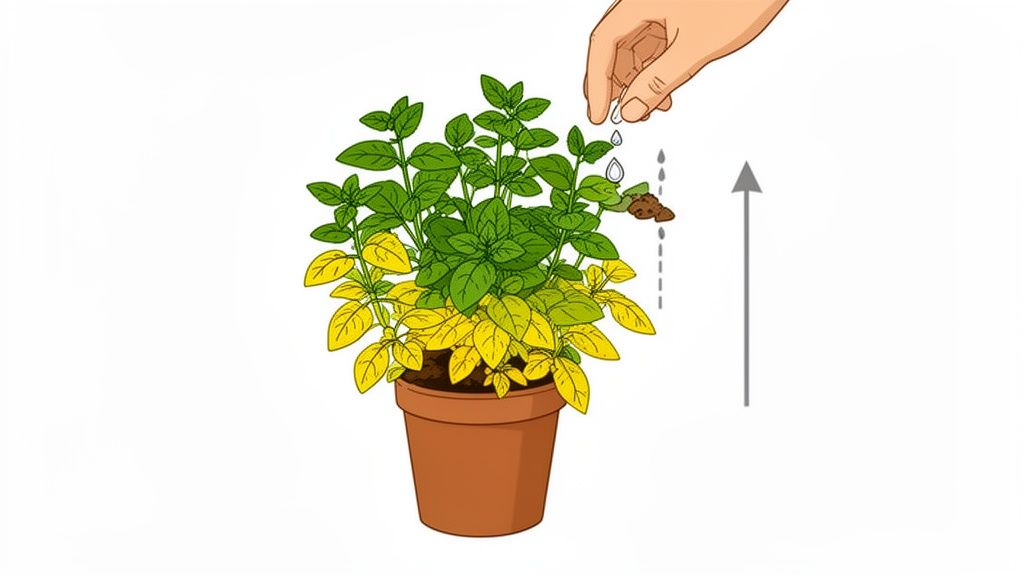
Sometimes the real reason your cannabis leaves are turning yellow has nothing to do with what you’re feeding them. The problem is often whether your plants can actually use the nutrients in their soil. This is where two of the most crucial, and often overlooked, aspects of growing come into play: your watering schedule and the pH of your growing medium.
Get these two right, and you've won half the battle. Think of it as laying a solid foundation for a house. If your watering and pH are off, you'll spend the entire grow just trying to patch up problems that never had to happen in the first place.
The Right Way to Water Your Plants
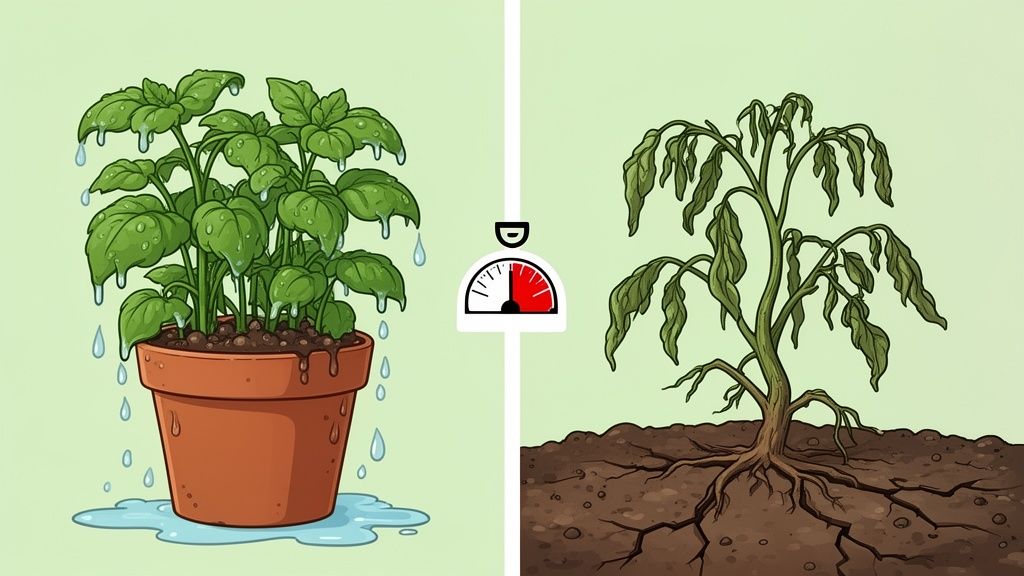
Watering sounds simple, right? It’s not. In fact, it's one of the easiest things to mess up. Both too much and too little water will stress your plants and cause yellow leaves, but the symptoms look quite different. The goal is to hit that sweet spot where the roots have consistent moisture to thrive but also plenty of oxygen to breathe.
Overwatering is, without a doubt, the most common mistake I see new growers make. You’re excited, you want to nurture your plant, so you keep giving it water. The issue is that roots need oxygen just as much as water. When the soil stays soggy, the roots can't breathe. They essentially start to drown, which can quickly lead to devastating root rot.
Here are the tell-tale signs of an overwatered plant:
- Droopy, heavy leaves: The leaves and stems are so full of water that they curl and droop downwards from the weight. They’ll feel firm and swollen, not limp.
- Widespread yellowing: You may notice a general yellowing creep up from the bottom and middle leaves as the plant's health declines.
- Stunted growth: A waterlogged plant simply stops growing because its root system has shut down.
On the other side of the coin, underwatering is a bit more obvious. Your plant is thirsty, and it’s not shy about showing it. The signs are exactly what you'd expect from any parched plant.
An underwatered plant will look:
- Wilted and lifeless: The leaves droop because they don't have enough water pressure to hold themselves up. They'll look sad and feel limp.
- Dry and brittle: The foliage will feel papery, thin, and fragile.
- Completely yellow: If you don't water it soon, the leaves will eventually dry out entirely, turning a crispy yellow or brown.
The best way to know when to water is to forget a fixed schedule and listen to the pot itself. After a good watering, lift the pot to feel how heavy it is. Then, just wait until it feels significantly lighter. Another dead-simple method is to stick your finger an inch or two into the soil. If it’s dry at your fingertip, it’s time to water.
Use the pot lift test and knuckle test
You don’t need fancy gear to get this right. You need a habit.
- Lift the pot: Pick it up right after a full watering so you learn what “heavy” feels like. Then lift it again each day. After a week or two, you’ll know the difference without guessing.
- Use your knuckle: Stick a finger into the medium. If the top layer is dry but it’s still moist below, wait. Surface dryness alone doesn’t mean the whole root zone is ready.
- Look at the saucer or tray: If runoff sits under the pot, roots can stay wet longer than you think.
- Check drainage holes: Slow drainage can point to compacted media or roots circling hard around the pot.
If you want a deeper breakdown of watering habits that work, this guide on watering your cannabis plant is worth keeping bookmarked.
A plant that gets watered on a human schedule instead of a plant schedule usually tells on you.
Why pH Is the Gatekeeper for Nutrients
Now, let’s get into pH. It might sound like a high school chemistry lesson, but the concept is critical for growers. Think of pH as the gatekeeper standing between the nutrients in your soil and your plant's roots.
If the pH of your soil or water is too high (alkaline) or too low (acidic), it chemically locks certain nutrients out, making them unavailable to the plant. It doesn't matter if the nutrients are there in abundance; the roots simply can't absorb them. This is a frustrating condition called nutrient lockout, and it's a primary cause of yellowing that mimics a nutrient deficiency. Adding more fertilizer will only make it worse.
To keep your plants happy and feeding properly, you have to maintain the pH within a specific range. This target zone changes slightly based on what you're growing in.
- Soil Grows: The ideal pH range is between 6.0 and 7.0.
- Hydroponics and Coco Coir: These soilless mediums thrive in a slightly more acidic range, with a target pH of 5.5 to 6.5.
Testing and adjusting your pH is a simple part of the routine. You can get an affordable digital pH pen or a liquid test kit. The key is to test your water after mixing in your nutrients, because the nutrients themselves will alter the pH. If the reading is off, just add a few drops of a "pH Up" or "pH Down" solution from any grow shop until you’re in the correct range.
Dialing in your watering and pH management is a true game-changer. It gives you the power to prevent problems before they start, saving you a ton of headaches and ensuring your Botanist Seeds cultivars can thrive. For more tips on building a successful grow from the ground up, check out our other guides on growing cannabis.
Solving Light Burn and Environmental Stress
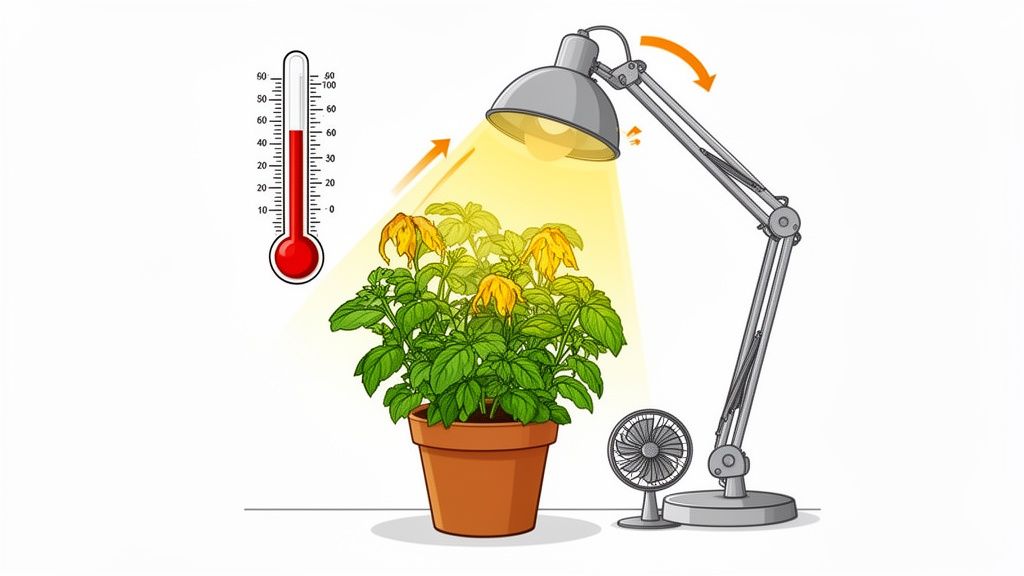
We've spent a lot of time looking at what can go wrong in the soil, but sometimes the real culprit behind yellow cannabis leaves is hanging right over your plants. The grow environment itself, especially your light setup, is a huge piece of the puzzle. If you're seeing yellowing concentrated at the very top of your plant, closest to the light, you're almost certainly dealing with a classic case of light burn.
This is something I see all the time, particularly with home growers trying to make the most of a small space. It comes from a good place; you want to bathe your plants in powerful light. But too much of a good thing can quickly stress them out. Thankfully, once you know how to spot it, the fix is usually straightforward.
Identifying Light Burn
The tell-tale sign of light burn is its location. A nutrient problem often starts from the bottom up or appears in strange patterns across the plant. Light burn is almost always a top-down issue. The leaves getting the most direct, intense light are the first to cry for help.
Think of it just like a person getting a nasty sunburn. The parts of the plant getting blasted by your grow light's "sun" get scorched, while the lower leaves, shielded by the canopy, stay perfectly green and happy.
Here are the key symptoms to look for:
- Yellowing Up Top: The highest fan leaves will look bleached-out, turning a pale yellow or even white in extreme cases.
- Veins Turn Yellow Too: Unlike a magnesium deficiency where the veins stay green, light burn tends to wash out the entire leaf, veins and all.
- Leaves Reaching for the Sky: You might notice the affected leaves pointing upwards toward the light, almost like they're trying to block the intense rays.
- Crispy, but Localized: The damaged leaves can feel dry and brittle to the touch, but this damage is focused squarely on the upper canopy, not the whole plant.
Here’s a quick sanity check I always use. Hold your hand, palm-down, at the top of your canopy for about 30 seconds. If it starts to feel uncomfortably warm for you, it’s definitely too hot for your plants. That's a dead giveaway you need to adjust your light.
Adjusting Your Lights and Environment
Fixing light burn really boils down to two things: creating more distance and managing heat. You want to provide a powerful but gentle light source, not blast your canopy with the intensity of an interrogation lamp. These simple tweaks will get your grow space back into that sweet spot.
- Raise Your Light: The most immediate fix. Just move the light fixture up a few inches to increase the distance between it and the top of your plants. This small change can make a massive difference.
- Dim the Intensity: If raising the light isn't practical, see if your fixture has a dimmer. Many modern LEDs do. Try dialing the power back to 75% or 80% and watch how your plant responds over the next couple of days.
- Improve Air Circulation: Get a small fan moving air gently between the light and the top of your canopy. This does two crucial things: it helps dissipate the heat radiating from the light and it strengthens your plant's stems. Just be sure it’s creating a gentle, indirect breeze, not a direct windstorm.
Having the right gear from the beginning makes preventing these issues so much easier. A quality setup, like a complete grow tent kit, gives you far more control over light, temperature, and airflow right out of the box.
Temperature and Other Stressors
While light burn is a primary suspect, other environmental stresses can absolutely cause yellow leaves. Cannabis plants are tough, but they aren't invincible. Just like us, they do their best work when they're in a stable, comfortable climate.
Drastic temperature swings are a huge source of stress. Temperatures that consistently stay above 85°F (30°C) can trigger heat stress, which often shows up as yellowing and curling along the leaf edges. On the other end of the spectrum, temps that drop below 60°F (15°C) can lock up nutrients by slowing down metabolic processes, which also results in yellow leaves.
A stable environment is the foundation of every great harvest. When you dial in your light, temperature, and airflow, you create the perfect home for your Botanist Seeds cultivars to hit their full genetic potential, and that's when you get the incredible results you're looking for.
The Fast Troubleshooting Order
Keep this sequence. It saves time.
- Water first: Lift the pot, check the medium, and ask if roots are drowning or drying out.
- Then pH: If the plant is being fed but still yellowing, test runoff before changing the nutrient line.
- Then nutrients: Read the pattern on the leaves, bottom-up fade, edge burn, interveinal yellowing, or tip burn.
- Then environment: Inspect for pests, disease signs, and light stress from top or bottom.
That order works because it eliminates the common, simple causes before you go hunting for a rare one.
When Yellow Leaves Are a Normal Part of Growth
It's easy to panic at the first sign of a yellow leaf. But before you start flushing your soil or mixing up a nutrient-heavy rescue feeding, take a deep breath. Sometimes, yellowing isn't a cry for help; it's a sign that your cannabis plant is right on schedule.
Knowing the difference between a real problem and a normal life cycle event will save you a ton of stress. More importantly, it stops you from trying to "fix" a perfectly healthy plant and potentially causing more harm than good.
The First Leaves Say Goodbye
When a cannabis seed first sprouts, it pushes out a pair of small, smooth, oval-shaped leaves. These aren't the classic fan leaves you're waiting for; they're called cotyledons, or "seed leaves."
Think of these cotyledons as the seedling's built-in battery pack. They are packed with all the food the plant needs to get started, fueling its initial push out of the soil and the growth of its very first true leaves. Once that energy reserve is used up, their job is done.
It's completely normal for these little leaves to turn yellow and shrivel away within the first week or two. This is actually a great sign. It means your seedling has successfully established its roots and is now feeding from the growing medium. Seeing them fade is your first milestone as a grower.
The "Fall Fade" Before Harvest
Fast forward to the end of your plant’s life, deep into the flowering stage. You’ll notice another, more widespread yellowing begin. This isn't a nutrient deficiency; it's a beautiful and natural process called senescence.
As your plant nears harvest, it diverts all its energy from vegetative growth to its final, most important job: ripening the buds. To do this, it starts pulling stored mobile nutrients, like nitrogen, from the older fan leaves and sends them directly to the developing flowers.
This process, often called the “fall fade,” starts at the bottom of the plant and works its way up, creating a stunning gradient of green, yellow, and sometimes even purple and red. It's the plant's grand finale.
This late-stage yellowing is not a sign of a problem; it's a sign that your plant is ripening perfectly. Trying to correct it by adding more nitrogen at this point can actually hurt your final product, potentially leading to a harsher, less pleasant sensory experience.
Learning to spot these natural changes is a huge part of becoming an experienced grower. It’s how you learn to speak the plant's language, understanding when it needs a hand and when it’s just doing its thing on the path to a rewarding harvest.
Frequently Asked Questions About Yellow Leaves
You've learned how to read the language of your plants, but it's completely normal to have a few more questions rattling around. Let's tackle some of the most common things growers wonder about when they spot those dreaded yellow leaves.
Can Yellow Leaves Turn Green Again?
This is the first thing everyone asks. The short answer is no, once a cannabis leaf turns fully yellow, it won't ever become green again. That yellowing, a process called chlorosis, signifies a total loss of chlorophyll. It's an irreversible change.
Think of it like an autumn leaf. Once it's turned brilliant gold, its work for the tree is over. Your job isn't to save the leaves that have already yellowed; your focus should be on stopping the yellowing from spreading to healthy new growth.
Success means you see the problem stop in its tracks and vibrant new leaves appear. Don't waste your energy on what's already gone: channel it into protecting the plant's future.
How Fast Should I Expect to See Improvement?
After you've diagnosed the issue and made a correction, like adjusting your pH or adding nutrients, it's tempting to check on your plant every five minutes. But growing is a masterclass in patience. You won't see a dramatic change overnight.
Here’s a more realistic timeline for recovery:
- 1-3 days: In this initial window, the best sign of success is that the problem isn't getting worse. The yellowing has stopped creeping up the plant, and things look stable.
- 3-7 days: Now you should start seeing healthy, green new growth emerging from the top of your plant. This is the ultimate confirmation that you’ve fixed the root cause.
Don't be alarmed if the old yellow leaves eventually wither and drop off. That's perfectly normal. Your victory lies in the health of that new growth.
Should I Remove the Yellow Leaves?
To prune or not to prune? The right call really depends on how far gone the leaf is.
- If a leaf is completely yellow and wilting: Yes, go ahead and snip it off. It’s not performing photosynthesis anymore and can become a breeding ground for pests or mold. A gentle tug is usually enough; if it hangs on, use clean scissors to remove it at the base.
- If a leaf is only partly yellow: It's usually best to leave it alone for a while. As long as some green remains, it's still contributing a little energy. The plant might also be pulling the last mobile nutrients out of it to redirect elsewhere.
My personal rule of thumb is to let the plant decide. If a yellow leaf comes off with the slightest touch, its time was up. If you have to give it a real pull, I let it hang on for a few more days. This keeps you from creating unnecessary open wounds on the plant.
Can Certain Cultivars Be More Prone to Yellowing?
Absolutely. Genetics play a huge part in a plant's personality. Some cultivars are just hungrier for specific nutrients, while others are drama queens about pH swings or environmental stress.
For example, many modern autoflowers grow so fast that they are incredibly demanding for nitrogen during their brief veg stage. If you aren't feeding them aggressively, they can show signs of yellowing much faster than a slower-growing photoperiod cultivar would.
This is exactly why getting to know your chosen cultivar is so crucial. When you're shopping for seeds, look at the breeder's notes. A good seed bank will often point out if a cultivar is a "heavy feeder" or is particularly sensitive, helping you prepare right from the start.
Is It a Pest Problem or a Nutrient Problem?
Telling the difference between a pest attack and a nutrient deficiency can be tough for new growers, as both can cause yellow leaves. The key is to look at the pattern of the damage. Nutrient issues tend to appear symmetrically and follow a clear pattern, like starting from the bottom and moving up.
Pest damage, on the other hand, is almost always random and chaotic.
- Look for irregularity: Pests are messy eaters. You’ll see random yellow splotches, tiny brown or white dots, or silvery trails where they've chewed on the leaf tissue.
- Check under the leaves: This is the secret hideout for most common pests like spider mites and aphids. Flip your leaves over and inspect the undersides, especially along the veins.
- Physical evidence: Look for the tell-tale signs they leave behind, like tiny black specks (pest poop), delicate webbing, or the actual bugs themselves.
If you spot any of these signs, you've got pests. This requires a totally different battle plan, often involving things like neem oil or insecticidal soap, so getting the diagnosis right is critical.
Finding the perfect cultivar for your grow space and style is step one for a great harvest. At Botanist Seeds, we provide detailed descriptions and comparison tools to help you find the right match with confidence. You'll save money, avoid dispensary trips, and have a blast doing it.
Start your growing journey today by exploring our full catalog at https://botanistseeds.com.












