Trichomes on Weed: Master Harvest & Potency
You're probably at that stage where the buds look frosty, your grow room smells fantastic, and you keep asking the same question every home grower asks: Is it ready, or am I about to cut too early?
That moment matters more than is often realized. A harvest that's a few days off can change the aroma, the overall vibe, and how proud you feel when you crack open the jar a few weeks later. It also hits your wallet. If you grow at home to avoid dispensary lines and keep more money in your pocket, learning trichomes is one of the easiest ways to get better results from the same plant.
The good news is that trichomes on weed aren't some secret only old-school growers understand. Once you know what you're looking at, harvest timing gets a lot less guessy and a lot more intentional.
What Are Those Tiny Crystals on Your Buds
You're standing over a plant that looks ready, scissors in hand, and the buds are sparkling under the light. At that moment, those tiny crystals matter more than the calendar on the wall.
They're trichomes. These are the resin glands on the flower, and they carry much of what growers care about at harvest: smell, flavor, character, and the feel of the final jar after cure. If you grow to save money and smoke better flower than what's sitting in a dispensary jar, learning to read them pays you back fast.
A frosty bud catches the eye. A well-timed frosty bud keeps the loud aroma, delivers the kind of effect you were aiming for, and gives you that satisfying feeling of getting the most out of your own work.
Why growers pay so much attention to them
Cannabis trichomes are the plant parts where cannabinoids and terpenes are made and stored. In plain English, the crystal coating is where a big share of the flower's value lives.
That matters for a home grower because harvest is not just about getting the strongest possible bud. Cut too early and the flower can feel underdeveloped, with an aroma that has not fully come together. Wait too long and the profile can drift away from what you wanted. Two plants from the same tent can finish with very different results if one is harvested by habit and the other is harvested by what the resin is doing.
The easiest way to say it is this. The frost is the working part of the flower.
Practical rule: If you want a better read on harvest quality, watch the trichomes, not just the calendar.
Why this matters in a home grow
You do not need a lab coat to use trichomes well. You need to know what they can tell you before you cut, during trim, and even while you decide which jars become your favorites.
They help you judge:
- Aroma development, because the resin holds much of the smell you notice when you crack a bud open
- Harvest timing, because trichome heads change as the flower matures
- Cultivar performance, because some plants stack resin better than others even in the same room
- Handling priorities, because rough trimming and careless movement can knock off the good stuff
That last point saves money in a very real way. Every avoidable mistake after harvest chips away at the quality you spent weeks building. When you start treating trichomes like the prize instead of just the shine, your jars smell better, your flower feels more dialed in, and your homegrown starts competing with products that cost far more per gram.
If you've been judging buds from arm's length, you're in good company. Most home growers start there. The shift happens when you stop asking, “Does it look sparkly?” and start asking, “What are those resin heads telling me right now?”
The Anatomy of a Trichome
A bud can look equally frosty from across the room, yet one plant is building rich aroma and a full, satisfying finish while another is still a few days early. The difference usually comes down to which trichomes you are looking at, and whether you are looking at the right part of them.
The three glandular types growers should know
Cannabis has a few kinds of glandular trichomes, but home growers only need a practical working map.
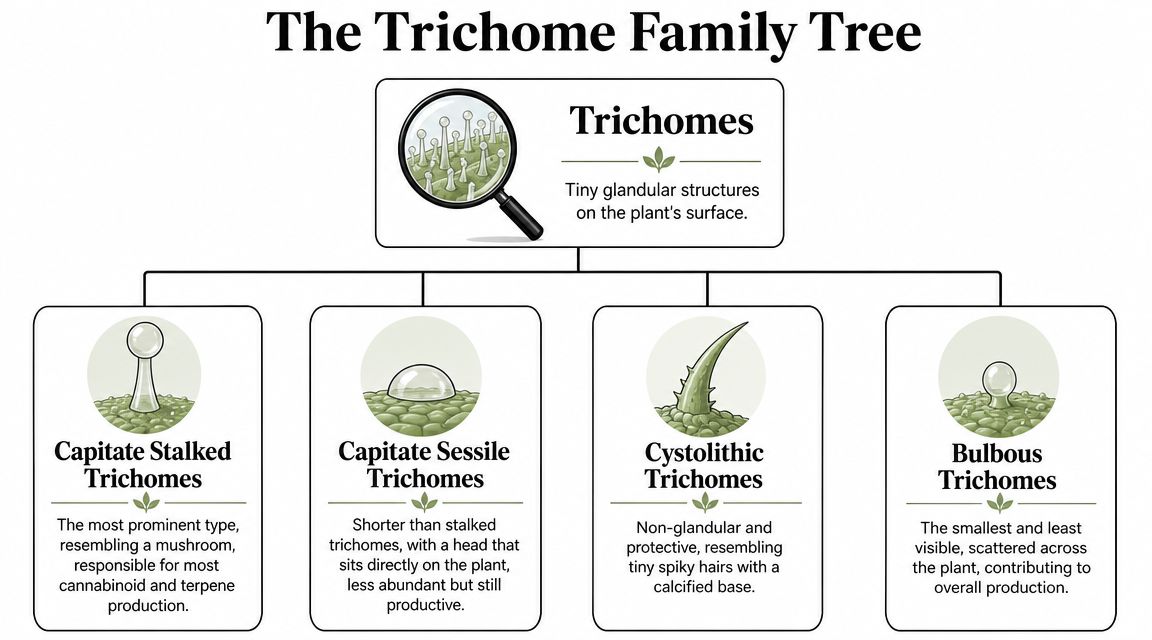
- Bulbous trichomes: These are the smallest. They exist, but they are not what you rely on for harvest calls.
- Capitate-sessile trichomes: These sit close to the plant surface with very little stalk. You will see them, especially earlier on, but they are not the clearest signal of peak flower maturity.
- Capitate-stalked trichomes: These are the big resin glands that look like tiny mushrooms under magnification. On mature flowers, these are the heads worth your attention.
If you remember only one name from this section, make it capitate-stalked. Those larger heads carry much of the resin that shapes smell, flavor, and the overall quality of the jar. Learning to spot them is one of those small grower skills that pays you back in a big way. Better timing means better flower, less disappointment, and fewer expensive dispensary runs to get the aroma and finish you were hoping to grow yourself.
Why the stalk and head matter
The stalk is the stand. It lifts the gland head up where it can develop on the flower surface.
The head is the part you read.
That rounded tip is where the resin gathers, and it is the part that changes appearance as the flower matures. When growers check trichomes with a loupe or microscope, the useful clues come from those intact heads, not from a general layer of sparkle and not from resin that has already been smeared or knocked loose during handling.
A simple way to keep it straight is to picture a mushroom on the forest floor. The stem holds it up. The cap is the part you notice first and inspect closely. Trichomes work much the same way under magnification. The head carries the information you need.
Where growers get tripped up
The easiest mistake is checking the wrong surface. Sugar leaves often frost up early and can make a plant look further along than it really is. For harvest decisions, flower trichomes give you a cleaner read than leaf trichomes.
The second mistake is mixing up pistils with trichomes. Pistils are the hair-like structures that darken and curl as the plant matures, and they can give useful context, but they are not the same thing as resin heads. If you want a quick refresher on what cannabis pistils tell you during flower, it helps to compare the two before you start judging ripeness.
The third mistake is treating all frost as equal. It is not. A flashy plant can still be early. A less showy plant can be right in the pocket, with swollen gland heads and a stronger, more developed nose when you brush the bud. That is where experience starts saving you money. You stop chopping by guesswork, you stop losing quality you spent weeks building, and your homegrown starts landing in the jar with the kind of smell and satisfaction people usually pay premium prices for.
Keep your eyes on the flower, then zoom in on the capitate-stalked heads. That is the part of the plant telling the true story.
Reading the Signs for a Perfect Harvest
Here, trichomes move beyond interesting biology and emerge as a practical tool.
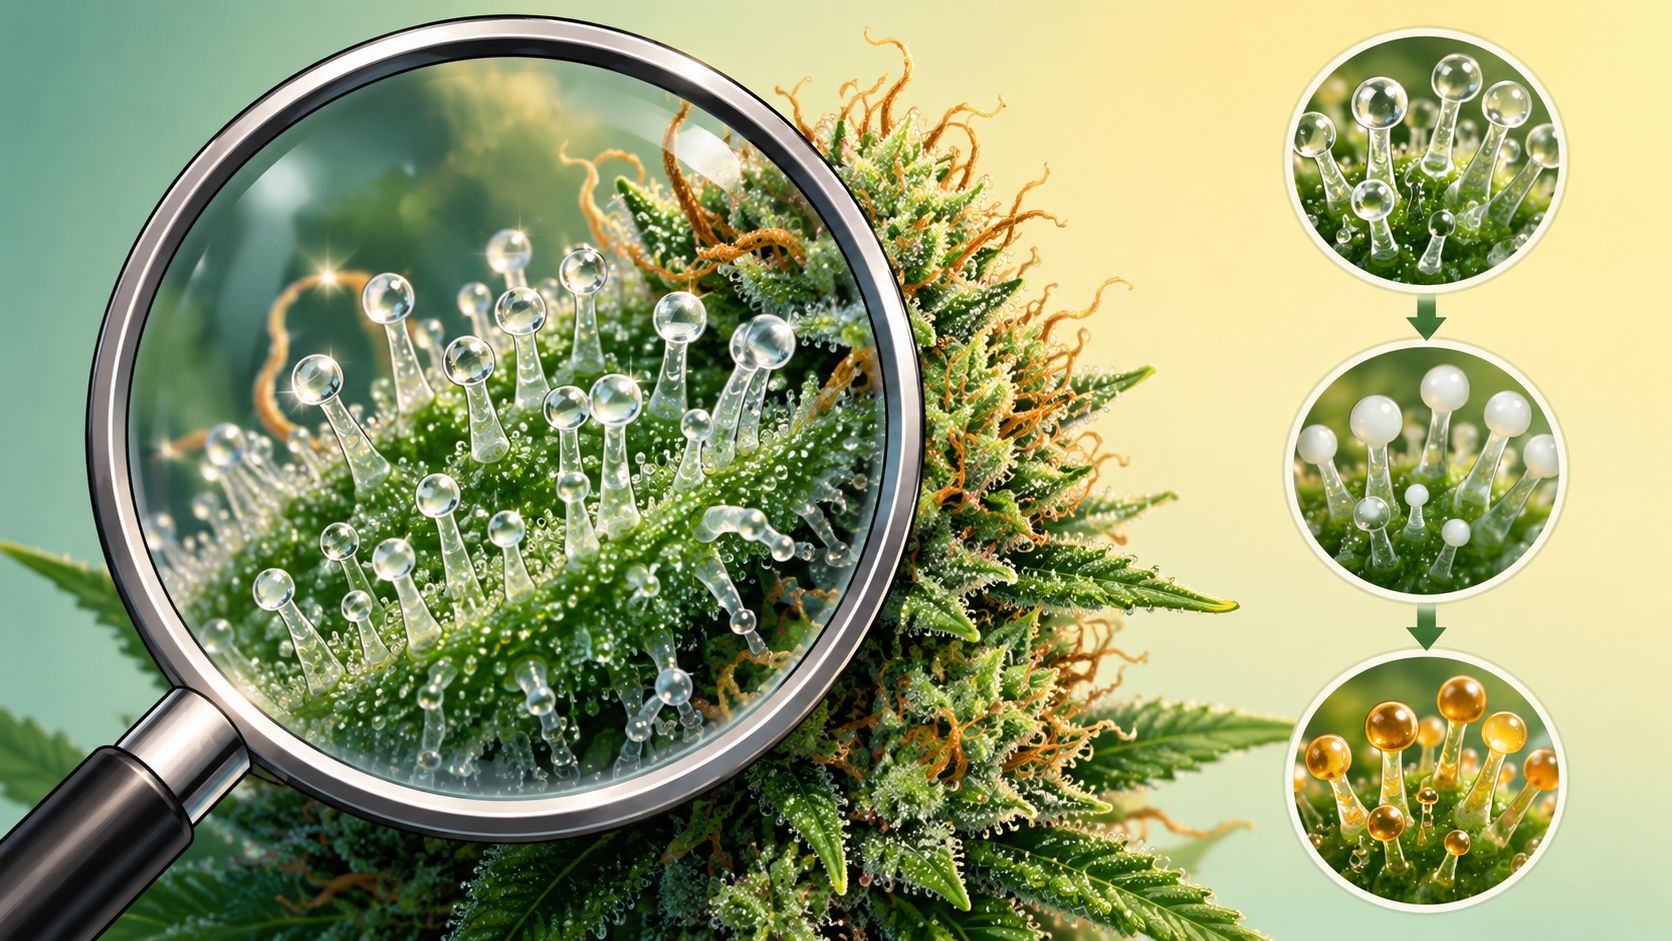
When growers talk about reading trichomes on weed, they're usually looking for three visual stages: clear, cloudy, and amber. Each one tells you something about where the flower is in its development, and each one can nudge the final jar toward a different sensory experience.
The three stages that matter
Clear trichomes look glassy and see-through. They usually signal that the flower still has time left. If most heads are clear, chopping now often means you're leaving something on the table.
Cloudy or milky trichomes look more opaque, like the head has filled in. This stage is commonly associated with peak THC accumulation and is where many growers aim if they want a lively, bright, dialed-in result.
Amber trichomes look darker and more aged. As more heads turn amber, the profile tends to shift toward a heavier, more relaxed vibe.
Don't check one bud and call it done. Read several flower sites, because the top of the plant often finishes ahead of the lower branches.
The harvest window most growers aim for
A practical benchmark used by growers is to harvest for peak potency when roughly 70–80% of trichomes are cloudy, 10–20% are amber, and 10% or less are clear. The same guidance says a more sedative profile is often targeted when 30–50% amber develops, while a more energetic effect is usually associated with less than 10% amber and more cloudy trichomes. It also notes that top colas can mature faster than lower buds, with top flowers sometimes showing 30–40% amber while lower flowers are still about 90% cloudy (GrowerIQ trichome harvest guide).
That's why experienced growers don't harvest by breeder timeline alone. They use the timeline as a clue, then let the trichomes make the final call.
Trichome Harvest Timing Chart
| Trichome Stage | Visual Appearance | Associated Vibe |
|---|---|---|
| Clear | Glassy, transparent, not fully developed looking | Early, less settled, usually not the ideal harvest point |
| Cloudy | Milky, opaque, fuller-looking heads | Brighter, fuller, often the sweet spot for many growers |
| Amber | Golden to darker heads, visibly aged | Deeper, heavier, more relaxed |
Where people get tripped up
Pistils cause a lot of confusion. Brown hairs can make a plant look finished when the resin still says “not yet.” Pistils are useful context, but they're not the final authority. If you want the full breakdown, this guide on pistils and what they really tell you helps sort out the difference.
Another common mistake is checking sugar leaves instead of the actual flower. Sugar leaf trichomes can mature differently, and they often turn amber sooner. That can push you into an early chop if you rely on the wrong surface.
A practical routine that works
Try this when you're close to harvest:
- Check multiple buds: Look at top colas and lower flowers, not just the prettiest bud.
- Inspect the flower, not just the leaves: Aim your loupe at calyx-rich parts of the bud.
- Take notes over several days: The shift from clear to cloudy to amber is easier to judge when you compare yesterday to today.
- Match timing to your preference: If you want a brighter daytime jar, lean toward mostly cloudy with limited amber. If you want a heavier evening vibe, wait for more amber.
That's the whole game. You're not chasing someone else's perfect harvest. You're choosing your own.
Tools of the Trade Seeing Trichomes Up Close
You can't read trichomes well with the naked eye. You can guess. You can squint. You can hold the bud under a bright light and convince yourself. But you can't really inspect maturity that way.
Research-backed guidance on trichome maturity points out that visible sparkle alone isn't enough. Magnification gives a more reliable read on cannabinoid and terpene development than simple visual frostiness (peer-reviewed discussion of trichome maturity and visual cues).
Good, better, best
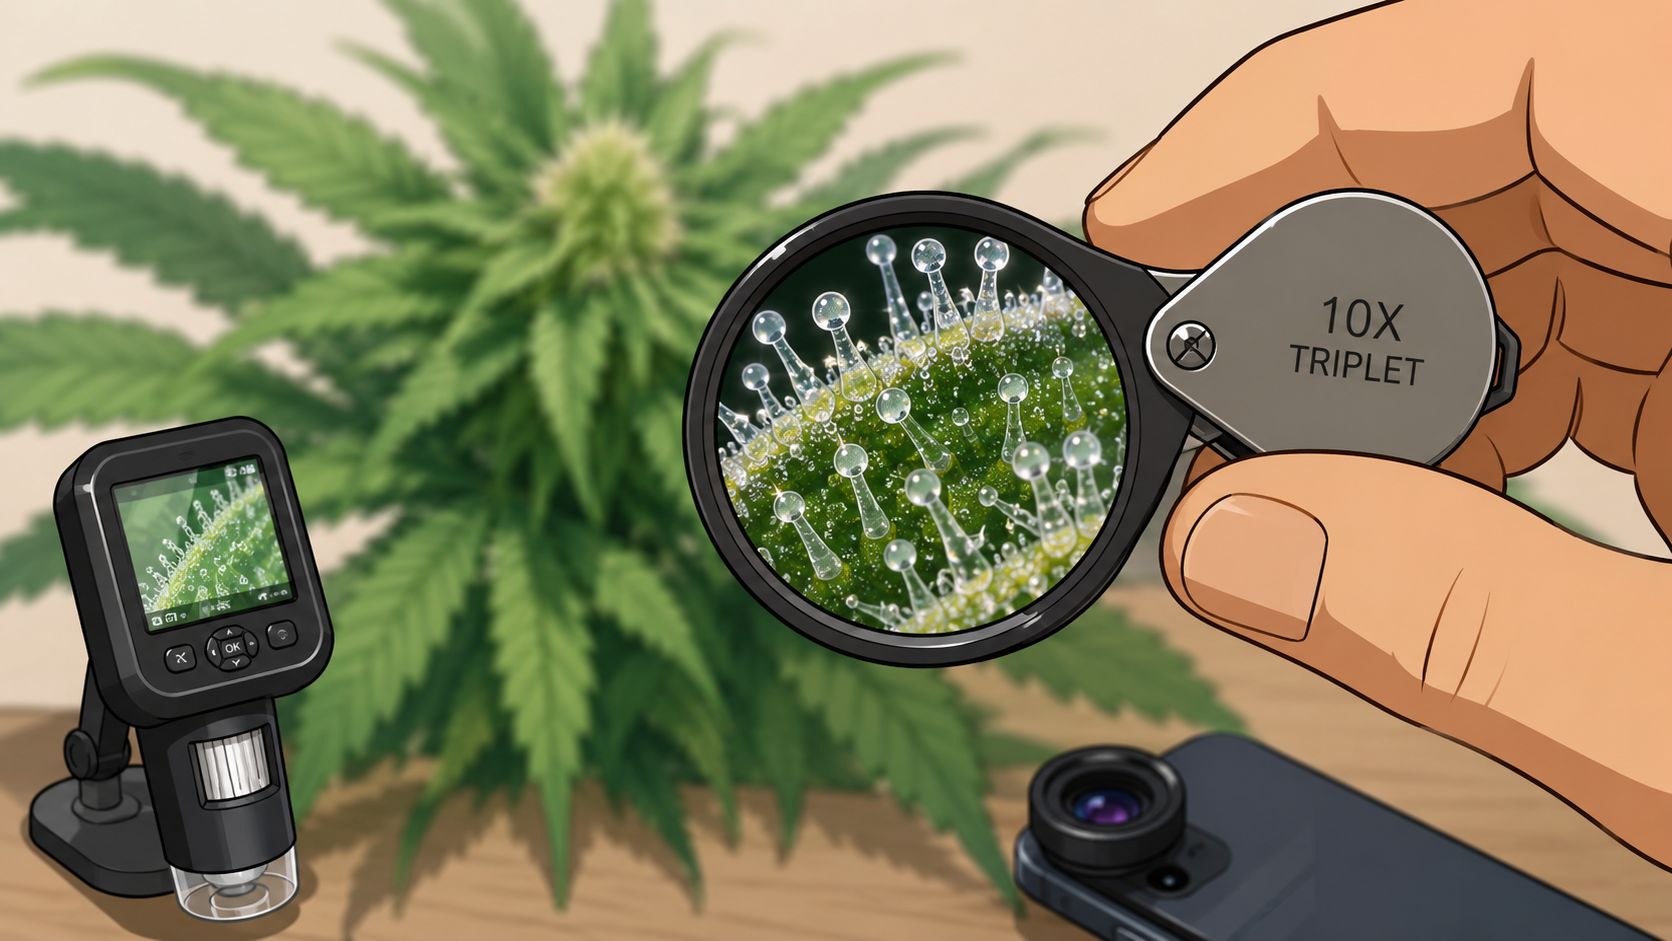
Jeweler's loupe
This is the classic budget tool. A decent loupe is small, cheap, and easy to toss in a drawer.
It works well if you've got steady hands and good lighting. The downside is that it takes practice. New growers often wobble around and end up staring at blur.
Best for: growers who want simple and affordable
Weak spot: focus can be fiddly
Smartphone macro setup
A phone with a macro attachment is the middle ground. It's more convenient than a loupe for some people because you can snap a photo, zoom in, and compare over time.
The catch is consistency. Lighting, phone movement, and focus hunting can make results uneven. Still, if you already use your phone for grow notes, this can be a practical option.
Best for: quick checks and photo tracking
Weak spot: quality depends a lot on the phone and lens
Digital microscope
This is the easiest way to get a clear answer. You can see the gland heads much more comfortably, and many models let you save images.
The only real downside is setup. It's not as grab-and-go as a loupe, and some models are annoying to hold steady unless mounted.
Best for: growers who want confidence and detail
Weak spot: less convenient for fast spot checks
How to get a clear look
A few habits make any tool work better:
- Use steady support: Brace your hand against a branch or use a stand if you have one.
- Check under soft light: Harsh grow lights can make resin look washed out.
- Inspect the same areas each time: That makes maturity changes easier to track.
- Avoid squeezing buds: The goal is to inspect, not mash the flower.
If you want to see how close-up inspection looks in practice, this quick video gives a useful visual reference before you try it on your own plants.
My honest recommendation
If you only buy one thing, start with a loupe. It gets the job done.
If you know you're the kind of grower who likes comparing photos, keeping records, and dialing in harvests cultivar by cultivar, a digital microscope is worth it. It removes a lot of uncertainty, and uncertainty is what leads to those “I probably should've waited” harvests.
Preserving the Prize From Harvest to Cure
A lot of growers do the hard part right, then fumble the finish.
You can nail timing, cut on the right day, and still lose quality if you handle the flower like yard waste. Trichomes are delicate. Once the plant is chopped, your job changes from growing resin to protecting resin.
Why gentle handling matters
Trichome heads are roughly 50–100 µm in diameter, and guidance on harvest maturity notes that their quality can degrade with heat, light, oxygen, and physical agitation. That's why rough trimming, bright rooms, and too much handling can cost you aroma and overall quality after harvest (Norddampf guide on trichome maturity and handling).
That's the part newer growers often miss. You're not just drying buds. You're trying to keep those tiny heads intact and clean until they hit the jar.
A perfectly timed harvest still needs a careful landing.
A simple do and don't checklist
Do
- Handle branches more than buds: Hold stems when you can, not the flower itself.
- Keep the room calm: Lower light, reasonable temperature, and a stable drying environment help preserve what you just grew.
- Trim with patience: Slow hands beat fast sloppy ones every time.
- Open cure jars with a purpose: You want fresh air exchange, not endless exposure.
Don't
- Don't pile buds roughly into bins: Compression and friction knock resin around.
- Don't dry in a bright, hot space: Heat and light are not your friends here.
- Don't over-handle for show-and-tell: Every squeeze, shake, and pass-around costs something.
- Don't rush the cure: Fast finish, flat result
The easiest way to protect your work
Think of drying and curing as part of the harvest, not an afterthought. If your dry space is too wet or too unstable, fixing that matters. If you need help dialing that part in, this guide on using a dehumidifier when drying weed is a good practical reference.
Where quality gets lost most often
Most of the damage happens in ordinary moments:
- carrying cut branches carelessly
- trimming in a warm room
- letting flowers sit in light too long
- checking jars constantly because they smell amazing
All of that is understandable. It's your harvest. You're excited.
But the growers who end up with jars that smell rich and stay impressive weeks later usually do one thing better than everybody else. They leave the trichomes alone as much as possible.
Making the Most of Your Trichomes
Once you've trimmed a plant, you'll notice something fast. Good trim still has value.
If the sugar leaves and small bits are resinous, you don't need to treat them like trash. For a home grower, this is one of the most satisfying parts of the whole process. You already saved money by growing your own. Using the leftover resin well stretches that harvest even further.
Two simple ways to use the good stuff
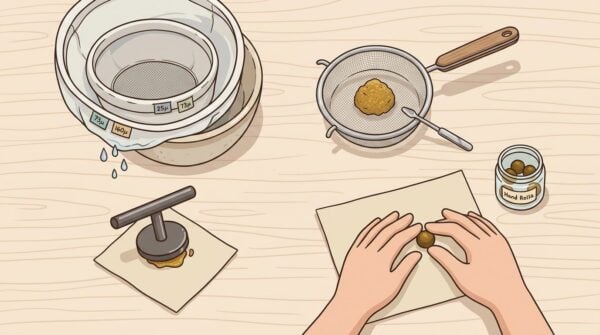
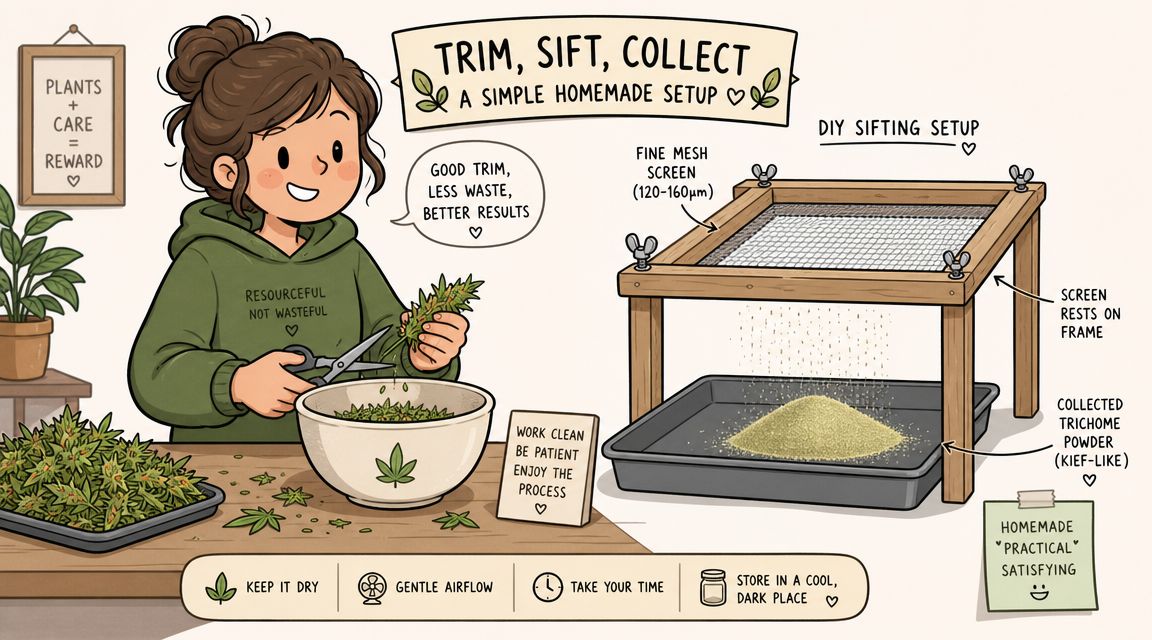
Kief is the loose trichome material that falls away from dry flower or trim. If you've ever opened the bottom chamber of a grinder and found a dusty, resin-rich layer, that's the idea.
Rosin is what you get when you apply heat and pressure to resin-rich material. It's popular because it can be made without complicated solvents or a lab-style setup.
Low-tech kief collection
You don't need fancy gear to start collecting.
- Use a grinder with a collection chamber: It's the easiest passive method.
- Save resinous trim separately: Dry trim can be sifted later through a fine screen.
- Work clean: A tidy trim area makes collection easier and keeps plant debris down.
The trick is restraint. Don't over-grind or over-handle material trying to force more out of it. Cleaner kief usually comes from a lighter touch.
Simple rosin for hobby growers
A lot of home growers like making small amounts of rosin from kief or nicely cured flower. The appeal is obvious. It feels like getting a bonus product from the same harvest.
A low-tech setup can be as basic as parchment paper, clean material, and a household hair straightener used carefully. Results vary a lot depending on the cultivar, dryness, and how resin-rich the material is, so treat this like a small kitchen experiment, not a guaranteed production system.
Good resin in means better rosin out. Starting material still makes the call.
Why this is worth learning
For hobby growers, this isn't just about squeezing extra use out of trim. It changes how you think about the whole plant.
You become more selective about what to save. You notice which cultivars leave your fingers sticky at trim time. You start connecting aroma, resin texture, and flower structure in a more hands-on way. If you want to better understand how aroma ties into the resin itself, this breakdown of cannabis terpenes is worth reading.
That's where home growing gets especially rewarding. You stop acting like a buyer and start thinking like a craft producer.
Your Harvest Your Call
Once you understand trichomes, harvest gets personal in the best way.
You're not stuck cutting because the packet said a certain week, or because the pistils looked done, or because the buds were shiny enough from across the tent. You can look at the flower up close, read what the resin is telling you, and decide what kind of jar you want at the end of the process.
That changes the whole experience. You get better control over aroma, better consistency from run to run, and a lot more pride when the cure is finished and you know you nailed the timing yourself. It also makes home growing pay off more. Better timing means better use of the plant you already spent weeks raising.
The next level is starting with the right cultivar for your setup, your taste, and the kind of resin production you want to chase.
If you're planning your next run, Botanist Seeds makes it easy to compare feminized and autoflower cultivars so you can pick genetics that fit your space, your schedule, and your harvest goals. Use the comparison tool to narrow down options and choose a cultivar that gives you the best shot at the frosty, aromatic homegrown you want.