Seed Shelf Life: How Long Cannabis Seeds Actually Last
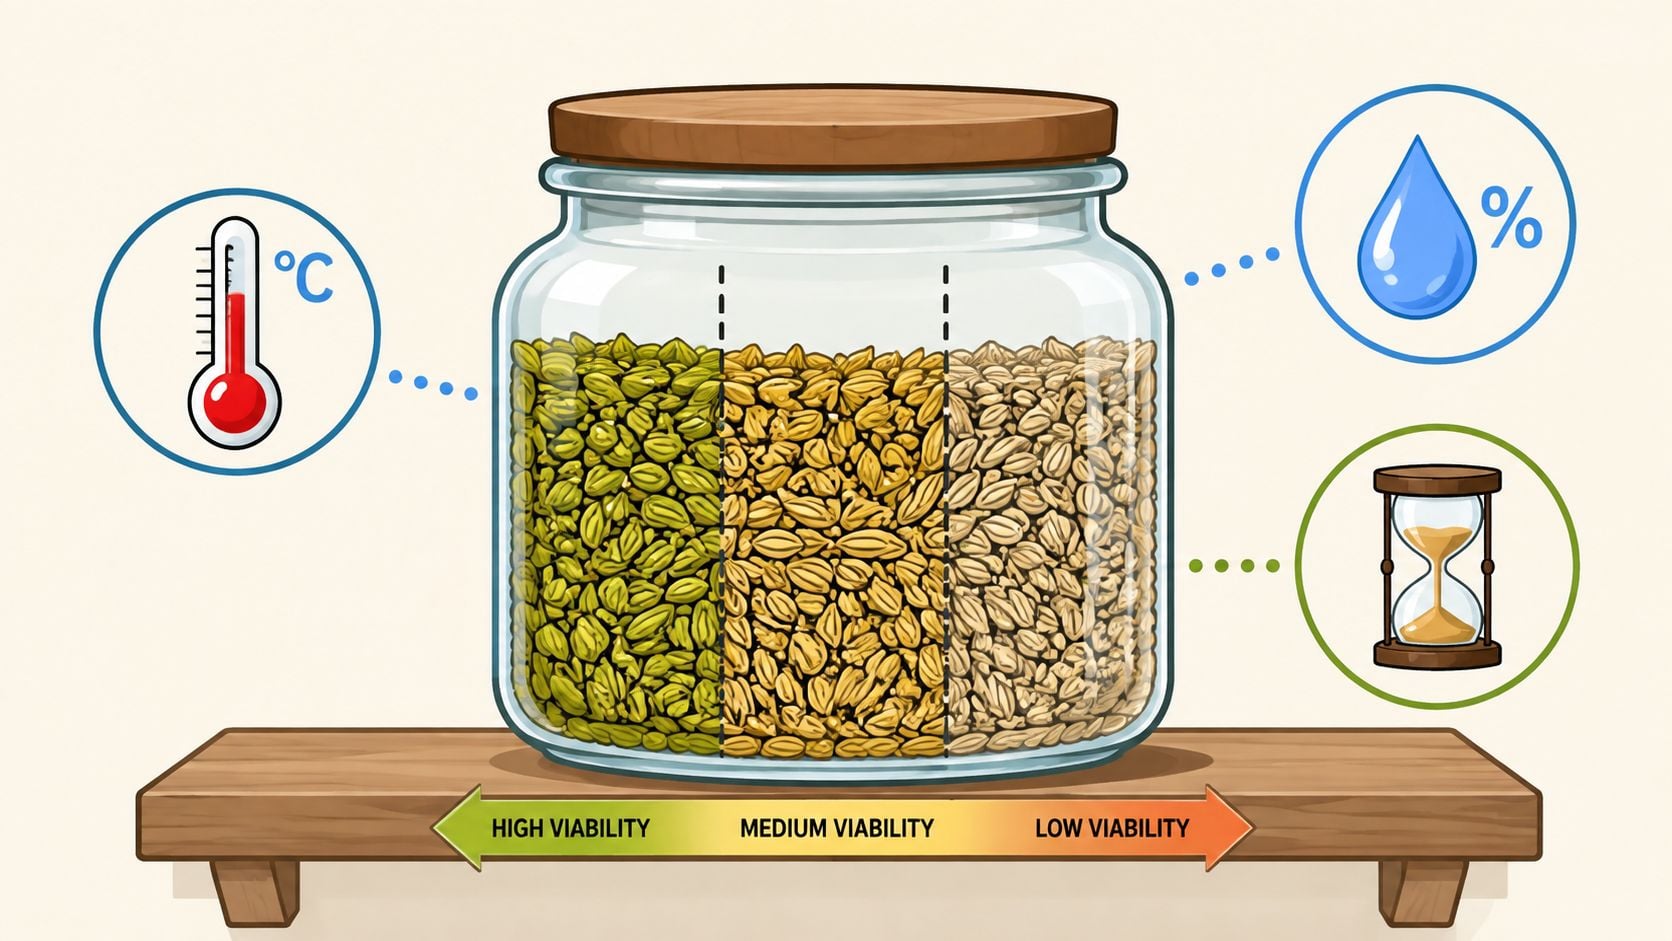
You find an old seed pack in a drawer, turn it over, and do the little mental math every grower knows too well. Is this still worth planting, or is it just expensive confetti now? That question comes up because seed shelf life feels vague from the outside, but in practice it comes down to a few hard variables, mostly moisture and temperature, not the calendar date printed on the pack.
The Old Pack Sitting in Your Drawer
The first time I pulled out a forgotten packet of Sour Diesel and saw the label faded nearly blank, I made the mistake a lot of growers make. I treated the age of the seeds like the whole story. It isn't. Two packs from the same cultivar can age very differently depending on where they spent those months, and that is why old seed can feel either useless or surprisingly alive.
What the drawer actually tells you
A seed pack in a cool, dark drawer is already in a better spot than one that lived in a hot garage or a damp basement. Extension guidance says many vegetable and flower seeds can sit for one year at room temperature without appreciable loss of germination, and with proper drying and storage they can last 10 or more years. That is a useful benchmark, but it only works if the storage conditions were decent in the first place.
I have opened packs that looked fine on the outside and found seed that was flat-out tired inside. The shell can look normal while the embryo has lost vigor. That is why seed shelf life is better understood as a storage problem than an “expired or not expired” problem.
Practical rule: if you do not know how a pack was stored, treat it as a candidate for a quick germination test, not a guaranteed keeper.
The question is not the date on the pack. It is the journey that pack took, especially the moisture and temperature it sat through. Once you read that journey, you can make a better call on whether the seed still deserves bench space, or whether it belongs in the compost bin.
The good news is that you do not need lab gear to make a smart call. You need a clearer model for what shortens life, a simple home test, and a storage setup that keeps the next batch from becoming a question mark.
What Seed Shelf Life Means for a Grower
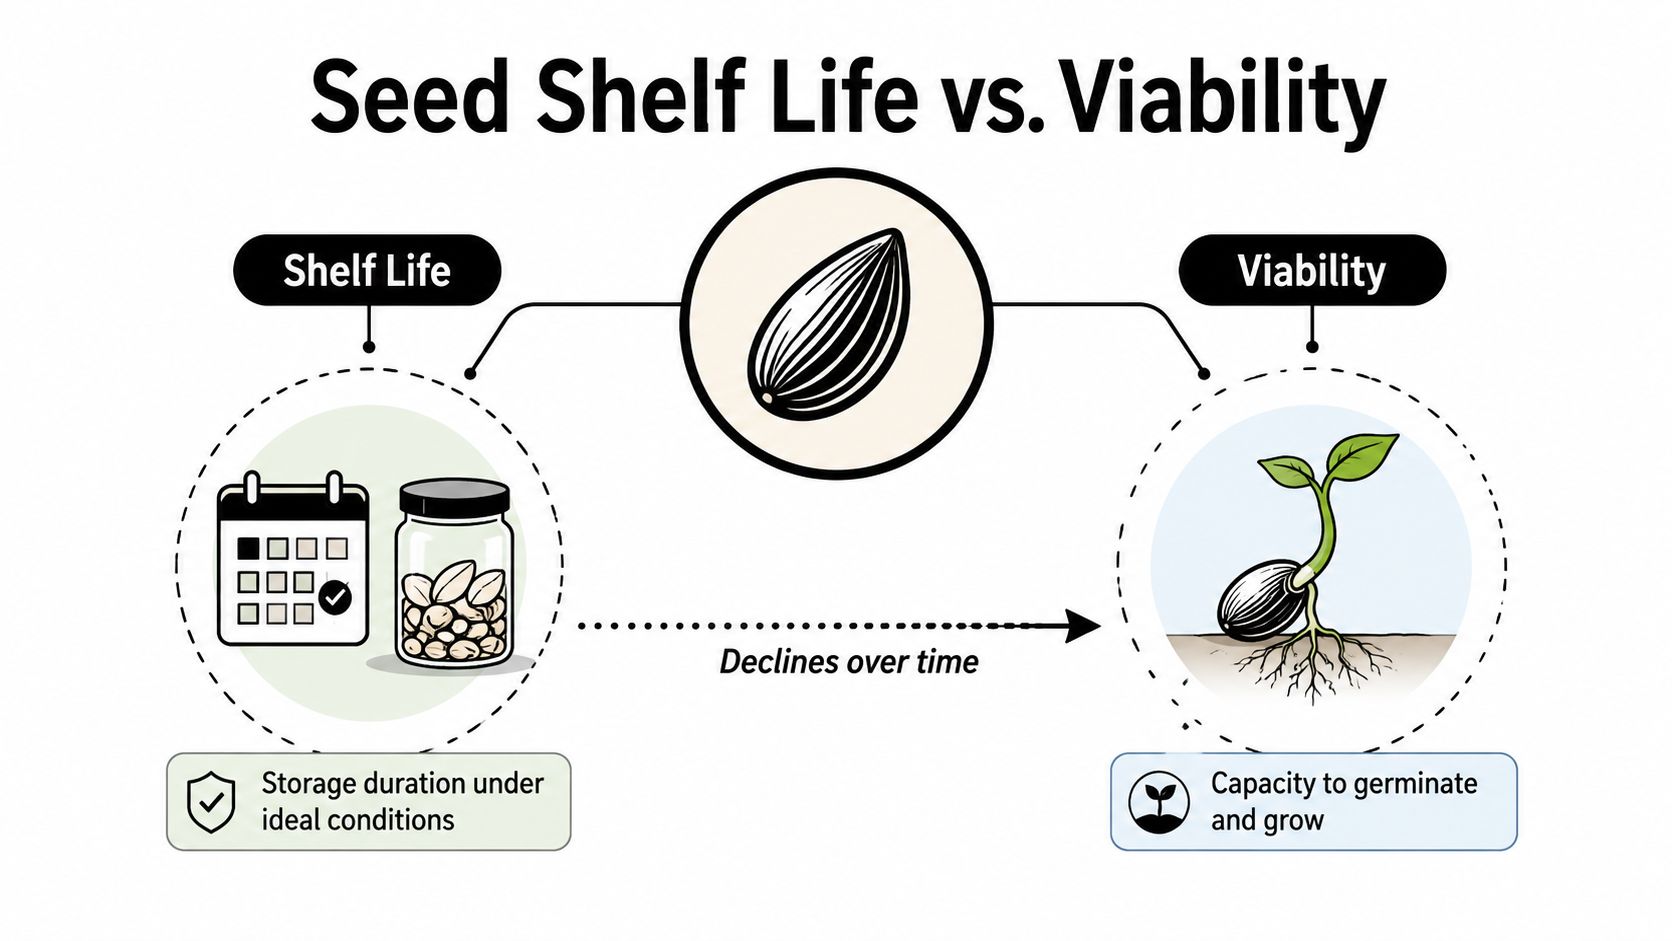
Seed shelf life is the amount of time seed stays worth planting under decent storage. Viability is what shows up in the tray, the share of seed that still germinates and makes a healthy seedling. Those are related, but they are not the same thing, and mixing them up is how growers end up throwing out seed that still has life in it, or trusting old stock that is already past its prime.
The rule that matters more than the printed date
For orthodox seeds, the storage rule of thumb is simple and unforgiving. Each 10°F increase in temperature halves longevity, and each 1% increase in seed moisture content halves longevity. That same idea is stated in Celsius in a research review, each 5°C increase in storage temperature and each 1% increase in moisture content cuts seed life in half (PMC review). The Tallgrass Prairie Center manual gives the same practical warning for seed storage, temperature and moisture drive the clock far more than the date printed on the packet (Tallgrass Prairie Center manual).
I have seen that rule play out in real time. A grower friend kept a prized pack in a garage through a hot summer, and it came back as a dead loss. The packet looked clean, the seed looked normal, but the storage conditions did the damage long before the calendar did.
The same rule explains why a seed pack stored cool and dry can outlast its date by a lot, while the same pack left warm and damp can go soft fast. Printed expiration dates are a rough guide, not a verdict. Cooler and drier wins every time.
The storage target you can actually aim for
Practical storage guidance keeps pointing to the same target, cool, dry, and stable. Seed literature describes a useful benchmark as storage where temperature plus relative humidity stays below 100, and many seeds can remain viable for at least a year at 50°F and 50% RH under those conditions (Tallgrass Prairie Center manual). A seed storage reference also says long-term sealed storage works best when seed moisture stays below 8%, which lines up with relative humidity below about 35% (Saving Our Seeds PDF).
That is the frame I use in practice. If a pack has lived in a hot room, a damp basement, a shed, or a car, I do not trust the date alone. I treat it as a storage question first and a planting decision second.
Temperature, Humidity, Light, and Seed Quality
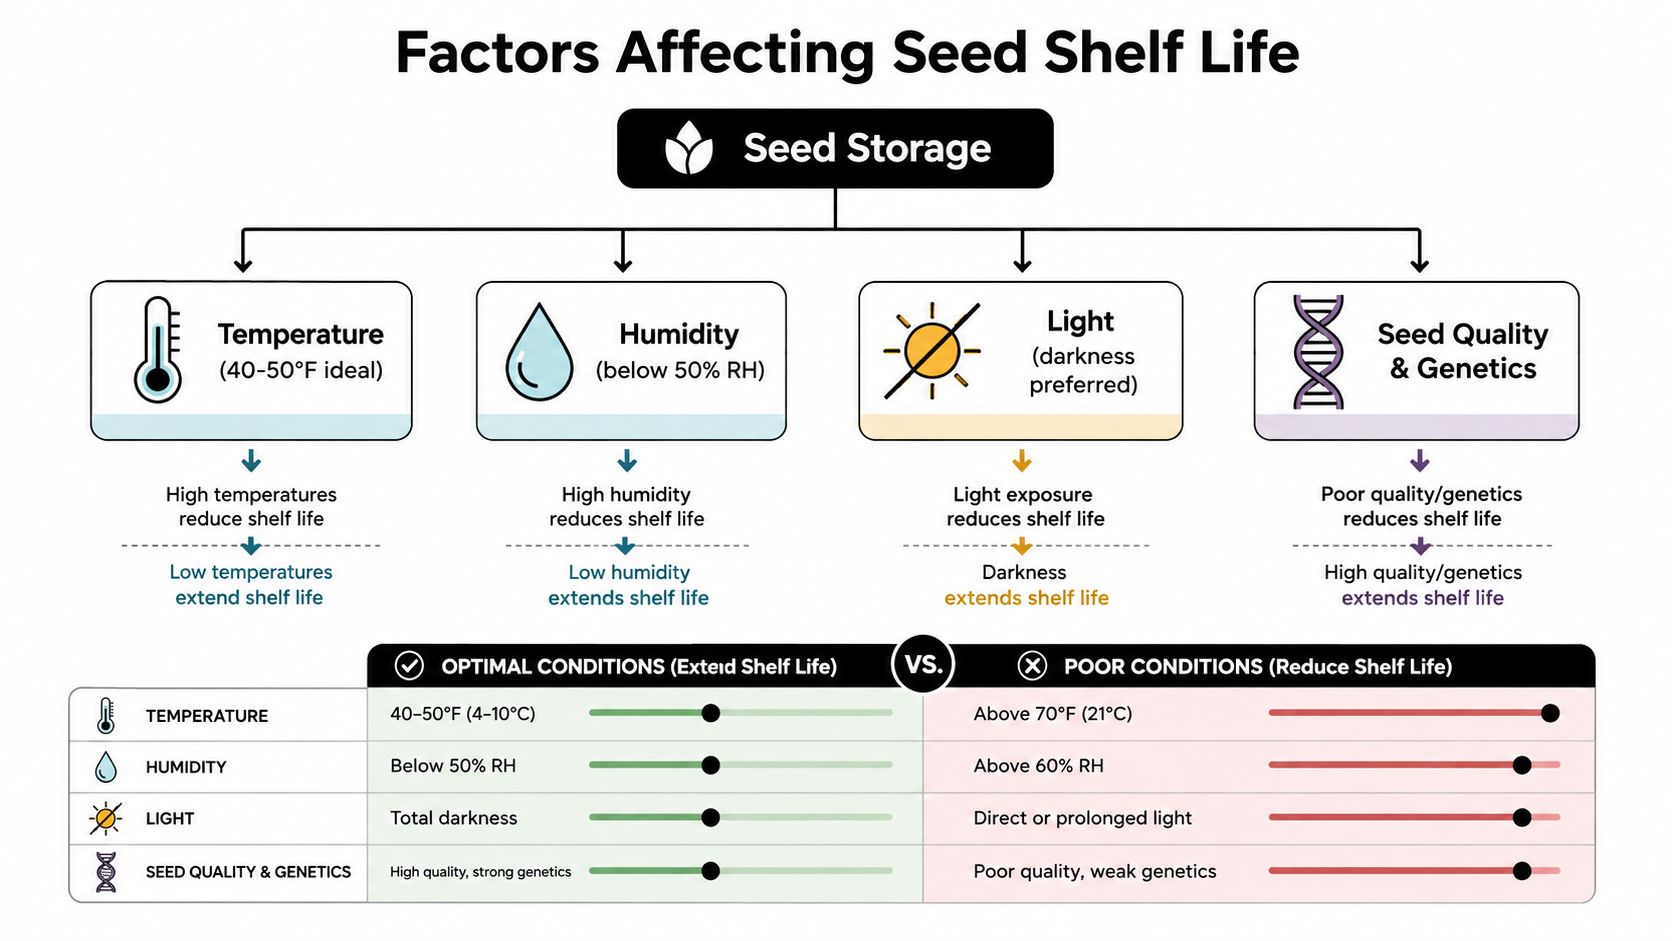
I treat old seed like a storage problem first and an age problem second. A pack can look fine in the drawer and still be on borrowed time if it sat warm, damp, or in bright light. I have opened packs that seemed untouched on the outside, then found the seed inside soft, dull, or slow to germinate because the room around them did the damage.
Heat and humidity hit first
Heat and moisture are the first two things I check, because they usually explain why a pack goes bad early. Warm air speeds seed aging, and damp air makes that process move faster. I have seen growers trust a sealed box in a garage through summer, only to open it later and find the seeds had lost their edge long before the calendar said they should.
That matches the storage guidance from seed references. Seeds held in warm, humid conditions lose viability much faster, and lowering moisture is the part that gives you the most return (Saving Our Seeds PDF). South Dakota State Extension also warns that high temperatures sharply cut seed life and says dry storage is the safer move for leftover seed (South Dakota State Extension).
A garage, shed, car, or sunny windowsill is a poor place for seed, even if the packet is still closed. The package can be intact and the seed can still be cooked by the air around it.
Seeds do not care that the room looks tidy. They care whether the air around them is warm and damp.
Refrigeration can help, but only if the seed is dry enough to go in and out without picking up condensation. I have had better luck with a simple, stable cool spot than with a fancy container in a place that swings hot and humid all week.
Light is less dramatic, but still worth controlling
Light usually is not the main thing that kills a seed lot, but it still adds stress that you do not need. Dark storage is the easy win. A drawer, an opaque tub, or a closed cabinet is better than a clear jar sitting on a bright shelf where heat and light keep working on the seed day after day.
Seed quality and handling still matter
Two packs from the same breeder can age differently because they were not handled the same way before they reached you. Drying, packaging, storage before sale, and how often the packet has been opened all affect what happens later. A strong, properly matured seed lot usually holds up better than one that was stressed before it ever left the source.
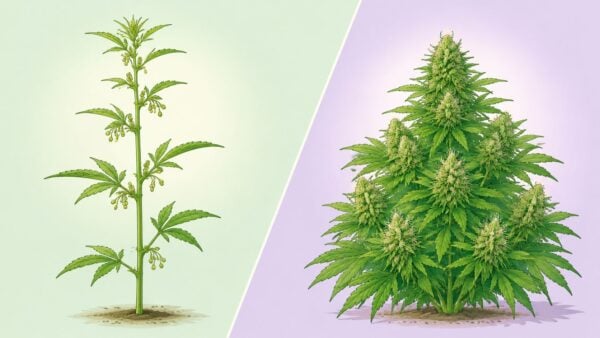
That is where cultivar differences matter too, including the difference between autoflower vs photoperiod seeds. The storage rules are the same, but the value of each seed is not always the same once you start a run. If a pack is questionable, the key question is not just how old it is, it is how it was kept and how much risk you want to carry into the next cycle.
How Long Feminized and Autoflower Seeds Last
Old seed packs do not fail on a neat calendar schedule. They fail when moisture, heat, and time wear them down enough that the embryo can no longer wake up cleanly, and that is why feminized and autoflower seeds follow the same storage rules as other orthodox seed. The practical difference is what happens if a weak pack slips through, because the cost of a bad start is not the same for every run.
A feminized pack can give you a little more room to adjust if germination is uneven. With an autoflower, the cycle is fixed, so a slow or weak start leaves less time to recover. If I have an autoflower pack that has sat around for a while, I am stricter with storage checks, I use a fresh desiccant pack, and I test a seed or two before I trust the whole lot.
Realistic expectations by storage condition
| Storage Condition | Typical Temperature | Typical Humidity | Expected Viable Window |
|---|---|---|---|
| Room storage, decent drawer or closet | About room temperature | Dry room air | Often usable for a year, sometimes longer if conditions stay stable (Colorado State Extension) |
| Cool, dry storage | Around 50°F or lower | Around 50% RH or lower | At least a year, with much better odds of longer viability (Tallgrass Prairie Center manual) |
| Sealed, very dry storage | Below 8% moisture content | Below about 35% RH | Long-term sealed storage becomes much more reliable (Saving Our Seeds PDF) |
| Genebank-style cold storage | About −18°C to −20°C | Very low humidity | Maximum longevity for orthodox seed, often far beyond home storage (Frontiers review) |
Those windows are guidelines, not promises. A pack kept cool and dry usually holds its edge far better than one left in a warm room, and that applies whether you are saving a feminized line for a future run or keeping autoflowers on deck for a faster turnaround. The seed does not care about the label as much as it cares about the conditions around it.
Why feminized and autoflower packs still age differently
The seed biology is similar, but the practical risk is not. A feminized pack stored well can stay worth running for years, and if one seed underperforms you still have a little room to recover with the rest of the cycle. An autoflower pack can age just as well under the same conditions, but because the plant moves on a fixed schedule, a weak germination rate hits harder when you need every seed to start cleanly and quickly.
I treat the printed date as a rough marker, not a verdict. The storage window stretches or shrinks based on moisture and temperature, not on the name on the packet. That is why a pack kept dry, dark, and cool can stay useful much longer than one stored in a warm cupboard, even if both were bought around the same time.
For growers choosing between types, the storage math stays the same, but the margin for error changes. If you want a broader look at how the two growth styles affect planning, this autoflower vs photoperiod guide is a useful reference. With feminized seeds, a little decline is often easier to work around. With autoflower seeds, I am more conservative, because there is less time to compensate for a weak start once the run is underway.
Testing Germination Before You Commit
A home germination test beats a printed expiration date every time. You don't need to guess whether an older pack is still worth a full run. You just need a small sample, a clean setup, and the patience not to overread a bad morning or underread a slow batch.
The simplest reliable check
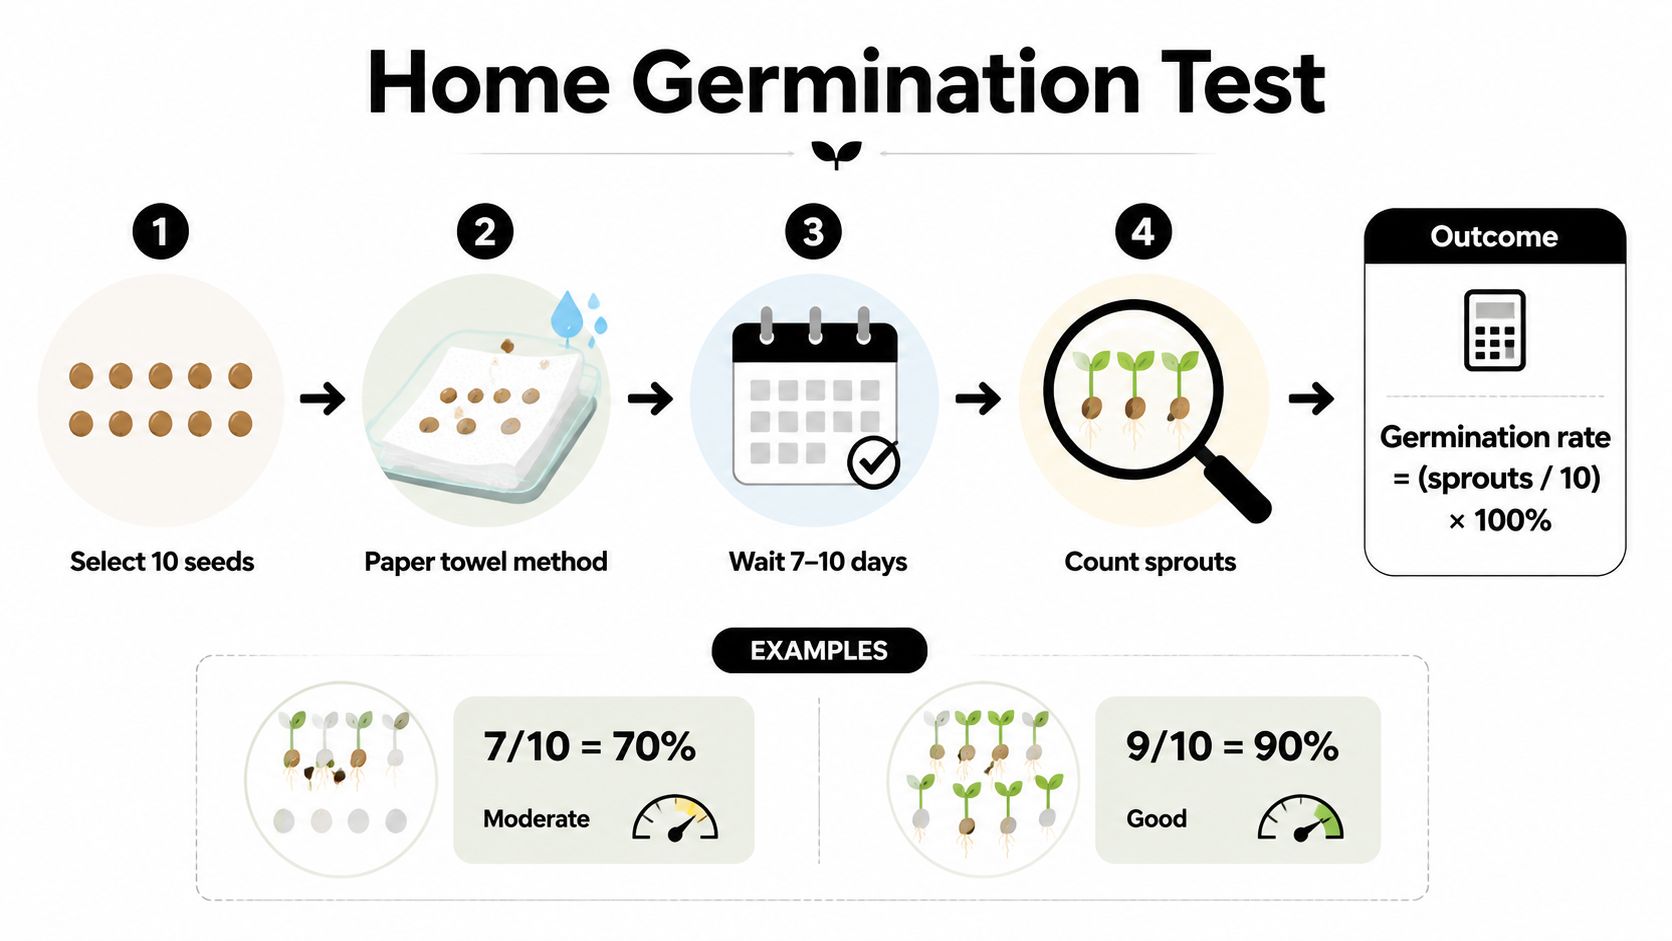
Start with 10 seeds if you can spare them. That sample size makes the math easy and gives you a real read on the pack instead of a lucky or unlucky fluke. Place them on a damp paper towel, fold it over, and keep the towel moist but not soaked in a warm, consistent spot.
Don't judge a pack by day one. Judge it by the full window you promised it.
A practical guide to germination timing is useful here, because some seeds are slower than others. If you want a deeper walk-through of timing and setup, use Botanist Seeds' germination guide.
How to read the result
After the normal germination window for your cultivar, count the sprouts and do the math.
- 70% or better: plant as normal.
- 40% to 70%: plant extra seeds and plan to cull weaker starts.
- Below 40%: retire the pack or keep it only for low-stakes experiments.
That threshold keeps you from wasting tray space on a weak batch, but it also keeps you from throwing away a usable one too soon. Older packs often still have life left in them, they just need a smarter plan. If the seeds are expensive or hard to replace, testing is cheap insurance.
Why this matters more with older stock
A seed lot that's still viable can look inconsistent. Some seeds will jump fast, some lag, and some never move. The test tells you whether the lot is worth a normal planting plan or whether you need to oversow. That's the difference between a tidy tray and a frustrating empty one.
A Storage Protocol You Can Set Up Tonight
Here is the exact system I use when I want a pack to stay worth opening later. The goal is simple, keep the seeds dry, sealed, dark, and stable, then leave them alone.
The drawer setup
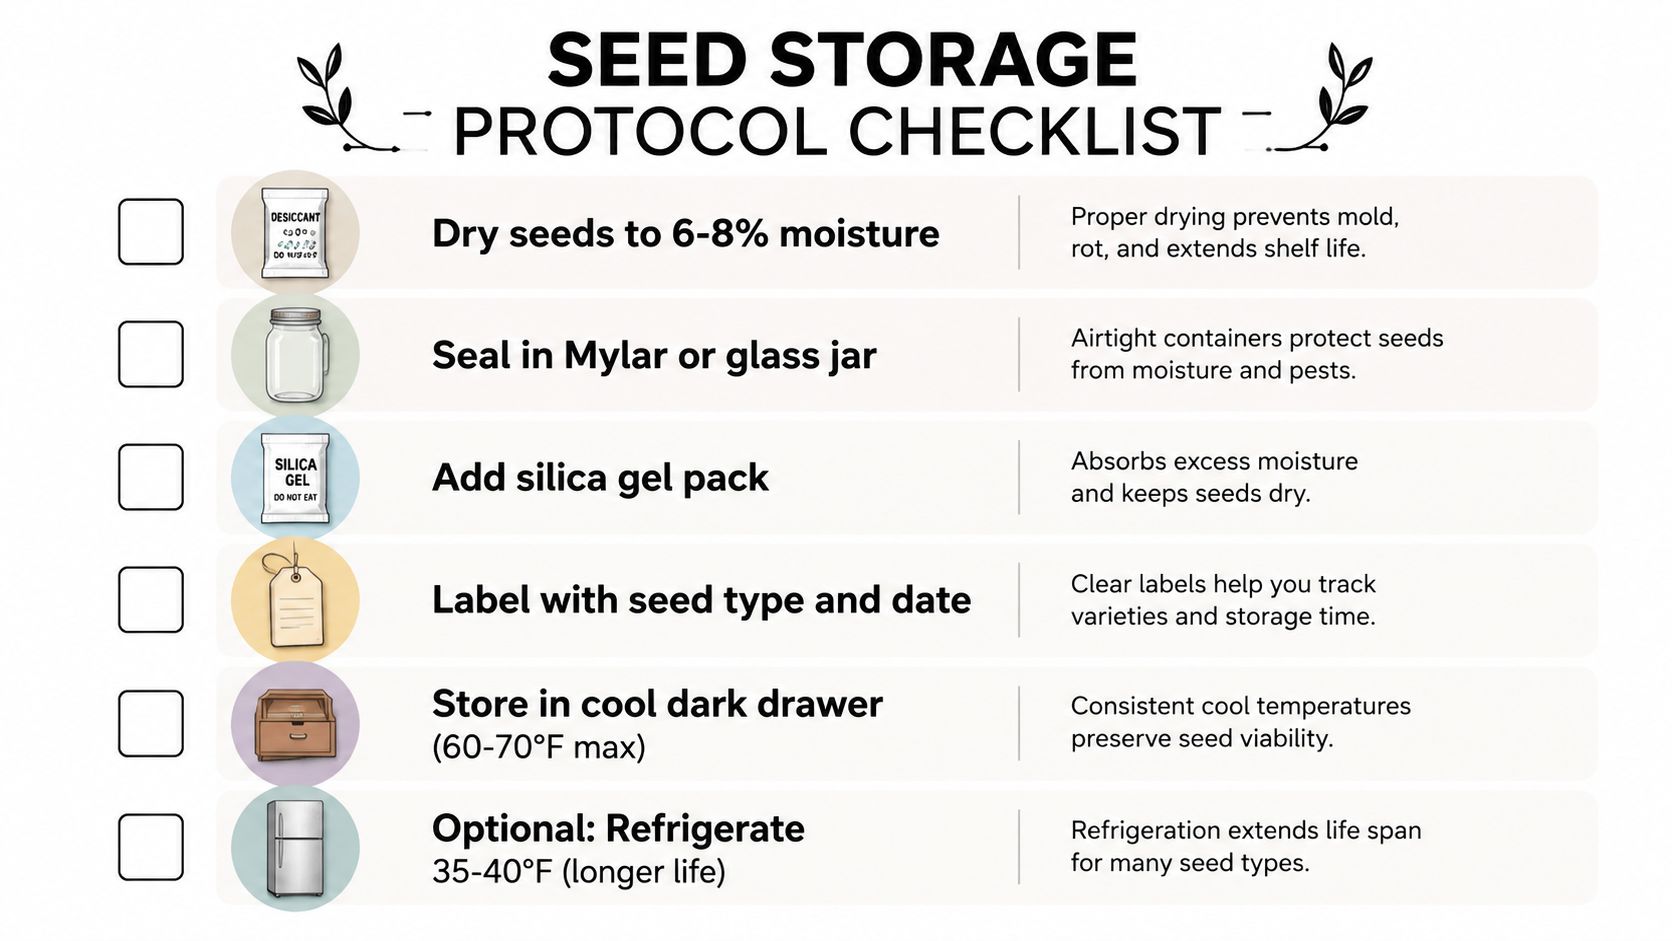
For seeds I plan to use soon, I keep them in a cool indoor drawer inside a small airtight container. I use a glass mason jar, add a color-indicating silica packet, and write the cultivar name and year on the jar with a paint pen so the label never rubs off. The jar goes in the back of the drawer, away from anything that throws off heat or light.
The packing order stays the same every time. Dry seed packets go into the jar, the desiccant stays with them, and the lid gets closed right away. I do not mix in loose packets from random places or leave a container half open while I sort. Once the seeds are in their storage spot, I leave that spot alone.
- Dry the seeds first: use only seed that is already dry before you seal it.
- Seal them well: a glass jar or similar airtight container works.
- Add desiccant: a silica gel packet helps keep the container dry.
- Keep them dark: store the jar out of direct light.
- Keep the spot steady: pick one place and stop moving the same pack around.
That is the part people skip when they are in a hurry. They seal the pack first and hope the rest works out later. It usually does not.
Fridge and freezer storage, done carefully
For long-term storage, I move the jar to the back of the refrigerator's vegetable crisper. That spot stays more consistent than the door, and I am not opening it every time I want a snack. I keep the jar sealed until it has come back to room temperature, then I open it. That one habit saves a lot of trouble.
I only freeze seed that I already trust to be fully dry. If a pack still feels questionable, I do not put it in the freezer and hope for the best. For a fuller preservation walkthrough, see Botanist Seeds' seed preservation guide.
A quick night-before checklist
- Sort the packs: keep the ones you will plant soon apart from long-term storage.
- Inspect for damage: set aside anything that smells off or shows mold.
- Repack smartly: put the good seed into one sealed container.
- Label clearly: include the cultivar and year.
- Choose one home for them: fridge, drawer, or freezer, then stick with that choice.
I have opened old packs that looked fine on the outside and failed because they bounced around between rooms, drawers, and shelves. A simple, fixed setup beats a clever one. It also takes less time than replacing a pack that could have been saved.
Common Mistakes and Storage Myths to Skip
The bad habits around seed shelf life usually come from trying to be helpful with the wrong tools. I've seen growers bury packets in rice, trust a loose silica packet by itself, or assume a darker jar automatically means safer storage. None of that fixes heat or moisture in a meaningful way.
What doesn't do the job
Rice can absorb a little moisture in a container, but it isn't a proper storage protocol. A single desiccant packet thrown in with an unsealed, damp pack won't save it either. If the seed started too wet, the problem was baked in before it ever hit the shelf.
A freezer also isn't magic. If the seed wasn't dried properly first, freezing can backfire. The same goes for the fridge if the container is opened too often and condensation keeps sneaking in.
Better habits instead of folklore
The better habit is boring, which is exactly why it works.
- Use dry seeds only: don't seal in moisture and hope for the best.
- Control temperature: keep them in a stable place, not a hot shed.
- Block humidity: use an airtight container with desiccant.
- Test old packs: don't trust a date when you can test viability.
- Store by timing: seeds you'll plant soon can live in simpler conditions than seeds you're saving for later.
Printed dates can be useful as a rough reference, but they're not biology. A well-kept seed lot can beat the date on the packet. A poorly stored one can fail long before it.
The pack doesn't know how old it is. It only knows how much heat and moisture it's been forced to handle.
That's why the smartest growers stop arguing about calendar age and start looking at storage conditions and test results. The science is consistent, and the fix is simple enough to do at home.
Putting It All Together for Your Next Run
Seed shelf life only matters if the genetics are worth keeping in the first place. A well-stored packet of a weak cultivar still gives you a weak run. A solid cultivar stored correctly gives you options, whether you're planning a full home grow or just holding a few packs for later.
The practical move is to tie storage to selection. Keep reliable cultivars in good conditions, test old stock before a full commitment, and choose seeds that match the way you grow. If you like a faster cycle, a compact footprint, or a specific aroma profile, that should shape what you store and how long you keep it.
That's where a comparison tool helps. The best seed plan isn't just about longevity, it's about fitting the cultivar to the space, schedule, and vibe you want from the run. If a pack has been sitting a while, a quick germination test tells you whether it still deserves tray space. If the test comes back weak, don't romanticize it. Replace it and save the frustration.
A lot of growers lose time because they treat seed shelf life like a mystery. It's not a mystery. It's a moisture-and-temperature problem with a simple test at the end. Once you start thinking that way, old packs stop feeling risky and start feeling manageable.
If you're ready to match storage habits with better seed choices, Botanist Seeds makes it easy to compare cultivars by growth pattern, aroma profile, and overall vibe. Visit Botanist Seeds to find the right pack for your space, then store it properly so the seeds you buy today are still worth planting when your next run is ready.