





How Long to Germinate Weed Seeds: A Grower’s Timeline
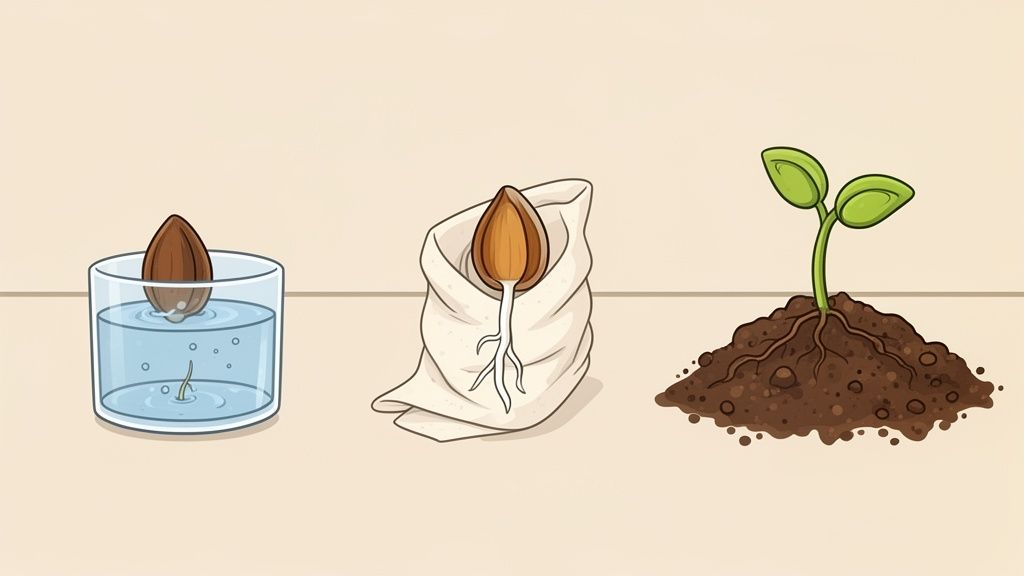
So, you've got your seeds, and you're ready to get your grow started. The big question on every new grower's mind is always the same: how long does it take for weed seeds to germinate?
Thankfully, you won't have to wait long. Most seeds will "pop" and show their first tiny taproot in just 1 to 3 days. From there, you should see a healthy seedling break through the soil between days 7 and 10.
How Long Does Germination Take?
Watching and waiting for that first sign of life is one of the most exciting parts of starting a grow. It's that feeling of checking on your seeds every few hours, hoping to see that little white root emerge. Knowing what to expect can help turn that nervous energy into pure excitement.
The germination method you choose, the environment you provide, and the quality of your seeds all have a say in the final timeline. However, the window is usually pretty consistent. Generally, you can expect cannabis seeds to sprout within 24 to 72 hours.
If you start with high-quality genetics, like our feminized or autoflower seeds, you can expect germination rates of over 90%. That’s a huge plus when every seed counts.
This quick timeline gives you a great visual of what to expect, from starting the process to having a seedling ready for its first real light.
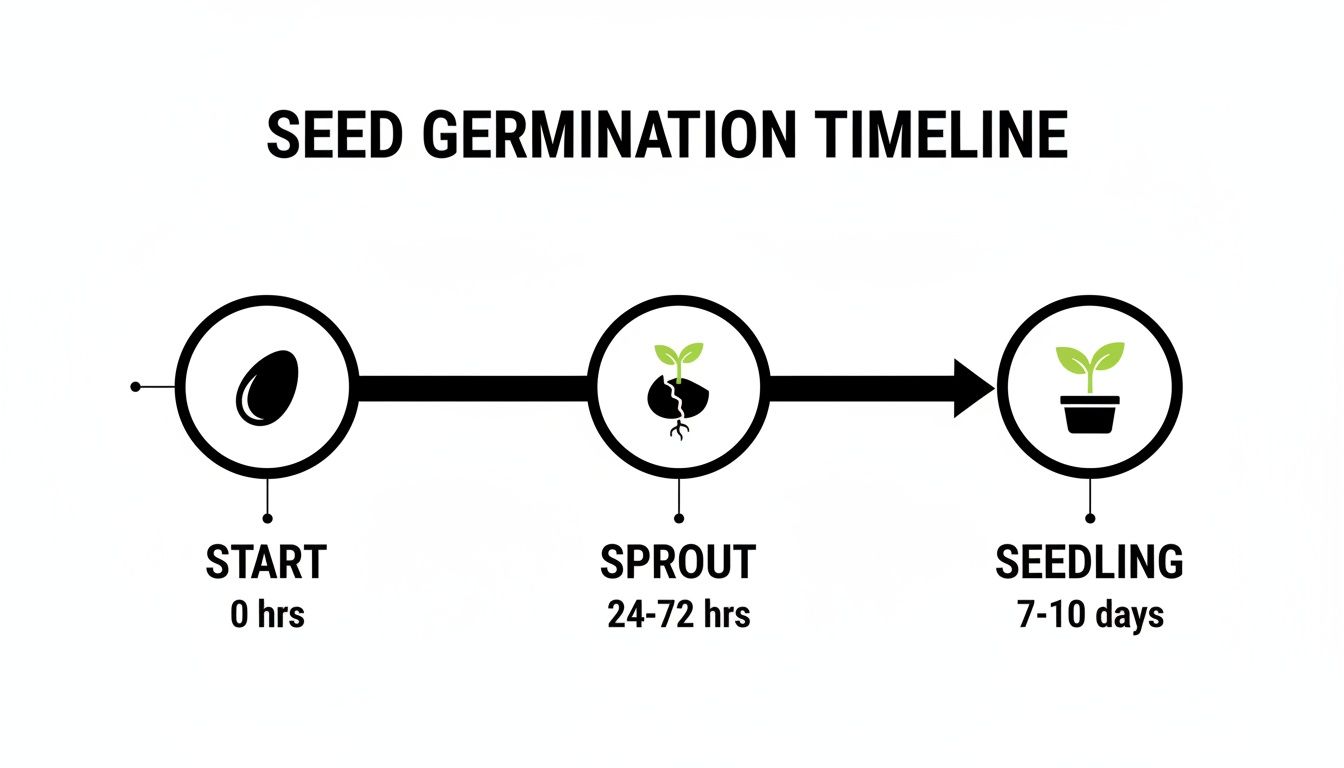
As you can see, the initial sprout happens fast, but getting the seedling to stand tall takes just a little more patience.
A Typical Day-by-Day Timeline
The change from a tough, dormant seed into a living seedling is an amazing thing to witness up close. Here’s a simple breakdown of what’s happening behind the scenes during those first crucial days:
- Days 1–3: This is the "sprouting" phase. The seed soaks up water, swells, and eventually cracks open. A little white taproot will emerge, signaling that life has begun.
- Days 3–5: The taproot gets noticeably longer as it starts its search for more water. If you planted directly into soil, the seedling is now working hard to push its way up to the surface.
- Days 5–10: Success! The seedling finally breaks through the soil, showing off its first pair of round leaves. These are called cotyledons, or "seed leaves," and their appearance marks the official start of your plant's journey.
Understanding these key milestones helps you know if everything is on track. If you're looking for more tips to get your grow off to a strong start, check out our other guides on growing cannabis.
Why Seed Quality Gives You a Major Head Start
When you're eager to get a new grow started, it's tempting to grab whatever seeds you can find. But let's be real: the quality of your seeds is the single biggest factor determining how long it takes to germinate your weed seeds, and if they sprout at all. Starting with top-tier genetics isn’t just a nice-to-have; it's the entire foundation of your grow.
It’s the same reason you can’t make a world-class espresso with stale, cheap beans, no matter how fancy your machine is. If you start with bad ingredients, you'll get a bad result. Premium seeds from a reputable source are fresh, genetically sound, and have been stored perfectly to keep them alive and ready to pop. That’s what sets you up for a quick, successful start.
The Problem with Old or Mystery Seeds
So, what about that old baggie of seeds you've had in a drawer for a year, or the mystery ones a friend passed along? Honestly, trying to germinate them is a total gamble. Age and bad storage are the biggest killers of a seed’s potential. Seeds are living things, and their internal energy pack slowly drains over time, especially when they’re exposed to light, heat, or humidity swings.
This is exactly why starting with feminized seeds is such a smart play. You're not just buying a seed; you're buying predictability. You're getting genetics bred for a specific vibe, aromatic profile, and growth habit, and you can trust that they'll actually perform.
Fresh, premium seeds from trusted breeders often hit germination rates of 90% or higher, with some sprouting in just a day or two. By contrast, seeds kept at room temperature can see their viability drop to less than 30% in only eight months.
Maximizing Your Success Rate
That difference is huge. A 90% success rate means if you plant ten seeds, you can realistically expect nine to sprout. With those old seeds, you might only get two or three, turning your exciting project into a frustrating waiting game. That’s a ton of wasted time, soil, and effort.
Here’s what really matters:
- Freshness Is Key: Viable seeds are usually a dark brown color, feel firm when you gently squeeze them, and might have a slight sheen. They should never feel hollow or crush easily.
- Genetics Matter: High-quality cultivars, especially autoflowers, are bred for pure vigor. They're literally designed to burst out of the shell and grow strong from day one. If you’re curious about these fast-growing options, our guide on autoflower cultivars can help you find a perfect match.
- Storage Makes a Difference: Professional breeders keep their seeds in cool, dark, and dry conditions to lock in that vitality, ensuring they’re primed and ready for you.
By starting with great seeds, you aren't just crossing your fingers for a good outcome: you're stacking the deck in your favor. It's the very first step toward that incredible feeling of pride that comes from growing your own supply and finally waving goodbye to dispensary lines and high taxes.
The Best Germination Methods for Home Growers
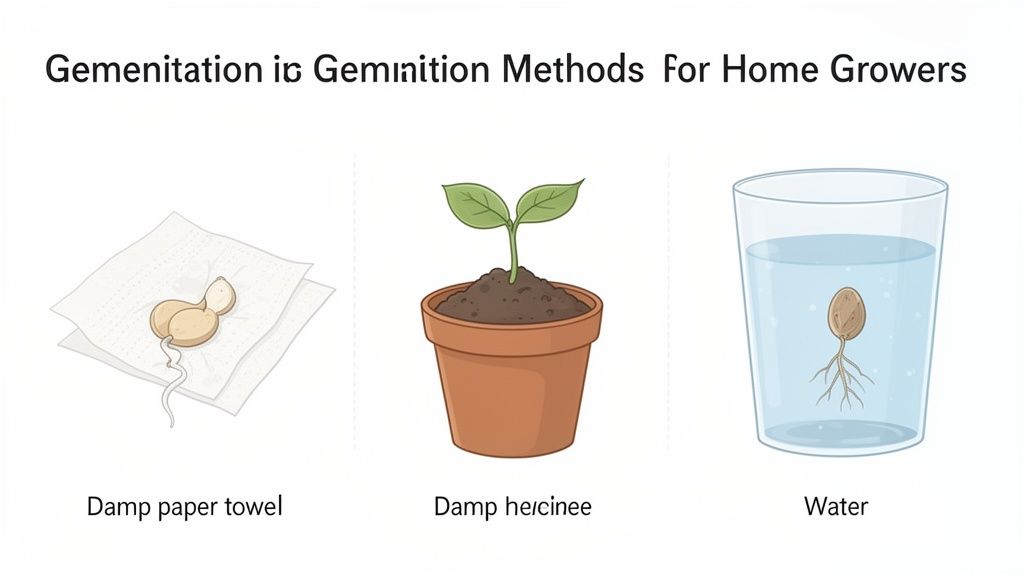
When it's time to pop your seeds, you've got options. The good news is that none of the go-to methods require a bunch of fancy gear. Most seasoned growers rely on a few simple, time-tested techniques to get things started.
We'll walk through the three most reliable choices for home growers: the ever-popular paper towel method, the natural direct-to-soil approach, and the quick-and-easy water glass soak. Each has its own rhythm and feel, and the right one for you is simply the one you're most comfortable with.
The Paper Towel Method
This is the classic for a reason. It’s probably the most common technique you’ll find online because it gives you a front-row seat to the germination process. You get to see that little taproot crack through the shell, so there's no guesswork.
Here's how it's done:
- Set Up Your Station: You'll need two dinner plates and a couple of paper towels. Get the towels wet, then gently wring them out. You want them damp, not sopping.
- Place Your Seeds: Lay one of the damp towels on a plate. Carefully place your seeds on it, making sure to leave an inch or so of space between them.
- Cover and Wait: Gently lay the second damp towel over the seeds. Use the other plate to cover everything up, creating a dark, humid little dome for them.
- Keep It Cozy: Find a warm, dark spot for your setup, the top of the refrigerator or inside a kitchen cabinet works perfectly. Peek in once a day to make sure the towels haven't dried out.
The obvious advantage here is that you know the second your seed has sprouted, which usually happens in 1 to 3 days. The only catch is that you need a steady hand when moving that fragile little sprout into its first pot.
Planting Directly in Soil
If you’d rather let nature do its thing with minimal interference, this is your method. Planting directly into soil mimics how seeds sprout in the wild and completely eliminates the stress of transplanting a delicate new sprout. It’s a beautifully simple, hands-off approach.
Of course, this technique requires a bit of patience and trust. You can’t see what's happening underground, so you just have to have faith that your seed is working its magic.
Pro Tip: Sowing directly into the final container is an excellent move for autoflowering cultivars. Their life cycle is a race against time, and avoiding any transplant shock helps ensure they don't lose a single day of growth.
Just make a small hole about a half-inch deep in your pot of moist, quality soil. Place the seed inside, cover it gently, and keep the soil damp but never waterlogged. Find a warm spot for the pot, and in about 4 to 10 days, you should be greeted by a tiny seedling pushing its way up to the light.
The Water Glass Method
For those who want to kickstart the process as fast as possible, there's the water glass method. It couldn't be simpler: just drop your seeds into a glass of room-temperature water. Put the glass in a dark, warm spot like a cupboard.
You'll often see the seed crack and a tiny white taproot emerge within just 24 to 48 hours.
The trade-off for this speed is that you have to be paying attention. As soon as you see that taproot, it's time to act. You must move the seed out of the water immediately to prevent it from drowning due to a lack of oxygen. Carefully transfer it to soil, and you're good to go. It’s fantastic for waking up stubborn seeds but unforgiving if you forget to check on it.
How Temperature and Humidity Speed Up Germination
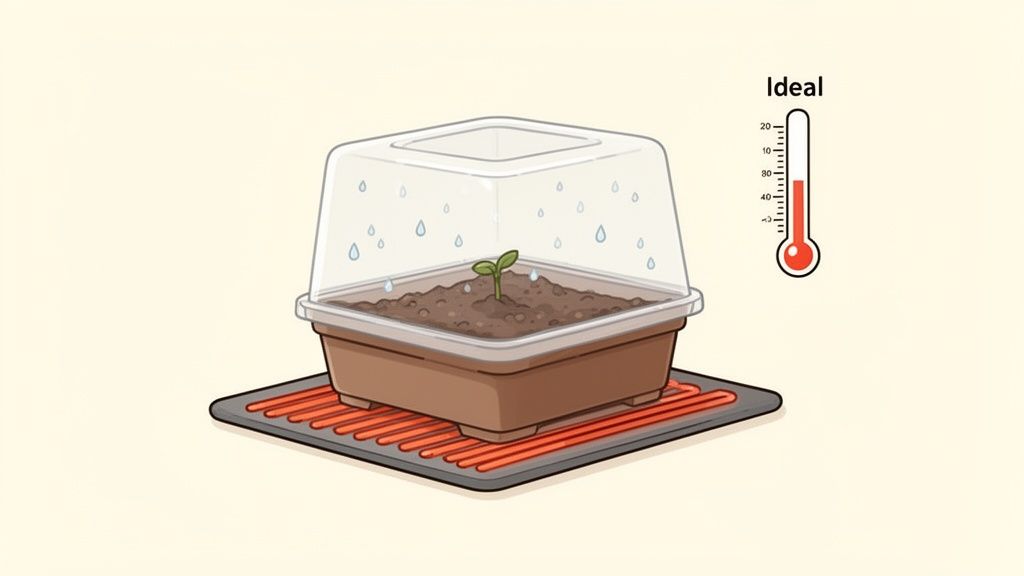
If high-quality seeds are the potential for a great plant, then temperature and humidity are what actually make it happen. Nailing this perfect little environment is the single best thing you can do to get your seeds to wake up and start their journey.
Think of it this way: your seeds are in a deep sleep. They need two signals to wake them up. Consistent warmth tells them it's springtime and safe to grow, while moisture softens their tough outer shell and gets things moving inside. Get this combination right, and you've created the perfect alarm clock.
Finding the Temperature Sweet Spot
Your seeds aren't asking for a five-star tropical vacation, just a consistently cozy spot. The ideal temperature range for germination is actually quite simple to hit: it’s basically just a warm room.
Temperature is a huge factor in how fast your seeds will sprout. Keeping them in that sweet spot between 70-85°F (20-27°C) is where the magic happens. In these conditions, you can see taproots emerge in just 24-72 hours with success rates often hitting 90% or higher. Let the temperature drop, and everything slows down. Let it get too hot, and you risk cooking the delicate life inside. This comprehensive seed guide has some great insights on how temperature influences germination.
Maintaining this warmth is easier than it sounds. Here are a couple of tried-and-true methods:
- Seedling Heat Mat: This is a grower's best friend. These affordable mats provide gentle, consistent heat from below, perfect for placing your paper towel setup or germination tray on.
- Warm Spots: No heat mat? No problem. The top of a refrigerator or a high shelf in a consistently warm room can work just as well. Just check it to make sure the temperature doesn't fluctuate wildly.
Maintaining Perfect Humidity
Warmth is only half the battle; your seeds also need to stay consistently damp. The key word here is damp, not soaking wet. Drowning your seeds is one of the most common rookie mistakes, as it cuts off the oxygen they need to breathe and leads to rot.
The goal is to create a small, humid environment that feels like the damp earth after a light spring rain. You want the seeds to be moist enough to absorb water but still have access to the air they need to survive.
A simple plastic dome or even some plastic wrap stretched over your germination container works wonders for trapping humidity. If you're using the paper towel method, the two plates create their own humid microclimate.
The most important thing is consistency. If your seeds dry out, even for a short while, the germination process can stop dead in its tracks.
By dialing in these two simple factors, you’re giving your seeds the best possible start. It’s this attention to detail that separates a successful grow from a frustrating one and gets you that much closer to enjoying your own harvest.
What to Do After Your Seeds Sprout
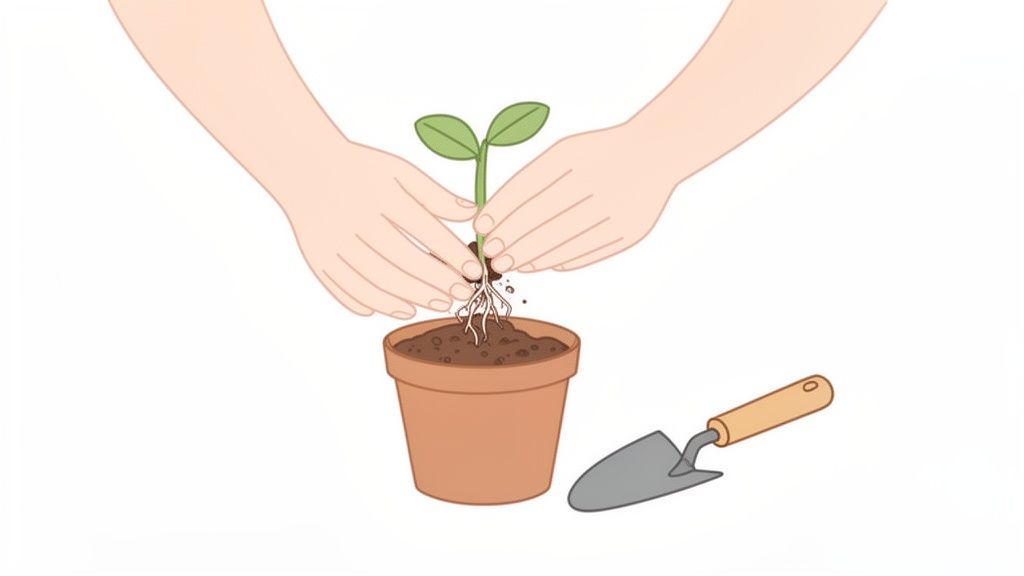
Seeing that little white tail pop out of your seed is a fantastic feeling. You've officially coaxed a new plant into existence! Now comes the critical, and slightly nerve-wracking, next step: moving your delicate sprout into its first real home.
This next phase is all about a gentle touch. Whether you germinated in a paper towel or a glass of water, your goal is to get that sprouted seed into soil without harming its tiny, fragile taproot. Seriously, this thing is delicate. Think of it like handling a single, wet strand of spaghetti. The best approach is to use tweezers or clean hands to pick up the seed by its casing, never touching the root itself.
Planting Your Sprouted Seed
With your sprouted seed ready to go, it’s time to get it into some soil. This is where your plant's journey really begins, and getting the planting depth and soil right will set it up for a strong start.
Here's the simple rundown I follow every time:
- Prep Your Pot: Grab a small starter pot and fill it with a light, airy potting mix. Don’t use dense soil from your backyard; it’ll suffocate the young roots. Get the soil damp before you start, but not waterlogged.
- Make a Small Hole: Use the tip of a pencil or even your pinky to poke a shallow hole about a half-inch (1-1.5 cm) deep. Planting too deep is one of the most common beginner mistakes, and it can exhaust the seedling before it ever sees the light.
- Plant the Seed: Carefully lower the seed into the hole, making sure the taproot is pointing down. This is essential: the root instinctively wants to grow downward to find water and anchor the plant.
- Cover Lightly: Gently brush a little soil over the seed. Don’t pack it down at all. You want to give the sprout the easiest possible path to push its way to the surface.
Initial Care for Your New Seedling
For the first few days above ground, your seedling needs just three things: light, water, and stability. Getting these right is simple, but crucial. This is the moment you officially become a cultivator, and a bit of attention now pays huge dividends later.
You'll want to keep the soil moist but never soggy. A small spray bottle is your best friend here, as it lets you mist the surface without dislodging the seed. As soon as the sprout breaks through the soil, it’s going to be looking for light. A simple fluorescent bulb or a low-wattage LED placed a few inches away will give it what it needs without overwhelming it, preventing the seedling from "stretching" out and becoming weak.
Congratulations, you're a grower. This tiny plant is the beginning of a rewarding journey that ends with personal pride, a full jar, and no more trips to the dispensary. The next logical step to ensure a great harvest is to build a dedicated space, and a complete grow tent kit provides everything you need to dial in the perfect environment.
Common Germination Mistakes to Avoid
We've all been there. You're excited to start growing, but a few simple missteps can stop you in your tracks before you even begin. Learning what not to do is just as important as knowing the right steps, and avoiding these common slip-ups will save you a ton of frustration (and seeds).
One of the biggest rookie mistakes is just being too rough. That tiny white taproot is incredibly fragile. If you're using the paper towel method, always handle the sprouted seed by the casing, never by the root itself. A gentle touch with clean tweezers is your best bet here.
Another classic error is planting the seed too deep. Think of a seed as having a small, finite battery pack of energy. It needs that energy to push its way up through the soil to find light. If you bury it more than a half-inch deep, it might run out of juice before it can break the surface.
Getting the Environment Wrong
Creating a perfect little nursery for your seeds is the goal, but it's surprisingly easy to get the environment wrong. The two most common culprits? Too much love, and not enough patience.
-
Overwatering Your Seeds: Yes, seeds need water to wake up, but they also need to breathe. Drowning them in waterlogged soil or leaving them in a glass of water for days on end will suffocate them. You're aiming for damp, not soaking wet.
-
Letting Things Dry Out: On the flip side, consistency is everything. If your paper towel or soil cube dries out, even for a few hours, the germination process can grind to a permanent halt. Check on them daily to make sure they stay consistently moist.
-
Being Impatient: This is the toughest one for most people. It's tempting to want to "help" a seed along by trying to crack the shell open yourself. Don't do it. You will almost certainly damage the delicate embryo inside and kill the seed.
Look, the bottom line is to be gentle, be patient, and keep the environment stable. Your seeds are programmed for this. Just give them the right conditions, and let nature take the wheel.
By sidestepping these common pitfalls, you drastically increase your chances of success. It's the first and most important step toward the pride and satisfaction of harvesting your very own plants.
Your Germination Questions, Answered
Okay, so you’ve followed the guide, you're checking your seeds constantly, and a few questions are probably starting to bubble up. That's a great sign: it means you're paying close attention. Let's clear up some of the most common things growers wonder about at this stage.
Why Are Some of My Seeds Sprouting Faster Than Others?
It’s completely normal to see some seeds pop within 24 hours while others in the very same batch seem to be taking their sweet time. Don't sweat it if you have a few overachievers and a few stragglers.
Think of it this way: even siblings have different personalities. Every seed is a unique individual. Tiny variations in shell thickness, the amount of energy stored inside, or even its exact placement in the paper towel can mean the difference between a one-day sprout and a three-day sprout. As long as they're all showing life within about a week, you're doing just fine.
Can I Save a Seed That Hasn’t Sprouted?
Before you give up on a seed that hasn't popped after five days, hold on. Some genetics are just notoriously slow starters. Your first move should be to re-evaluate the environment. Are your paper towels still consistently damp (not soaking wet)? Is the temperature holding steady and warm?
Often, a little patience is all that’s needed. However, if you've crossed the 10 to 14-day mark and there's still absolutely no sign of a taproot, it’s probably time to call it. At that point, the seed was likely not viable from the get-go.
How Do I Know If a Seed Is Just a Dud?
You can often spot a "dud", a seed that will never germinate, before you even start the process. The best way to check is with a gentle pinch test. A healthy, viable seed will feel hard and firm between your fingers. They are usually dark brown, grey, or tan, often with tiger-like stripes.
If a seed feels soft, looks pale green or white, or crumbles easily when you squeeze it, it’s probably immature or too old. It simply doesn't have the energy to sprout, no matter how perfect your setup is.
The easiest way to avoid duds is to start with great genetics from a source you trust. The crew at Botanist Seeds is obsessed with quality, curating a lineup of feminized and autoflower seeds that are bred for reliability and vigor.
Find your next favorite strain at Botanist Seeds and start your grow with total confidence.












