





Scrog Mastery: Boost Your Yields with the Screen of Green Method
If you've ever felt the sting of trimming a plant only to end up with a pile of fluffy "popcorn" buds from the lower branches, you already know why the scrog method is so popular. It’s a technique born from the desire to get the most out of every single plant.
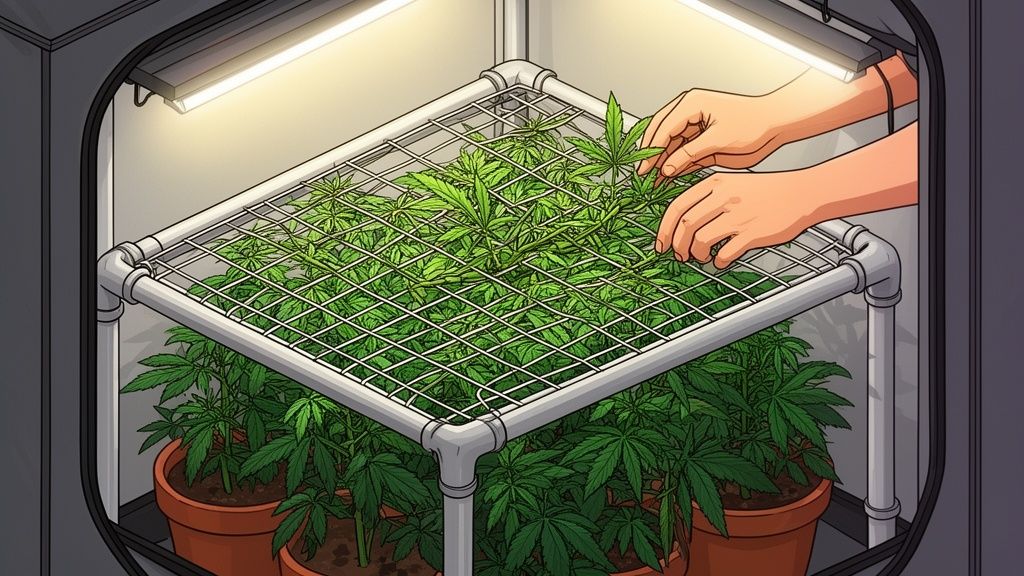
Scrog, short for "Screen of Green," is a low-stress training (LST) method that uses a horizontal screen to coax your plants into growing outward instead of just upward. The goal is simple: create a flat, even canopy where every bud site gets a prime spot under the light.
Why You Should Try The Scrog Method
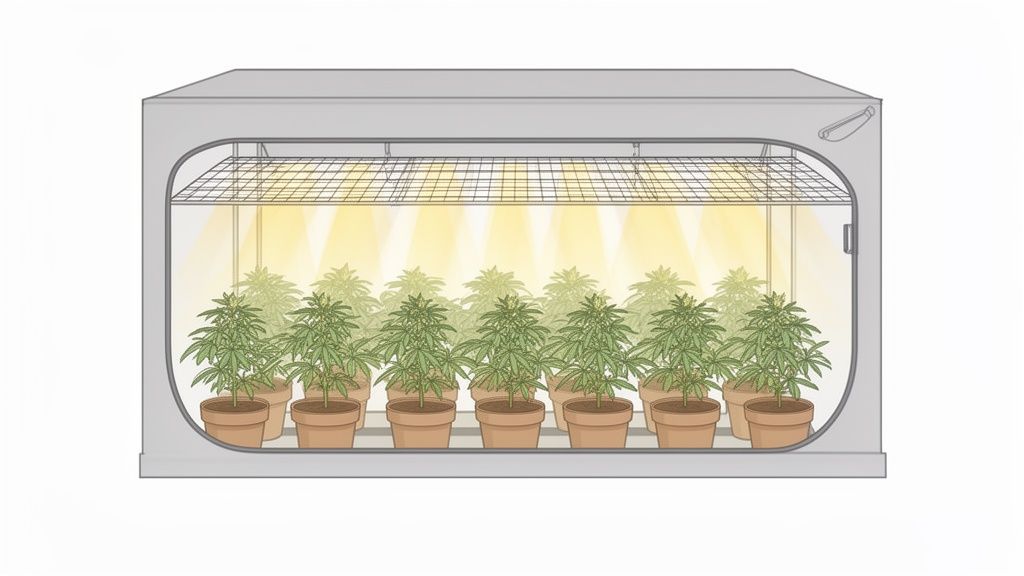
For a hobby grower, especially one working within the confines of a grow tent or a closet, scrog is one of the most effective ways to boost your harvest. It's about working smarter, not just cramming more plants into your space.
By weaving the branches through the screen, you’re telling the plant where to direct its energy. Instead of focusing on one dominant main stem that hogs all the light, you get an even spread of growth. No more wasted light on lower, shaded-out branches that never fully mature.
Maximizing Your Harvest Potential
Imagine your grow light is a powerful spotlight. A traditionally grown plant is shaped like a Christmas tree, meaning only the very top branch gets the full intensity. Everything below it lives in the shadows. A scrog fundamentally changes this, transforming that "tree" into a flat tabletop where the entire surface is bathed in light.
This horizontal training encourages the plant to develop dozens of colas, all roughly the same height and all receiving the same quality of light. The practical benefits become obvious pretty quickly:
- Heavier, more consistent yields: You’ll see a dramatic reduction in larf and a huge increase in dense, top-shelf flower.
- Better use of space and resources: You can completely fill a grow tent with just one or two plants, saving money on seeds and reducing your plant count.
- Improved light penetration: Every watt of electricity from your light goes directly into producing quality buds, not just sustaining leafy lower branches.
- Excellent structural support: As your buds get heavy late in flower, the screen itself acts as a support system, preventing branches from bending or snapping.
Before we get into the "how," let's quickly compare what you can expect from a scrog grow versus a more traditional approach. This table breaks down the key differences at a glance, which can help you decide if it's the right fit for your setup.
Scrog vs Traditional Growing At a Glance
| Aspect | Traditional Growing | Scrog Method |
|---|---|---|
| Canopy Shape | Apical dominance creates a "Christmas tree" shape. | A flat, even tabletop canopy. |
| Light Distribution | Uneven: top colas get the most light. | Even: all bud sites receive direct light. |
| Yield Quality | Mix of large top colas and smaller "popcorn" buds. | Consistent, dense, top-shelf buds across the canopy. |
| Plant Count | Requires more plants to fill the same space. | Fewer plants needed to fill the same footprint. |
| Support | May require stakes or yo-yos for heavy colas. | The screen provides built-in structural support. |
| Effort | Less initial training but more plants to manage. | More initial training, but fewer plants to maintain overall. |
As you can see, the scrog method requires a bit more hands-on work during the vegetative stage, but the payoff during harvest is undeniable.
The results really do speak for themselves. The scrog method has become a pillar of modern indoor growing because it delivers. In fact, one study analyzing scrog principles found that growers could achieve an incredible 687 grams (24.2 ounces) per plant. You can read more about these impressive SCROG results on Humboldt Seed Company's blog.
Ultimately, mastering scrog is about taking control of your garden and getting more out of each feminized or autoflower seed you pop. It turns a simple hobby into a true craft, giving you the satisfaction of cultivating your own top-tier supply while saving money.
Alright, let's get our hands dirty and build your scrog screen. The best part about this technique is that you don't need a bunch of expensive, specialized gear. A quick trip to the hardware store is usually all it takes to get everything you need.
The whole setup is really just two parts: a frame and the net itself. For the frame, PVC pipe is the go-to choice for almost every home grower I know. It’s cheap, super lightweight, and you can easily cut it to fit the exact footprint of your grow tent. Just measure your space, cut four pieces of PVC, and pop them together with some simple corner fittings.
Choosing Your Netting Material
Now, for the net. You've got options here, but some are definitely better than others. The main goal is to find a material that's strong enough to support heavy colas but won't cut into your plant's stems. I always aim for squares between 2 to 4 inches. This size gives you plenty of room to gently tuck and weave branches without risking a snap, while still being tight enough to provide real support.
Here are a few common materials growers use:
- Trellis Netting: This is what I'd recommend for most people. It's usually made of plastic or nylon, sold specifically for this, and comes with perfectly sized squares right out of the package. It’s durable and you can reuse it for several grows.
- Mason Line or Hemp String: If you really want to go full DIY, you can stretch string across your PVC frame. It works, but it's a bit tedious to set up evenly. You have to pull it incredibly tight to prevent it from sagging under the weight of your plants later on.
- Metal or Plastic Fencing: Some growers opt for rigid materials like plastic garden fencing. It’s definitely supportive, but it has zero give. If you're not careful during training, you can easily damage a branch.
A word of caution: stay away from any thin, fibrous string like jute or garden twine. It can absorb moisture from the air, creating a potential hotspot for mold right above your canopy. The fibers can also shed and end up stuck to your frosty buds, which nobody wants.
Perfecting Screen Placement
This is probably the most critical part of the whole setup. Where you hang that screen can make or break your scrog. It’s a real balancing act. If you set it too low, you’ll barely have room to get underneath to water, defoliate, or check on your plants. But if you set it too high, you're just wasting time and energy during the vegetative stage waiting for the plant to reach it.
My rule of thumb is to position your scrog screen about 8 to 12 inches above the top of your containers. This gives you enough clearance to work comfortably underneath while making sure your plants can reach the net without an excessive stretch. A plant is usually ready for the screen once it has 4-6 strong nodes and its lower branches are starting to reach the edges of the pot.
Taking the time to get the frame, netting, and placement right from the very beginning will make the entire process so much easier. If you're just starting to build out your space, having the right foundational gear is half the battle. You might want to check out our complete guide to choosing a grow tent kit, which walks you through all the essential equipment you’ll need. A solid scrog screen in a well-equipped tent is the perfect recipe for a truly massive harvest.
The Art Of Weaving Your Canopy
With your screen in place and your plants growing vigorously, it’s time to start training. This is where the real magic of scrog happens. It's an active, hands-on process of guiding your plants, turning their natural vertical growth into a sprawling, horizontal canopy.
The basic technique is simple: tuck and weave. As a branch grows a few inches up through a square in the screen, you’ll gently bend it back down and guide it horizontally into an adjacent, empty square. You aren’t breaking or creasing stems; you’re just coaxing them to spread out.
You'll need to do this every couple of days during the vegetative stage. Think of it as a routine check-in, constantly directing growth to fill the screen. The goal is to create a flat, even carpet of future bud sites before you ever flip to flower.
This visual guide shows the basic steps for a DIY screen, covering the frame construction, netting choice, and final placement.
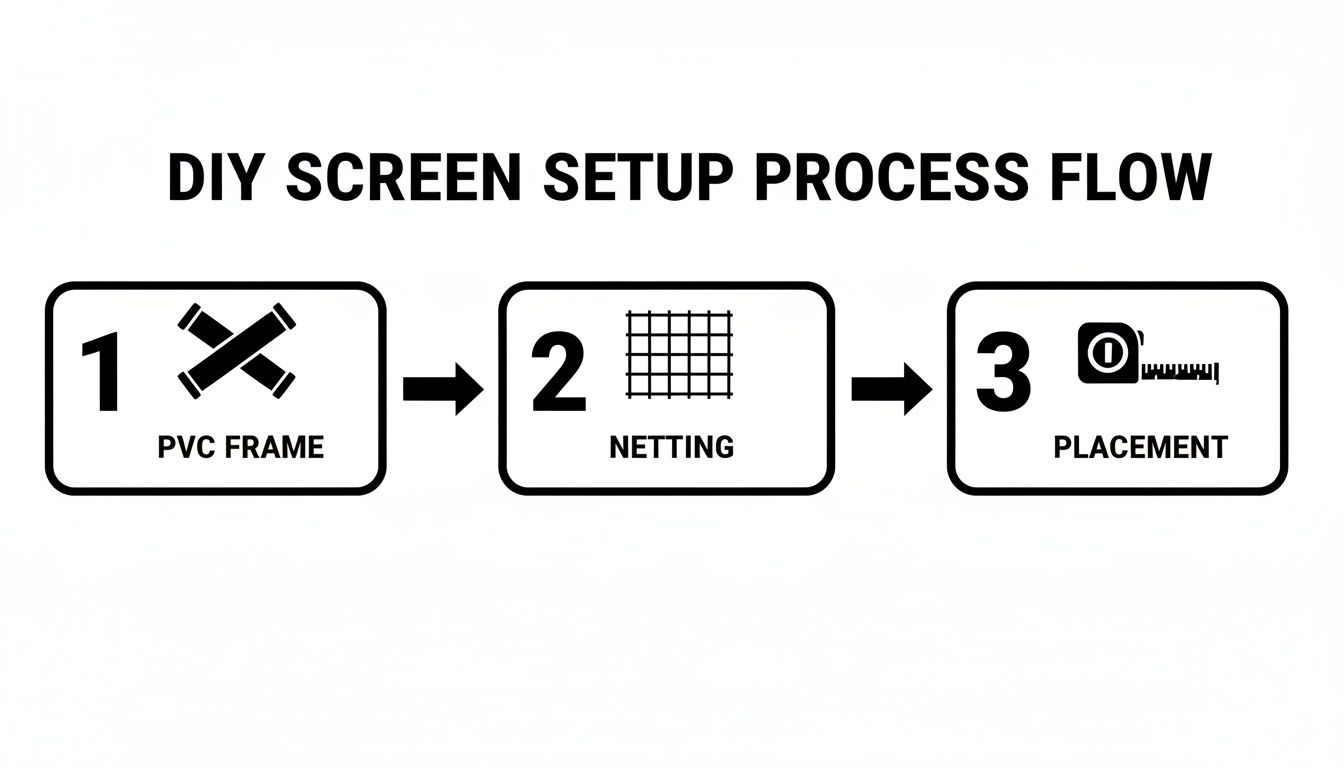
As you can see, a solid frame and proper net placement are the foundation. Once that’s handled, the weaving can begin.
Topping: Creating More Branches to Weave
Before your plants even touch the screen, you can set them up for success by topping them. Topping is simply snipping the very top of the main stem, which encourages the plant to stop growing one single main cola and instead produce two new main branches from the node just below the cut.
Most experienced growers top their plants once they have 4 to 6 strong nodes. This gives the plant a solid base to recover and start pushing out that bushy, lateral growth that is perfect for a scrog. Some will even top these new branches a second time to create four or eight main colas, giving you a fantastic, multi-branched structure to work with.
Think of it like this: without topping, you're trying to fill a wide screen with a single Christmas tree. By topping, you’re creating a candelabra shape that’s naturally designed to spread out and fill the space efficiently. It’s a simple cut that completely changes the plant's architecture for the better.
Mastering The Weave And Tuck Technique
Once your topped plant has grown up to the screen, the real artistry starts. Those branches you created by topping are now your primary tools for filling out the canopy. As they poke through the net, your job is to gently guide each one into an open square.
Here are a few tips from the field to keep in mind:
- Be Gentle: During veg, branches are pretty pliable, but they can still snap. Bend slowly and never force a branch. If you feel serious resistance, it's better to back off and try again the next day.
- Fill The Gaps: Your main objective is to fill every last square. Constantly be on the lookout for empty spots and direct the nearest growing shoot toward them. An even canopy is a high-yielding canopy.
- Use the Whole Screen: Don't let all the growth bunch up in the center. Make a conscious effort to guide branches toward the corners and edges to maximize your footprint.
- Secure If Needed: For a really stubborn branch that keeps popping back up, a soft plant tie can be used to loosely hold it down. Just make sure it’s not cinched tight enough to restrict growth.
This constant tucking is what makes scrog so effective. You're overriding the plant’s apical dominance: its natural instinct to grow straight up: and creating a perfectly level plane where every bud site gets equal access to light.
Knowing When To Stop Tucking
So, how long do you keep this up? A common mistake I see growers make is filling the screen completely before flipping to flower. The sweet spot is to stop weaving once the screen is about 70% to 80% full.
This might feel like you're stopping too early, but you have to plan for the explosive growth that happens right after you switch to a 12/12 light cycle. Leaving that 20-30% of empty space gives the canopy room for the "flowering stretch."
During the first few weeks of flower, plants can easily double in size. The branches you tucked will stretch upwards, and all that empty space will fill in fast, creating a dense and uniform sea of green. If you fill the screen 100% during veg, you'll end up with an overcrowded, tangled mess. That leads to poor airflow, shaded-out lower buds, and a much higher risk of mold. Knowing when to stop is just as important as knowing how to tuck.
Flipping to Flower and Managing The Stretch
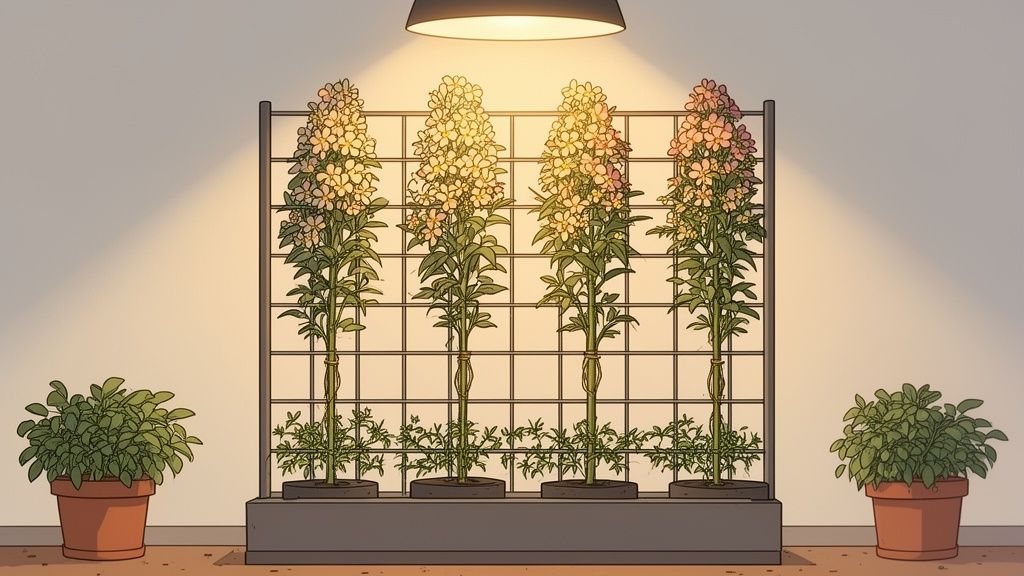
After weeks of patient training, your screen is looking about 70-80% full. This is the moment you've been waiting for. It's time to flip the switch and send your plants into flower by changing your light schedule to a strict 12/12 cycle.
But don't put your feet up just yet. This light change triggers a dramatic growth spurt known as “the stretch.” For the next two to three weeks, your plants can easily double in size. How you handle this explosive growth is what separates a good scrog from a great one.
Working With The Stretch
During the first couple of weeks of flower, you're still very much in a training mindset. You’ll need to keep tucking any branches that get ambitious and try to shoot up past the others. Your main goal here is just to maintain that perfectly flat canopy you've worked so hard to establish.
You’re not trying to weave branches deep into new squares anymore. Think of it more like gentle guidance, just tucking the tips under to keep everything level while the remaining 20-30% of your screen fills in. After about two weeks, that intense vertical growth will slow to a crawl. Now, you can finally let the branches grow straight up. This is when you’ll start to see that beautiful, even field of colas emerge.
At this point, the scrog net’s job changes. It goes from being a training tool to a vital support system. As your colas start packing on serious weight, the net will be the only thing stopping them from bending, or worse, snapping right off.
Managing your light distribution is everything for getting consistent quality. As one study on SCROG-grown cannabis found, cannabinoid levels can swing wildly from plant to plant, ranging from 4.3% to 25.2% THC. A proper scrog helps eliminate that variance by giving every bud site a front-row seat to the light, leading to much more uniform and potent results.
Lollipopping for Bigger Buds
Once the stretch is over and your colas are reaching for the sky, it's time for a major cleanup below the canopy. We call this lollipopping, and it's absolutely essential for getting the dense, top-shelf flowers you’re after.
Lollipopping is simply removing all the lower leaves and tiny branches below the screen. Once your canopy is established, virtually no light can penetrate that deep. All that lower growth just saps energy that should be going to your main colas, producing nothing but wispy "popcorn" buds.
Here’s how to get it right:
- Time It Perfectly: The ideal window for lollipopping is around week 3 of flower, right after the stretch has finished. Pruning too early can stress the plant, but if you wait too long, you’re just wasting the plant's energy.
- Be Ruthless: Get a clean pair of shears and strip everything below the net. Don't be shy. Remove all those small bud sites, fan leaves, and any branch that didn't make it to the canopy.
- Boost Airflow: A clean under-canopy is your best friend for preventing mold and pests. It dramatically improves airflow, which is critical in the humid environment of a flowering tent.
By removing all that unproductive growth, you're sending a clear signal to your plant: "Focus all your energy up top!" The plant will redirect its resources into the main colas, helping them swell into the dense, frosty giants we all want to grow.
Choosing The Right Cultivar
Not every cultivar is a great candidate for a scrog. Some are just naturally better suited for this training technique. In my experience, you want a plant with pliable branches and a decent amount of stretch.
Sativa-dominant hybrids are often a perfect match. Their vigorous, stretchy growth and longer internodal spacing make them incredibly easy to weave through the net. Trying to scrog a very compact, bushy Indica-dominant cultivar can be a frustrating exercise since its branches might not have the length to fill out a screen effectively.
If you’re deciding what to grow next, our guide on autoflower vs feminized seeds can point you in the right direction. When looking for seeds, keep an eye out for feminized cultivars described as "stretchy," "vigorous," or "great for training," those are the ones that will give you a massive scrog harvest.
Common Scrog Problems and How to Fix Them
Even a perfectly planned scrog can throw you a curveball. It’s one of the most effective training techniques out there, but it’s not without its own set of challenges. Let's get real about the common headaches you might run into and, more importantly, how to solve them like a pro.
A flawless scrog is a thing of beauty, but reality can get a little messy. The key is staying one step ahead and knowing what to look for before small issues become big problems.
Overcrowded Squares and Poor Airflow
This is probably the most common mistake I see growers make. You get a little too enthusiastic with your tucking, and suddenly you have two or three branches fighting over the same square. This creates a dense, leafy traffic jam that chokes out light and, even worse, kills your airflow.
When humid, stagnant air gets trapped under that thick canopy, you’re basically sending an open invitation to powdery mildew and other nasty fungal diseases. The fix here is all about discipline and selective pruning.
- Pick a Winner: When multiple shoots are competing for one square, choose the strongest, most dominant one to tuck into place.
- Snip the Competition: Prune away the weaker, secondary branches that are just adding clutter. It can feel harsh, but you're just redirecting the plant's energy to where it will pay off in bigger, better buds.
- Strategic Defoliation: Don't be shy about plucking off large fan leaves, especially those blocking prime bud sites or creating dense patches with no air movement. Your goal is to see dappled light hit the floor and feel a gentle breeze when your fans are on.
Think of it like you're a bonsai master, not just a gardener. You’re actively sculpting the plant. A little trim here and there ensures every part of the canopy gets the light and air it needs to thrive.
Pests and Deficiencies Under The Net
Spotting problems early is everything in a successful grow, but the scrog net makes routine inspections a real pain. You can't just lift the pot and turn it around to check for pests. Once those plants are woven into the screen, you have to bring the inspection to them.
This means getting comfortable working underneath the net. A headlamp is your best friend here, seriously. It frees up your hands and lets you get a clear look at the undersides of leaves, which is exactly where pests like spider mites love to hide.
When you do spot trouble, like the first signs of a nutrient burn or deficiency, your access for treatment is limited. For example, seeing some tell-tale yellowing leaves through the top of the canopy is one thing, but figuring out the cause is tough without a good look.
Here’s how to manage inspections and treatments in such a tight spot:
- Get a Pump Sprayer: A sprayer with a long, adjustable wand is a lifesaver. It lets you apply foliar treatments like neem oil or insecticidal soap to the undersides of leaves without having to become a contortionist.
- Invest in a Watering Wand: These make it so much easier to deliver water and nutrients directly to the soil or medium without wrestling with the canopy above.
- Use Sticky Traps: Place a few yellow sticky traps right above the canopy and a few near the base of the plant. They act as a great early-warning system for flying pests like fungus gnats and thrips.
Waiting Too Long to Flip to Flower
This is the classic rookie scrog mistake. You get completely absorbed in tucking and weaving, determined to fill 100% of your screen during veg. It looks incredible: a perfect, solid carpet of green. And then you flip to a 12/12 light schedule.
That's when the "flowering stretch" kicks in, and your beautiful green carpet explodes into an overgrown jungle. Branches shoot straight up, fighting for light and creating a tangled, unmanageable thicket. Airflow plummets to zero, and your risk of bud rot and mold goes through the roof.
Remember the golden rule: flip to flower when the screen is about 70-80% full. That remaining empty space is your buffer zone. It gives the plants room to stretch out during early flowering without choking each other out.
If you realize you flipped too late, you're in damage control mode. Get in there and be aggressive with your lollipopping and defoliation to open up as much airflow as possible. It’s not ideal, but it’s your best shot at saving the harvest.
Your Scrog Questions, Answered
Let's be honest, scrog can seem a little intimidating at first. It's a hands-on technique that pays off big, but everyone has questions when they're starting out. I've heard them all, so here are some straight answers to the most common things growers ask.
Can I Scrog an Autoflower?
You sure can, but you have to move fast. Autoflowers work on their own schedule, and you can’t hit the pause button on their veg time. This means you need that screen set up early, ready to start training the moment those branches are long enough to tuck. This usually happens around week three.
With autos, forget about topping. Your focus should be entirely on low-stress training (LST). Gently bend the main stem down under the screen to encourage all those side branches to grow up and out. It’s a race against the clock to spread the plant horizontally before it flips itself into flower, but a well-executed auto scrog can add some serious weight to your final harvest.
What's the Best Cultivar for My First Scrog?
For your first time, do yourself a favor and pick a cultivar that likes to stretch. You'll have a much easier time with a forgiving photoperiod plant that has some Sativa in its genes.
These plants naturally grow longer, more flexible branches that are a dream to weave through a screen. Trying to wrestle with a short, stout, and bushy Indica-dominant cultivar can be a real headache for a beginner. You'll spend more time fighting the plant than training it.
When you're shopping for seeds, look for descriptions that mention things like "vigorous growth," "stretchy," or "great for training." Those are green flags. The Botanist Seeds comparison tool is fantastic for filtering cultivars by these specific growth habits.
How Do I Water Plants in a Scrog Net?
This is one of the biggest practical hurdles you'll face. Once that canopy gets dense, trying to snake a watering can underneath is a recipe for spilled water and a sore back. A cheap garden pump sprayer or a watering wand on a hose will make your life so much easier.
If you really want to set it and forget it, a simple drip irrigation system is the way to go. You can lay your drip lines before you even put the net in place. The main goal is to get water to the entire pot without soaking the lower foliage, which can trap humidity under the canopy and invite mold or mildew.
How Many Plants Should I Use for a Scrog?
This all depends on your space and how long you’re willing to veg. That's the beauty of scrog: it’s incredibly flexible.
- In a 4×4 tent, you could fill the entire screen with a single plant if you have the patience for a longer vegetative period.
- For a quicker cycle in that same 4×4 tent, you could use four plants to fill the canopy in a fraction of the time.
A great rule of thumb for most home growers is to plan for one plant per 2×2 foot section of your screen. This strikes a perfect balance between veg time and plant count, letting you max out your space without getting overcrowded.
Ready to find the perfect cultivar for your first scrog? The team at Botanist Seeds has curated a collection of top-tier feminized and autoflower seeds that are ideal for training. Use our comparison tool to find genetics that match your setup and start planning your biggest harvest yet. Explore the full catalog at https://botanistseeds.com.












