





How to Raise Humidity in a Grow Tent for a Thriving Harvest
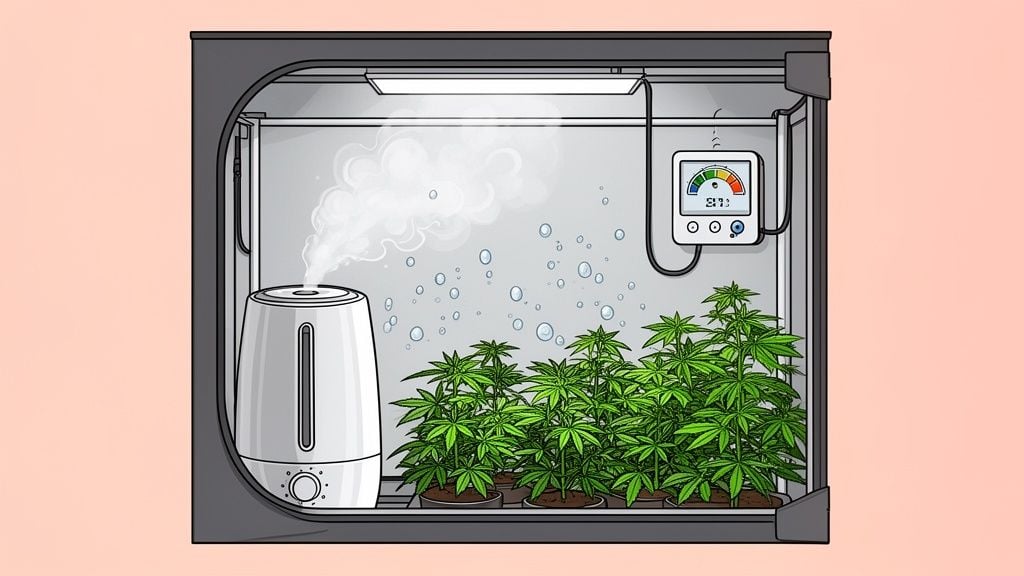
If you want a truly impressive harvest, you have to learn how to raise humidity in a grow tent, especially when your plants are just starting out. The good news is, it's not complicated. Simple tricks like adding a few open containers of water, running a humidifier, or even hanging a wet towel can make all the difference. These little adjustments create the perfect environment for your feminized and autoflower plants to really take off.
Why Your Grow Tent Humidity Is Key to a Better Harvest
Let's get real about humidity. It's easy to overlook, but dialing in the moisture level in your tent is one of the most powerful moves you can make for a better harvest. You've already invested in high-quality autoflower and feminized seeds, and you're growing at home to get top-shelf results without the dispensary lines and taxes. So let's make sure your environment is dialed in.
Proper humidity is all about helping your plants breathe through a process called transpiration.
Think of it as the engine that drives growth. When the air has the right amount of moisture, the tiny pores on the leaves (stomata) open up to pull in CO2. This creates a suction effect, drawing water and nutrients up from the roots. But if the air is too dry, the plant slams those pores shut to conserve water, and everything grinds to a halt.
The Benefits of a Humid Environment
Nailing the humidity isn't just about preventing problems. It's about actively pushing your plants to reach their full potential. Here’s what you get when the environment is just right:
- Supercharged Nutrient Uptake: With transpiration humming along, your plants can actually use all the nutrients you're giving them. No more wasted time or expensive nutrients.
- Explosive Early Growth: Seedlings and clones have tiny, weak root systems. They get most of their moisture directly through their leaves, so high humidity is non-negotiable for getting them off to a strong start.
- Tougher, Healthier Plants: A happy plant is a resilient plant. Keeping the humidity in the sweet spot reduces stress, making your plants naturally better at fending off pests and mold. That means a cleaner, more satisfying final product for you.
Think of humidity as the essential foundation for the first few weeks of growth. Early commercial growers learned this the hard way. They found that failing to raise humidity for seedlings led to a staggering 40-50% higher transplant failure rate. You can read more about why this early stage is so critical in this guide to early-stage humidity.
Mimicking Nature for Better Buds
Ultimately, what we're doing here is playing Mother Nature. By controlling the humidity, you're recreating the perfect spring day inside your tent, giving your plants exactly what they need to stop worrying about survival and start focusing their energy on what really matters: packing on dense, frosty, and aromatic buds.
It’s about so much more than just watering. When you master the air your plants live in, you unlock their true genetic potential. This isn’t a chore, it’s the art of cultivation. It's the first step toward that immense pride you feel when you've grown your own incredible stash, perfectly tuned to the exact vibe and aromatic profile you love. And with the Botanist Seeds comparison tool, you can find the perfect cultivar that will absolutely thrive in the environment you've worked to create.
Matching Humidity Levels to Each Growth Stage
Think of your plant's environment like its own personal weather system. What works for a tiny seedling in its "spring" won't work for a mature plant in its "autumn." Each stage of growth has a sweet spot for humidity and temperature, and dialing in those conditions is one of the biggest secrets to a stellar, problem-free harvest.
Get it wrong, and you're looking at slow growth, nutrient issues, or every grower's nightmare: mold. Let's walk through exactly what your plants are looking for at each phase, so you can stop guessing and start growing with confidence.
Humidity and Temperature Targets by Grow Stage
Here’s a quick reference guide for the ideal environmental conditions to help your plants thrive from seedling to harvest. Keep this handy. It's your roadmap to a healthy grow.
| Growth Stage | Ideal Relative Humidity (RH) | Ideal Temperature (Day) | Ideal Temperature (Night) |
|---|---|---|---|
| Seedling & Clone | 65-75% | 70-80°F (21-27°C) | 65-75°F (18-24°C) |
| Vegetative | 50-70% | 72-82°F (22-28°C) | 68-78°F (20-26°C) |
| Early Flowering | 40-50% | 68-78°F (20-26°C) | 65-75°F (18-24°C) |
| Late Flowering | 30-40% | 68-78°F (20-26°C) | 62-72°F (17-22°C) |
Nailing these numbers is about more than just checking a box. It’s about giving your plants the exact climate they need to perform their best at every single stage.
Seedling and Clone Stage
At this point, your plants are just babies. Whether you’ve just popped some seeds or are tending to fresh clones, their root systems are incredibly small and fragile. They can’t draw much water from the soil, so they rely on absorbing moisture directly through their leaves.
To give them the best start, you need to create a high-humidity bubble for them.
- Ideal Relative Humidity: 65-75%
- Ideal Temperature: 70-80°F (21-27°C)
A simple, clear humidity dome is your absolute best friend here. It traps moisture and warmth right where your little ones are, creating a mini-rainforest that encourages strong root development without stressing the plant. For a better look at this critical first phase, check out our guide on the stages of growing cannabis.
Vegetative Stage
Once your plants have a few sets of true leaves and a more established root system, they shift gears into the vegetative stage. This phase is all about explosive growth, building the strong frame and lush fan leaves needed to support massive buds later on.
Because they’re transpiring more, they’re pulling a lot more water and nutrients up from the roots. The humidity can come down from seedling levels, but you definitely don’t want the air to get too dry. Dry air forces a plant to close its stomata (the pores on its leaves), which is like telling it to hold its breath and stop eating. Growth grinds to a halt.
Keeping the relative humidity in that 50-70% sweet spot encourages vigorous, healthy development and helps the plant process nutrients efficiently.
This infographic breaks down exactly why humidity is so critical for nutrient uptake, transpiration, and ultimately, building the foundation for big buds.
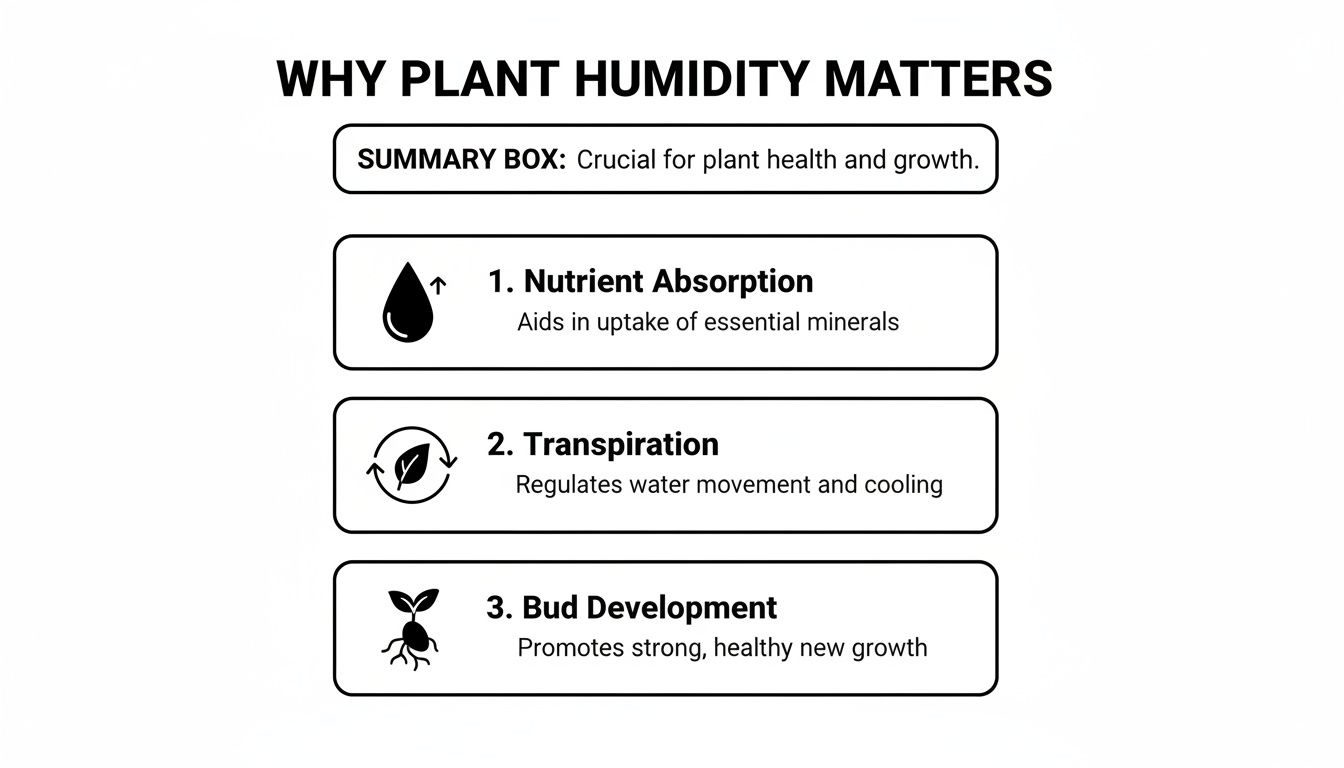
As you can see, humidity is really the engine that drives your plant’s ability to eat, drink, and pack on size.
Flowering Stage
Now for the main event. Whether your autoflower is starting to show its first pistils or you’ve just flipped your photoperiods to a 12/12 light cycle, your plant’s needs change dramatically. The focus is no longer on making leaves. It’s all about producing dense, frosty, and fragrant flowers.
During flowering, high humidity becomes your enemy. Warm, moist air trapped inside dense buds is the perfect recipe for bud rot (Botrytis) and powdery mildew, two fungi that can wipe out an entire harvest in days.
This is where you have to be disciplined about dropping the humidity. Gradually lowering it throughout the flowering cycle mimics the arrival of autumn, which signals the plant to harden off and boost resin production as a final defense mechanism.
- Early Flowering (Weeks 1-4): Aim for 40-50% RH.
- Late Flowering & Ripening (Weeks 5+): Drop it further to 30-40% RH.
- Ideal Temperature: Keep it slightly cooler at 68-78°F (20-26°C).
This final drop in humidity is non-negotiable. It’s crucial for protecting your buds, enhancing trichome production, and ensuring you end up with a clean, potent, and aromatic product. You’ve come this far, don’t stumble at the finish line.
Choosing the Right Humidifier for Your Grow Tent
Okay, so you’ve figured out your humidity is too low. Now what? While a few DIY tricks can get you through a pinch, a good humidifier isn’t just a gadget. It’s one of the best investments you can make for your grow tent. It’s the difference between constantly fighting your environment and dialing it in perfectly.
Think of it as the ultimate control switch for your tent’s atmosphere. It takes the guesswork out of hitting your target RH, which means healthier plants and a lot less stress for you.
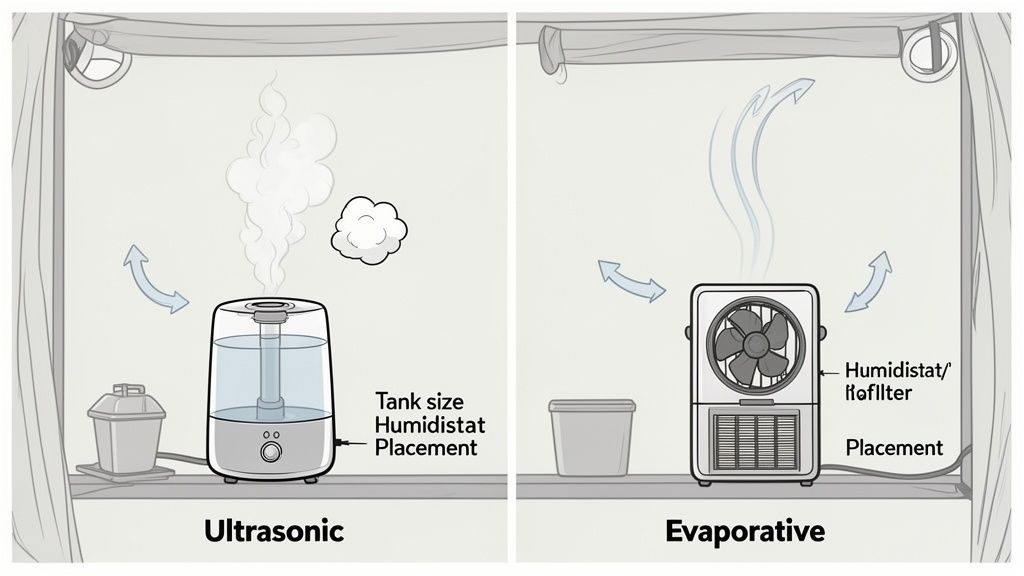
This isn’t about finding the most expensive unit on the shelf. It’s about picking a reliable workhorse that helps your feminized and autoflower plants thrive without you having to babysit them 24/7. Let’s look at the two main types you’ll find.
Ultrasonic vs Evaporative Humidifiers
When you start shopping, you’ll see two main technologies: ultrasonic and evaporative. Both get the job done, but they work quite differently.
Ultrasonic humidifiers are the most common choice for home growers. They use a tiny metal plate that vibrates at an ultrasonic frequency, which instantly turns water into a fine, cool mist.
- The Good: They are incredibly quiet, which is a huge plus if your tent is in a living space. They’re also great at producing a lot of mist quickly.
- The Bad: If you use regular tap water, the minerals can get aerosolized and settle as a fine white dust on your plants and equipment. The easy fix is using distilled or reverse osmosis (RO) water, but this does add a small ongoing cost.
Evaporative humidifiers take a more old-school approach. They use a fan to pull dry air through a moist wick filter, which naturally adds humidity to the air as it passes through.
- The Good: They’re self-filtering, so you don’t have to worry about white mineral dust. They also make it almost impossible to over-humidify the air, as the evaporation process slows down when the ambient humidity gets higher.
- The Bad: The fan makes them a bit noisier than ultrasonic models. You’ll also have to stay on top of cleaning or replacing the wick filters to prevent them from becoming a breeding ground for bacteria.
For most grow tent scenarios, an ultrasonic model is a solid choice. The quiet operation and precise control are hard to beat, especially if you’re willing to use filtered water.
Essential Features to Look For
Not all humidifiers are built the same, and a few key features can make a world of difference in a grow tent.
- Built-in Humidistat: This is a must-have, not a nice-to-have. A humidistat automatically turns the unit on and off to maintain the exact humidity level you set. It’s the key to real automation.
- Tank Size: Capacity matters. A small 1-liter tank might have you refilling it every single day. A larger 6-liter tank, on the other hand, could easily run for a full day or two, depending on how dry your air is.
- Adjustable Mist Levels: You need to be able to control the output. Sometimes you need to crank it up to raise the RH, and other times you just need a gentle mist to maintain it.
- Easy to Clean: Humidifiers can get grimy. Look for models with a large tank opening that lets you get your hand in for a proper scrub. Top-fill designs are also a massive convenience.
A built-in humidistat is the single most important feature. Without it, you’re just guessing and will constantly be chasing the right RH. Those wild swings are stressful for your plants and can invite problems like slow growth or even mold during the flowering stage.
Proper Humidifier Placement and Use
Where you put the humidifier is just as important as which one you buy. The goal is to get even moisture distribution without creating wet spots.
The best spot is usually on the floor of the grow tent, near an air intake vent. This lets the incoming fresh air mix with the mist and circulate throughout the tent. If you have a small oscillating fan inside, aim it to help move that humid air around. You can find more tips for arranging your equipment in our complete grow tent kit guide.
A critical warning: Never aim the mist nozzle directly at your plants, your grow light, or any electrical gear. Constant moisture on leaves can cause light burn, and spraying water on hot bulbs or electronics is a huge safety risk. You’re trying to raise the humidity of the air itself, not soak the contents of your tent.
Get the right humidifier, put it in the right spot, and you’ll create a stable environment that lets your plants truly flourish.
DIY Methods for Raising Humidity on a Budget
So, you need to bump up your humidity but aren’t quite ready to spring for a fancy humidifier. Good news. As home growers, we’re a resourceful bunch, and there are plenty of tried-and-true tricks to get the job done with stuff you likely have around the house.
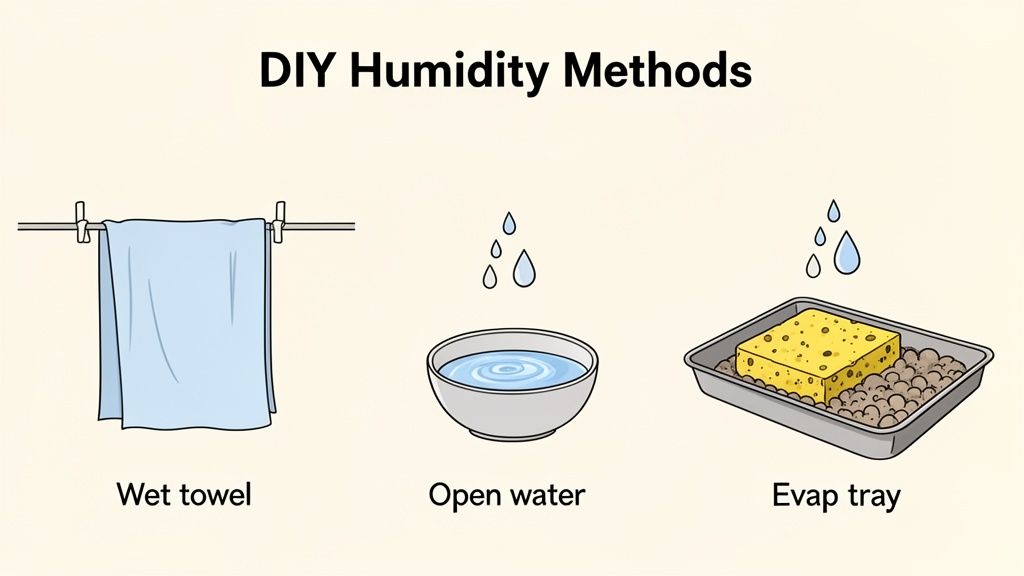
These low-tech hacks are perfect for making small tweaks to your environment or just getting you through a dry patch without spending a dime. Let’s get into a few classic methods that have saved many a grow.
The Wet Towel Trick
This one is a classic for a reason. It’s simple and it works. All you need to do is soak a clean towel, wring it out so it’s damp but not dripping, and hang it inside your grow tent.
The airflow from your circulation fans will pass over the towel, picking up moisture through evaporation and distributing it throughout your tent.
- Pro Tip: For the biggest impact, hang the towel right in the path of a fan. The constant airflow is key to getting that water to evaporate quickly and raise your RH.
- Placement: Use a bit of string or a small bungee cord to hang it from a support pole. Just be absolutely sure it’s not dripping onto your plants or any electrical equipment.
- Maintenance: The main drawback is that you’ll need to re-wet the towel every few hours as it dries out. This method is best when you’re around to keep an eye on things.
Open Containers of Water
Looking for something more “set it and forget it”? Placing a few open bowls or buckets of water on the floor of your tent will provide a slow and steady increase in humidity.
This is a passive method, so don’t expect dramatic results. It’s a great way to add a few percentage points to your baseline RH with practically zero effort.
For a little extra oomph, try placing a bowl of water near a minor heat source, like near (but not on) your light’s ballast if it’s inside the tent. The added warmth will speed up evaporation, releasing more moisture into the air.
You’ll have to top off the water every day or two. This constant evaporation is a small but important part of your tent’s water cycle, which connects to your plant’s needs. You can learn more about dialing that in with our guide on watering your cannabis plant.
Supercharge Your Evaporation with a Humidity Tray
If the bowl of water isn’t cutting it, you can take things to the next level by creating a dedicated evaporation tray. The goal here is to dramatically increase the surface area of the water, which makes it evaporate much faster.
It only takes a couple of minutes to set one up:
- Find a shallow tray, like a large plant saucer or a baking sheet from the kitchen.
- Fill it with a porous medium. Hydroton clay pebbles are perfect for this, but a large, clean sponge also works great.
- Add water until it’s almost to the top of the pebbles or sponge. The key is that you don’t want standing water for pests to breed in.
- Place it on the tent floor where it can catch some good airflow.
The water wicks up through the medium, and the massive amount of exposed, moist surface area puts out a surprising amount of humidity. It’s a fantastic low-tech, high-impact solution.
These DIY methods prove you don’t always need expensive gear to create the perfect environment. A little bit of grower ingenuity goes a long way, giving you the power to dial in your grow and keep your plants happy.
How to Balance Humidity and Ventilation
This is where the real art of growing comes into play. Getting your humidity up is one thing, but if you don’t manage your airflow at the same time, you’re just trading one problem for another. It’s a delicate dance, and finding that perfect harmony between moisture and fresh air is what truly elevates your grow.

Think about it: your humidifier is constantly pumping moisture into the tent, while your exhaust fan is working just as hard to pull it all out. They’re locked in a tug-of-war. The secret is to get them to work together to create a stable, predictable environment your plants will absolutely love.
Adjusting Your Ventilation to Keep Humidity
Your exhaust fan is non-negotiable. It pulls in fresh CO2 and keeps heat from building up. But running it at full blast, 24/7, makes it nearly impossible to maintain high humidity, especially for seedlings. The trick is to dial it back just enough without letting the air get stale and stagnant.
If you have a fan with a variable speed controller, you’re already ahead of the game. Try turning the fan speed down. This slows the rate of air exchange, giving the moisture from your humidifier a chance to actually build up in the tent before being vented out.
Another great trick is to hook your exhaust fan up to a cycle timer. Instead of running constantly, you can set it to kick on for 15 minutes every hour, for example. This simple schedule gives you the best of both worlds: the air gets periodically refreshed, but the humidity has plenty of time to climb and stabilize during the fan’s “off” cycles.
Think of it like this: your humidifier is filling a bucket with water, and your exhaust fan has a hole in the bottom. If the hole is too big (fan on high), you can never fill the bucket. By making the hole smaller (slower fan speed) or plugging it intermittently (cycle timer), you can finally reach your target level.
Understanding Vapor Pressure Deficit (VPD)
Don’t let the technical name intimidate you. Vapor Pressure Deficit, or VPD, is a concept that can seriously level up your growing game once you get the hang of it. At its core, it’s all about the relationship between the temperature and humidity in your tent, and how that affects the moisture inside your plant’s leaves.
When you nail the VPD, you encourage your plants to “breathe” more efficiently through a process called transpiration. In that sweet spot, your plants are actively pulling water and nutrients up from their roots, which translates directly to faster, healthier, and more vigorous growth.
Here’s the simple version:
- Too Low VPD (too humid): The air is so damp that your plants can’t effectively “exhale” water vapor. This slows down nutrient uptake and creates a perfect breeding ground for mold and mildew.
- Too High VPD (too dry): The air is so dry that it aggressively strips moisture from the leaves. The plant panics and slams its pores (stomata) shut to conserve water, which grinds growth to a halt.
You don’t need to get lost in complex charts right away. Just know that VPD is all about the balance between temperature and humidity. If you’re following the RH targets we’ve outlined for each growth stage, you’re already getting your plants very close to their ideal VPD.
Finding the Sweet Spot for Your Cultivars
The end goal is to create a fresh, humid environment where your specific cultivars can truly flourish. Your feminized or autoflower seeds hold the genetic blueprint for incredible growth and amazing aromatic profiles, but it’s the environment you create that allows them to express that potential.
For instance, a big, leafy sativa-dominant cultivar will transpire more and impact your tent’s humidity differently than a short, compact indica. You have to watch your plants and learn their language. Are the leaves “praying” up towards the light, looking full and vibrant? That’s a classic sign you’ve dialed things in perfectly.
By mastering the balance between your humidifier and your ventilation, you’re doing more than just raising humidity. You’re becoming the architect of your own perfect microclimate. This level of control is what allows you to find the ideal cultivar for your space using a tool like the Botanist Seeds comparison tool, knowing you can provide the exact conditions it needs to thrive.
Answering Your Top Grow Tent Humidity Questions
Even with the right gear, questions always come up as you get into the thick of a grow. Let’s tackle a few of the most common ones I hear from growers trying to nail their humidity levels. Think of this as a quick-reference FAQ from someone who’s been there.
Can Humidity Be Too High in a Grow Tent?
You bet it can. It’s a common misconception, especially with new growers, that more humidity is always better for young plants. While seedlings love moisture, sky-high humidity becomes a serious liability later on, creating problems far worse than dry air ever could.
Once you flip to the flowering stage, persistently high humidity is basically an open invitation for a grower’s two biggest enemies: bud rot (Botrytis) and powdery mildew. I’ve seen it happen countless times. These fungal nightmares thrive in damp, stagnant conditions and can turn a picture-perfect cola into a pile of gray mush almost overnight.
Here’s the key takeaway: Your tent should feel like a rainforest for seedlings, but it needs to feel like a dry, breezy fall afternoon for flowering plants. As soon as you see those first little buds starting to form, you need to get your humidity down below 50% RH. Your harvest depends on it.
Does My Humidifier Need a Built-in Humidistat?
In my book, this is non-negotiable. A humidifier without a built-in humidistat is just a fog machine. The humidistat is the crucial component. Its sensor reads the relative humidity in the tent and automatically cycles the unit on and off to maintain your target level.
Without one, you’re signing up for a constant battle of manual adjustments. You’ll turn it on, overshoot your goal, turn it off, and then watch the RH crash. These wild swings create a stressful environment that can slow down plant growth. A humidistat provides the stability your plants crave, making it the single most important feature to look for.
Where Is the Best Place to Put a Humidifier in a Grow Tent?
Strategic placement is everything. You want that moisture to disperse evenly, not just puddle in one spot. The ideal location is on the floor of your tent, preferably near one of the passive intake vents. This lets the incoming air grab the mist and circulate it naturally.
For an even better setup, add a small oscillating clip-on fan nearby. The fan will break up any dense pockets of fog and push the humid air into every corner of your canopy.
Just remember the golden rule: Never aim the mist directly at your plants, lights, or any electrical equipment. The goal is to humidify the air, not drench your gear. Direct water on leaves can lead to light burn, and I don’t need to tell you why mixing water and electronics is a bad idea.
Will Misting My Plants with a Spray Bottle Raise Humidity?
Misting is a classic rookie move. It feels productive, but it’s really just a short-term band-aid, not a real solution. A quick spray will cause a temporary humidity spike right around the plant, but the effect is gone in minutes as soon as the water evaporates.
It’s simply not a reliable method for maintaining a stable climate. In fact, it often causes more problems than it solves. Those little water droplets on the leaves can act like tiny magnifying glasses under your powerful grow lights, leading to unsightly burn spots. You’ll get far better results by raising the ambient humidity of the entire space with a proper humidifier or even a simple DIY tray of water. A stable environment is what truly fuels vigorous, healthy growth.
Now that you’re ready to master your grow tent’s climate, you can choose cultivars with confidence. The Botanist Seeds comparison tool helps you filter through feminized and autoflower seeds to find the precise genetics and aromatic profiles you’re after. Grow what you love and skip the dispensary. Find your next favorite cultivar today at https://botanistseeds.com.












