





The Best Nutrition for Cannabis Plant Growth at Home
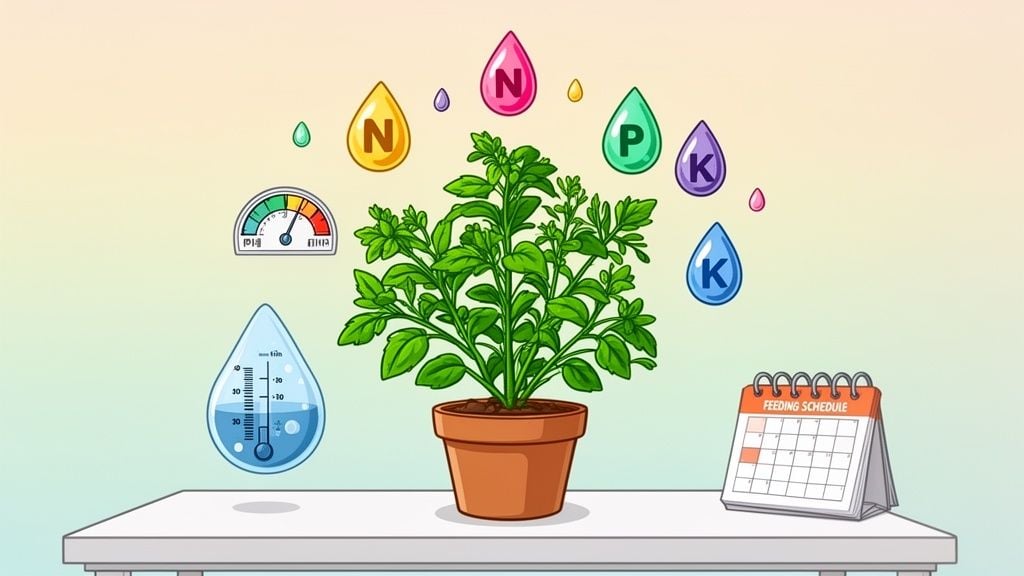
Nailing your plant's nutrition doesn't require a chemistry degree. It really just boils down to giving your cannabis the right food at the right time. The secret is a balanced diet of macronutrients (the big three: Nitrogen, Phosphorus, and Potassium) and a handful of essential micronutrients, all adjusted for each stage of growth.
It’s less about complicated formulas and more about understanding what your plant is trying to build.
A Straightforward Guide to Cannabis Nutrition
Let's cut through the noise. Feeding your cannabis plants can feel overwhelming with all the products on the shelf, but the core concepts are surprisingly simple. As a home grower, your main job is to supply the basic building blocks your plants need to grow a strong frame and, ultimately, deliver a rewarding harvest.
Honestly, that’s one of the best parts of growing your own. You get to skip the dispensary lines, save money on taxes, and feel that personal pride when you see the final result.
The nutrient market itself tells a compelling story. It's absolutely booming, which shows just how critical a good feeding strategy has become for getting great results. The US cannabis nutrients market is projected to leap from $48.16 million in 2024 to nearly $1.5 billion by 2035. That massive growth signals that growers everywhere are getting serious about dialing in their feeding schedules. You can check out these market trends to see just how fast the industry is moving.
The Main Food Groups: Macronutrients
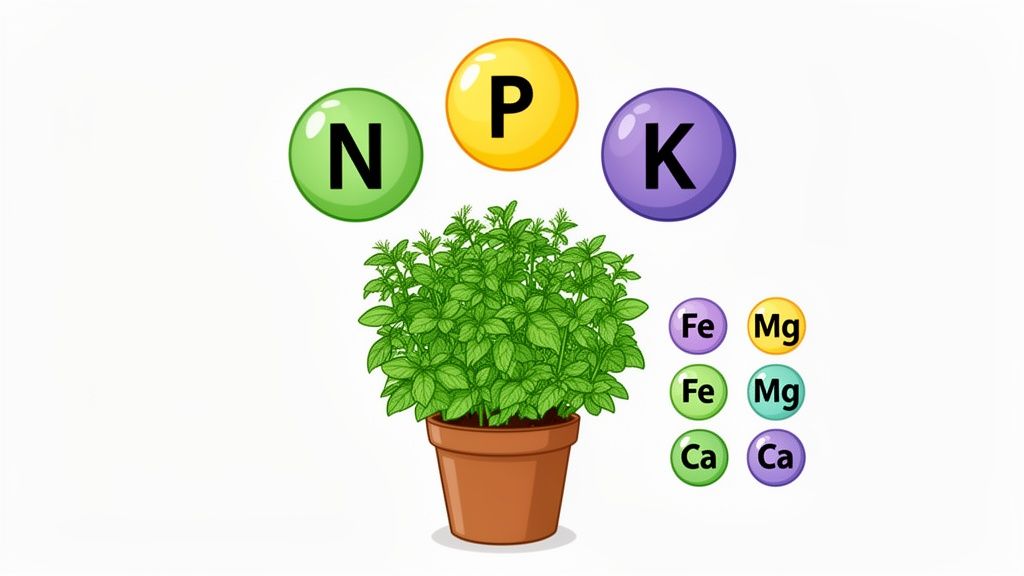
The foundation of any good cannabis feeding plan rests on the "big three" macronutrients, which you’ll see listed as an N-P-K ratio on almost every nutrient bottle. Each one plays a vital role, but their importance shifts dramatically depending on whether your plant is focused on vegetative growth or flowering.
To keep things simple, here’s a quick-reference table breaking down what these nutrients do.
Cannabis Macronutrient and Micronutrient Cheat Sheet
| Nutrient | Symbol | Primary Role |
|---|---|---|
| Nitrogen | N | Fuels leaf and stem growth (vegetative stage). Essential for photosynthesis. |
| Phosphorus | P | Critical for root development, energy transfer, and flower/bud formation. |
| Potassium | K | Regulates water uptake, strengthens the plant, and improves overall vigor and bud density. |
| Calcium | Ca | Builds strong cell walls, preventing weak stems and promoting healthy new growth. |
| Magnesium | Mg | The central atom in chlorophyll, making it vital for photosynthesis (energy production). |
| Iron | Fe | Helps in chlorophyll production and enzyme function. Deficiency causes yellowing. |
Understanding these roles is the first step. Nitrogen is your gas pedal for the vegetative stage, Phosphorus is your flower booster, and Potassium is the all-around health manager.
Honestly, getting these three macronutrients right is about 80% of the battle. If your N-P-K levels are dialed in for each stage, you're already most of the way to a healthy plant and a successful harvest.
The "Vitamins" of Plant Health: Micronutrients
Just like people need vitamins in addition to their main meals, your plants need a spectrum of micronutrients to thrive. They're needed in much smaller amounts, but a lack of them can cause big problems.
Deficiencies in these trace elements often lead to frustrating issues like yellowing leaves (chlorosis) or stunted, weak growth. The most common ones you'll hear about are Calcium (Ca), Magnesium (Mg), and Iron (Fe).
The good news? Most quality nutrient lines formulated specifically for cannabis already include a balanced profile of these micronutrients. You typically won't need to supplement them unless you spot the tell-tale signs of a specific deficiency.
Nutrient Strategies for the Vegetative Stage
The vegetative stage is where the plant really starts to take off. Think of it as your plant's adolescence: it's all about explosive growth. Your mission is to help it build a strong, sprawling framework of leaves, branches, and roots. This structure is what will eventually support those heavy, dense flowers you're working toward.
During this phase, your plants are absolutely ravenous for Nitrogen (N). This is the primary fuel for all that green, leafy growth. Nailing your plant's nutrition now is one of the most important things you can do, as it lays the foundation for a successful harvest.
Fueling Rapid Growth
Your goal in veg is straightforward: promote strong, vibrant growth. You want to see lush, green foliage, thick stems that can hold some weight, and a healthy root system. A plant that struggles here will never quite catch up and will have a hard time producing impressive results in the flowering stage.
Your nutrient mix's N-P-K ratio should reflect this nitrogen hunger. Look for a veg-specific formula with a high nitrogen content and moderate levels of phosphorus and potassium. A common ratio you’ll see on the bottle is something like a 3-1-2 or a similar nitrogen-heavy blend.
Getting your plant off to a strong start is non-negotiable. A robust vegetative stage directly translates to a plant that can handle the energy demands of flowering, meaning bigger and better results for you.
Recent research has given us some fantastic, specific numbers to aim for. Studies have shown that the sweet spot for vegetative nutrient levels is 160–200 mg/L nitrogen (N), 30 mg/L phosphorus (P), and 60 mg/L potassium (K). Plants grown with these concentrations developed more leaves, greater root mass, and thicker stems. If you want to get into the science, you can see how these specifics can supercharge your plants and lead to more robust growth.
Target pH and EC for the Vegetative Stage
Simply giving your plants food isn't the whole story; they need to be able to actually absorb it. That's where pH comes into play. If the pH at the root zone is out of whack, your plant can't take up the nutrients you’re so carefully providing, leading to deficiencies even with a perfect nutrient solution.
We also need to measure the strength of that solution. That’s done with EC (Electrical Conductivity) or PPM (Parts Per Million), which tells you the total amount of dissolved mineral salts in your water.
Here are some solid targets to aim for during the vegetative stage:
- Soil: A pH range of 6.0 to 7.0 is your target. Soil is great for beginners because it's more forgiving and acts as a natural pH buffer.
- Coco Coir & Hydroponics: You need to be more precise here. Aim for a tighter pH range of 5.5 to 6.5. These soilless mediums give you incredible control but demand close attention.
- EC/PPM: Start your seedlings and young plants with a low EC (0.8 to 1.3) or PPM (400 to 650). As they get bigger and stronger, you can gradually increase this, topping out around 1.8 EC or 900 PPM for mature vegetative plants.
A golden rule of growing: always start with a weaker nutrient solution and work your way up. It’s far easier to fix an underfed plant than to reverse the damage of nutrient burn on an overfed one. Feeding and watering are two sides of the same coin, so check out our guide on watering your cannabis plant for more detailed advice.
Feeding Schedules Across Different Grow Mediums
How often you feed is completely dependent on what your plants are growing in. Each medium has its own rhythm.
Growing in Soil
Good soil, especially high-quality potting mixes, often comes loaded with its own nutrients.
- Feed Frequency: You’ll likely feed every 2-3 waterings.
- Pro Tip: Let the soil do some of the work. Give your plants plain, pH-adjusted water between feedings. This helps prevent nutrient salts from building up in the soil and gives the roots a chance to breathe.
Growing in Coco Coir
Coco is a blank slate: an inert medium with zero nutrients. This means you have total control.
- Feed Frequency: Feed with every single watering. Because coco doesn't hold onto nutrients, you have to provide them consistently.
- Pro Tip: Keep a close eye on your runoff EC. If the EC coming out is much higher than what you're putting in, it’s a clear sign that salts are accumulating. When this happens, flush the pot with a low-strength nutrient solution or pH'd water.
Growing in Hydroponics
In a hydro setup, the roots have direct, constant access to the nutrient solution.
- Feed Frequency: Your system, whether it's a DWC, Ebb & Flow, or something else, will constantly supply nutrients, either continuously or on a timed cycle.
- Pro Tip: You absolutely must check your reservoir's pH and EC daily. These values can drift surprisingly fast in water. Daily monitoring is the key to keeping your plants happy and preventing nutrient lockout.
Alright, so your plants are ready to flower. Whether you've just flipped your light schedule to 12/12 or spotted the first white pistils popping on your autoflowers, the real fun is about to begin. The explosive vegetative growth is done, and now your plant is single-mindedly focused on producing beautiful, resinous buds.
This shift in focus means you need to change up their diet. Getting the nutrition right during the flowering stage is what separates an okay harvest from an exceptional one. It’s how you directly influence the final size, density, and aromatic profile of your buds.
The biggest change? We’re backing way off the Nitrogen (N) and hitting the gas on Phosphorus (P) and Potassium (K). I always tell new growers to think of it like this: Phosphorus builds the flowers, and Potassium packs on the weight. Nitrogen, which was the MVP of the veg stage, now needs to take a backseat. Keep feeding high nitrogen levels now, and you'll end up with leafy, airy buds: something nobody wants.
This is your chance to really bring out the best in your chosen cultivar, giving you a level of quality control you simply can't find anywhere else.
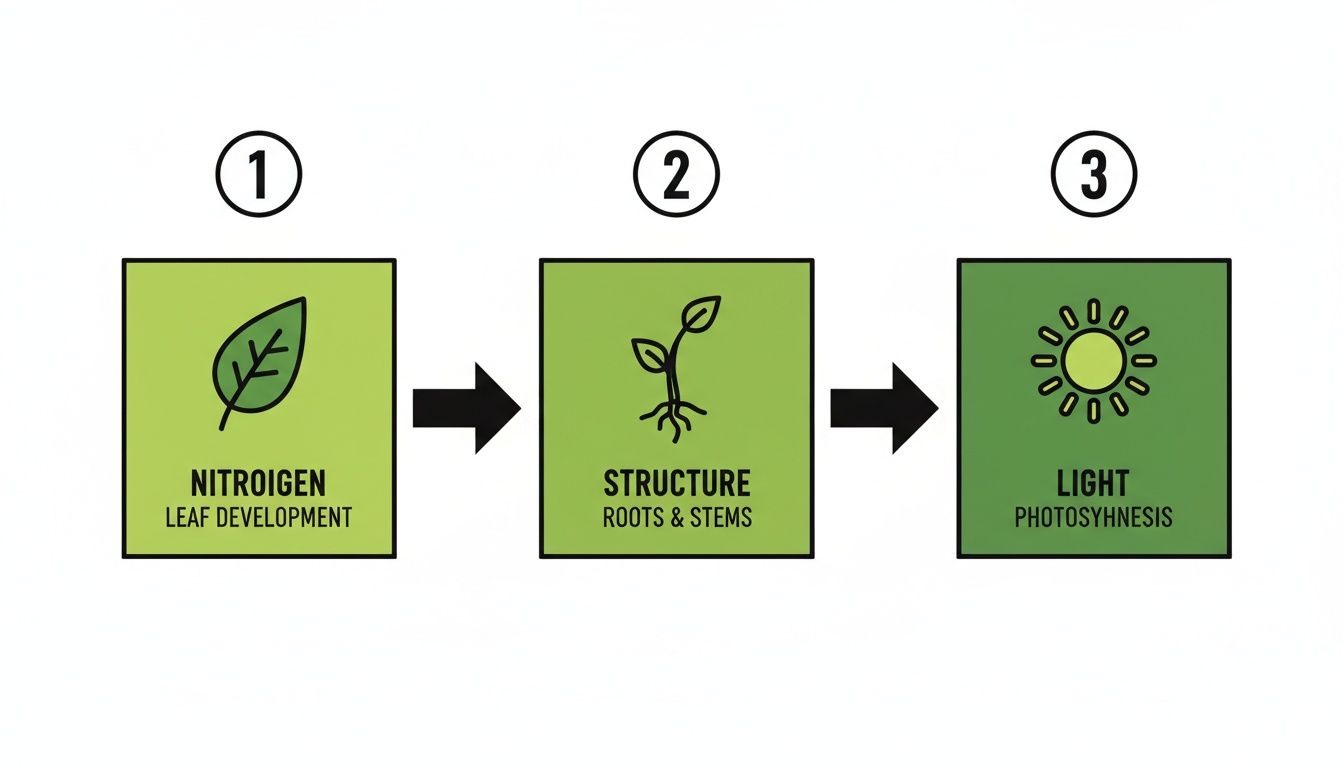
A strong foundation built with nitrogen during veg, powered by good light, is what sets the stage for a massive flowering phase.
The Stretch: Weeks 1-3
Don't be fooled by the first few weeks of flowering. Your plants are about to go through a final, dramatic growth spurt often called "the stretch," where they can easily double in height. Because they're still putting on some size, they have a slightly higher nitrogen demand than they will later on.
- Nutrient Focus: This is the perfect time for a "transition" or early bloom nutrient mix. These formulas have a balanced N-P-K ratio, easing the plant from veg to full-on bloom.
- Target pH: Keep your pH stable from the vegetative stage. For soil, that’s 6.0-7.0; for coco and hydro, stick to a tighter range of 5.5-6.5.
- EC/PPM Target: You can start pushing the nutrient strength. I usually aim for an EC between 1.2-1.9 (around 600-950 PPM).
Interestingly, a bit of targeted stress can work wonders. A 2023 study showed that strategically dialing back nitrogen right after the flip can significantly ramp up cannabinoid production. Researchers found that by reducing nitrogen to about 80 mg/L, they nearly doubled the CBD content while still achieving 95% of the total yield. You can read the full study on managing nitrogen levels to see just how impactful these small adjustments can be.
Peak Flower: Weeks 4-6
Now we're in the thick of it. The stretch is over, and your plant is dedicating every ounce of energy to building buds. This is when they get really, really hungry for Phosphorus and Potassium.
It’s time to switch over to a dedicated "bloom" nutrient. These formulas will be very low in nitrogen but packed with the P and K needed to fuel dense, resinous flower development.
This period is make-or-break for your final harvest weight and quality. Listen to your plants and give them what they need, but always keep an eye on the leaf tips for the first signs of nutrient burn.
Ripening and Finishing: Late Flower
As you enter the final weeks, you'll notice the plant's appetite starts to decrease. The buds are mostly formed and are now focused on ripening: developing those amazing terpenes and maturing. This is when most experienced growers begin tapering off their nutrient feeds.
This slow-down leads right into the final, crucial step before harvest: the flush. For the last 1-2 weeks, you'll stop feeding nutrients entirely and give your plants only pH-balanced water. The idea is to force the plant to consume any remaining nutrients stored in its tissues, which many growers swear results in a far smoother and cleaner final product. It’s a simple pro move that elevates your homegrown flower.
Choosing Your Grow Medium: Soil, Coco, or Hydro
Before you even think about which nutrient line to buy, you've got a much bigger decision on your hands: what are you going to grow in? Your choice of grow medium: be it soil, coco coir, or a hydroponic setup: is the foundation of your entire nutrition strategy.
The best nutrients in the world won't do you any good if they can't get to your plant effectively. I like to compare it to cooking. You can have the same ingredients, but you’ll get vastly different results (and need a different process) using a slow-cooker versus a skillet or a sous-vide machine.
Let's look at the three most common paths home growers take.
Growing in Soil: The Forgiving Foundation
Soil is the classic, old-school choice, and for good reason. It’s intuitive, familiar, and by far the most forgiving medium for anyone just starting out. A high-quality potting soil isn’t just dirt; it’s a living ecosystem packed with organic matter and microbes that create a natural buffer for your plant’s roots.
This buffering capacity is a massive safety net. If you happen to mix your nutrients a little too strong or your water’s pH drifts, the soil provides a cushion. This gives you precious time to spot the problem and fix it before any real damage is done.
- The Upside: Extremely beginner-friendly and requires less frequent feeding. Many growers also swear it produces plants with richer, more complex aromas thanks to the living microbial environment.
- The Downside: Growth is noticeably slower than other methods. It can also be heavy, messy, and you have far less direct control over your plant's immediate nutrient intake.
For most people new to growing, soil is the perfect place to learn the ropes. It simplifies the feeding process, letting you get a feel for the plant's life cycle without getting overwhelmed by daily technical measurements.
Growing in Coco Coir: For Total Control
Coco coir, made from shredded coconut husks, might look and feel like a light, fluffy soil, but it's a completely different beast. The single most important thing to understand is that coco coir is an inert medium. It contains absolutely no nutrients on its own.
Think of it as a blank canvas. This gives you complete control over your plant’s diet, but it also means you’re fully responsible for providing it. Since coco doesn't hold nutrients, you’ll generally feed with every watering. You also have to be on top of your pH and EC game to avoid nutrient buildup or lockout. If you need a refresher, check out our guide on why pH is so critical for cannabis.
- The Upside: Promotes explosive root growth and faster overall development than soil. You get precise control over your feeding schedule, and it's a reusable, sustainable option.
- The Downside: Demands more frequent feeding and watering. It’s unforgiving of mistakes in pH or nutrient strength and almost always requires a Cal-Mag supplement.
Coco is a fantastic middle ground for growers who have a handle on the basics and are ready to start dialing in their process for bigger, better results.
Growing with Hydroponics: The High-Performance Option
Hydroponics is the art of growing plants without any soil at all. Instead, the roots are suspended in an inert medium (like rockwool or clay pebbles) or hang directly in a nutrient-rich water solution.
With hydroponics, you are delivering nutrients directly to the root zone. This unimpeded access leads to stunningly fast nutrient uptake, resulting in some of the most rapid growth rates and heaviest yields possible.
This high-performance system, however, leaves absolutely no room for error. A small mistake with your pH or nutrient concentration can scorch your plants in a matter of hours, not days. It demands a bigger upfront investment for pumps, reservoirs, and air stones, and you have to commit to daily monitoring.
- The Upside: The absolute fastest growth and potentially the largest yields. It's incredibly efficient with water and nutrients and provides a clean, soil-free environment.
- The Downside: A steep learning curve and a high initial setup cost. Daily checks of pH and EC are non-negotiable, and something as simple as a power outage can be catastrophic for your crop.
Hydroponics is the perfect fit for the dedicated grower who geeks out on the technical details and wants to push their plants to their absolute maximum potential. It's a serious challenge, but the rewards are undeniable once you get your system dialed in.
How to Spot and Fix Common Nutrient Problems
No matter how dialed-in your plan is, every grower runs into nutrient issues eventually. Think of this as your field guide for playing plant detective: spotting the clues, figuring out what they mean, and stepping in before a small hiccup becomes a major setback.
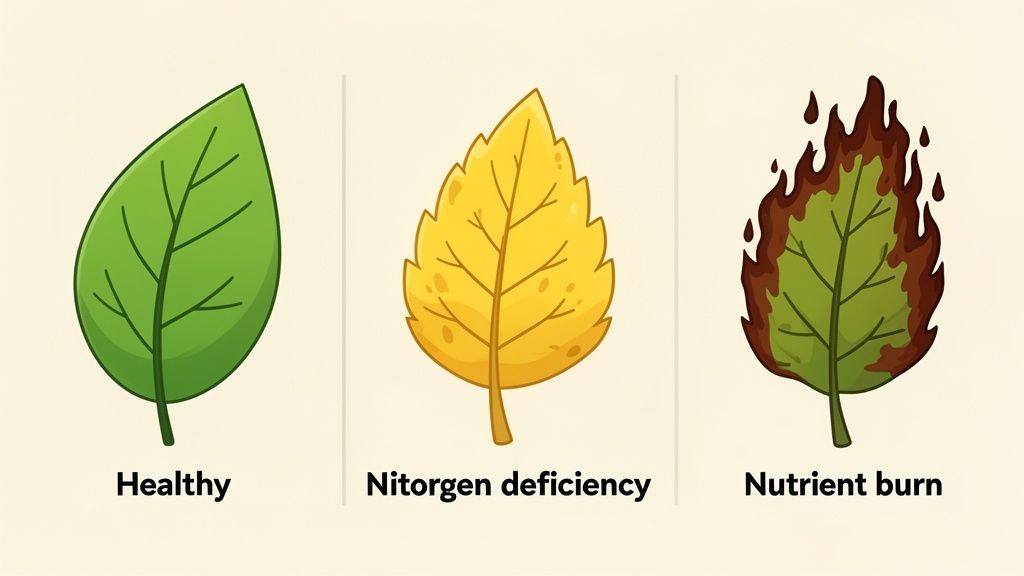
Catching these problems early is everything. The good news? Most fixes are surprisingly simple, often just a quick pH adjustment or a flush. It all comes down to reading the signs your plant is giving you.
Reading the Leaves: Mobile vs. Immobile Nutrients
Your plant's leaves are a living diagnostic report, but you need to know where to look. The location of a problem is the first and biggest clue to what’s wrong. This all depends on whether a nutrient is mobile or immobile.
Mobile Nutrients: These are elements like Nitrogen (N), Phosphorus (P), Potassium (K), and Magnesium (Mg). Your plant can actually pull these nutrients out of older growth and send them to new shoots. Because of this, a deficiency in a mobile nutrient will almost always show up on the older, lower leaves first.
Immobile Nutrients: This group includes Calcium (Ca), Sulphur (S), Iron (Fe), and Manganese (Mn). Once the plant deposits these nutrients in its tissue, they're locked in place. If there's a shortage, the deficiency will appear on the newest, upper growth because the plant can't pull them from older leaves.
This one distinction is a game-changer. Yellowing at the bottom? It's a mobile nutrient issue. Problems at the top? You're dealing with an immobile one.
Common Deficiency Symptoms and Fixes
Let's get into what the most common problems look like and how to handle them. Before you do anything else, always check and correct your pH. I can't stress this enough: nutrient lockout from incorrect pH is the real culprit behind deficiencies more than half the time.
Nitrogen (N) Deficiency
This is probably the most frequent issue growers face, especially if they're a bit shy with nutrients during the vegetative stage.
- What it Looks Like: You'll see a general, uniform yellowing that starts on the lowest fan leaves and works its way up. The leaves turn a pale, washed-out green, then fully yellow, before eventually getting crispy and falling off.
- The Fix: This is an easy one. Simply increase the nitrogen in your next feeding. A good base nutrient for the vegetative stage has plenty. If you see this late in flower, don't sweat it; it’s perfectly normal for the plant to cannibalize its lower leaves for energy as the buds ripen.
Phosphorus (P) Deficiency
A phosphorus shortage is more serious, particularly during flowering when demand for it skyrockets.
- What it Looks Like: Growth might seem slow or stunted, and the leaves can take on a dark, almost blue-green hue. As it gets worse, you'll notice dark bronze or purplish blotches, and the leaf stems may also turn purple.
- The Fix: First, make sure your root zone isn't too cold, as low temperatures can inhibit phosphorus uptake. Then, amend your feeding with a high-phosphorus bloom booster or a natural source like bone meal.
Stay calm and be methodical. The single biggest mistake growers make is panicking and throwing a cocktail of supplements at the problem. Check your pH, identify the symptom, make one small, targeted adjustment, and then wait a few days to see how the plant responds.
Nutrient Burn and Toxicity
Of course, sometimes the problem isn’t too little: it’s too much. We call this nutrient burn or toxicity. It’s a classic rookie mistake born from being a little too generous with the bottled nutes.
It’s always, always easier to fix an underfed plant than an overfed one.
- What it Looks Like: The dead giveaway is bright yellow or brown "burnt" tips on the leaves. The tips will look and feel dry and crispy. In more severe cases, the edges of the leaves will also burn, and you might see the leaves curl down into a "claw" shape.
- The Fix: The universal reset button for this is a flush. Drench the growing medium with plain, pH-balanced water: using about 2-3 times the volume of the pot: to wash out the excess nutrient salts. Let the medium dry out a bit, and then resume feeding at a much lower strength, maybe half of what you were using before.
Yellow leaves can be a symptom of many different things, from nitrogen deficiency to pH issues. If you're trying to get to the bottom of it, you can learn more by diagnosing yellow leaves on cannabis plants in our in-depth guide.
Common Questions About Cannabis Plant Nutrition
Even with the perfect feeding schedule mapped out, questions are going to pop up. It’s just part of the process, and it happens to every grower, from first-timers to seasoned veterans. Let’s walk through some of the most common hurdles you might face and give you the straightforward answers you need.
Getting your plant's diet right is where the real fun of growing begins. This is about more than just saving a few bucks or skipping dispensary lines; you're taking complete control over the quality of your own harvest.
Synthetic vs. Organic Nutrients: What’s the Real Difference?
The way I see it, synthetic nutrients are like an IV drip for your plant: they're immediately available. These are concentrated mineral salts that dissolve perfectly in water, giving you precise, fast-acting control. This is a huge advantage if you’re growing in hydroponics or coco coir, where you are the sole provider of nutrition.
Organic nutrients, on the other hand, are more like a slow-simmered stew. Derived from natural sources like bone meal, worm castings, or kelp, they need to be broken down by beneficial microbes in the soil before your plant can access them. This approach builds a rich, living soil ecosystem over time. Many growers are convinced this slow-release method enhances the final aroma and flavor.
There's no single "best" choice here. They're just different tools for different growing philosophies.
- Synthetics deliver that fast, measurable control that's almost essential for hydro and coco setups.
- Organics tend to be more forgiving in soil, creating a natural buffer that makes it harder to overfeed. You're working with the soil's biology, not just force-feeding the plant.
For someone just getting started, synthetics in coco can promise faster growth, while a good organic soil can be a more laid-back, "just add water" approach. It all comes down to how hands-on you want to be.
How Often Should I Actually Be Feeding My Plants?
This is probably the number one question I hear, and the honest answer is always, "It depends." How often you feed is completely tied to your growing medium, the container size, and your plant’s current stage of life. There's no universal calendar that works for everyone.
A great habit to get into is letting the top inch or two of your medium dry out before reaching for the watering can again. Overwatering is, without a doubt, one of the easiest and most common mistakes. Get used to lifting your pots to feel the weight difference between a dry plant and a freshly watered one. This simple feel-test will become your most reliable guide.
Here's how it generally breaks down:
- In a rich organic soil: You might only feed with nutrients every second or third watering. The soil itself acts as a pantry, holding on to food for the plant.
- In an inert medium like coco coir: You’ll likely be feeding with every single watering. Coco is a blank slate with no inherent nutritional value, so you have to provide everything consistently.
- In hydroponic setups: The roots are bathed in the nutrient solution 24/7. Your job isn't to "feed" them daily but to manage the health and concentration of the reservoir.
The best advice I can give is to look at your plants every single day. Their leaves and posture will tell you everything you need to know. Droopy leaves can mean they're thirsty or drowning, which is why learning the "pot lift" method is such a crucial skill.
Do I Really Need to Bother with pH and EC?
Absolutely. But don’t let the science-class terms intimidate you. Getting a handle on these two measurements is the secret to taking all the frustrating guesswork out of feeding.
Think of pH as the gatekeeper for nutrients. If the pH in your root zone is too high or too low, your plant simply can't absorb the food you're giving it: even if it's swimming in a perfect nutrient solution. This is what we call nutrient lockout, and it's a maddeningly common problem for new growers.
EC (Electrical Conductivity) or PPM (Parts Per Million) is much simpler: it just measures the total strength of your nutrient mix. It’s your safeguard against over or underfeeding. Investing in a cheap digital pH and EC/PPM pen is one of the smartest moves a grower can make. It protects your much larger investment of time, energy, and genetics.
What Is Flushing and Why Is It So Important?
Flushing is just the simple act of giving your plants plain, pH-balanced water for the last one to two weeks before harvest. You cut out all nutrients entirely.
The whole point is to encourage the plant to use up any stored-up nutrients and mineral salts from its leaves and flowers. Countless experienced growers swear by this, believing it results in a noticeably smoother and cleaner-tasting final product by removing any potential for a harsh, chemical-like bite.
This is an especially critical step if you're using synthetic bottled nutrients. Beyond pre-harvest, flushing is also your emergency reset button. If you spot the tell-tale signs of nutrient burn (crispy, yellowing leaf tips), a heavy flush with plain water can rinse the excess salts from the root zone and give your plant a chance to recover.
At Botanist Seeds, we're committed to helping you nail every aspect of your grow. When you're ready to find the perfect genetics for your setup, use our powerful comparison tool to explore top-tier feminized or autoflower seeds.












