





When to Harvest Cannabis for Max Potency and Yield
Deciding when to harvest cannabis is probably the most exciting—and nerve-wracking—part of the whole grow. You’ve put in the work for months, and this single decision will define everything. Chop too soon, and you'll miss out on weight and potency. Wait too long, and you might end up with a sleepy, heavy vibe you weren’t aiming for.
So, what's the secret? The short answer is to harvest when most of the tiny crystals on your buds are cloudy and a few have started turning amber. But let's get into the details.
Knowing When to Harvest Your Cannabis Plants
After all that time tending to your plant, you're finally at the finish line. Nailing this last step is what separates a decent harvest from a stash you’ll be genuinely proud of—the kind of top-shelf flower that makes you forget dispensary lines and taxes even exist.
The best part is, your plants will tell you exactly when they're ready. You just need to learn how to speak their language. Forget rigid schedules; this is all about observation.
- Peak Quality: A perfectly timed harvest locks in the richest aromas, deepest flavors, and the exact effects you're shooting for.
- Maximum Yield: Letting your buds fully mature means they swell up to their maximum size, giving you a much heavier, more satisfying haul.
- Total Control: You get to be the artist. By choosing the harvest day, you decide whether the final product is energetic and creative or relaxing and mellow.
The most reliable way to know when it’s time to harvest is by getting up close and personal with the trichomes: those tiny, frosty resin glands covering the buds. Their color is a direct window into the plant’s maturity and the kind of experience it will provide.
Whether you're growing a photoperiod plant or a super-fast autoflower, the core signs are the same. We focus on feminized and autoflower seeds to keep things straightforward, letting you concentrate on the harvest itself without any surprises. If you're new to autos, learning about the rapid growth of autoflower cultivars can help you prepare for how quickly this final window approaches.
This guide is all about teaching you how to read those signals. By the end, you'll be able to pinpoint the perfect harvest day to get the exact results you want, every single time.
Reading Trichomes for Peak Potency
If you want to know exactly when your plants are ready, you have to look closer. Much closer. We're talking about the trichomes, those tiny, sticky, mushroom-shaped glands that cover your buds and give them that frosty sparkle. Forget what the calendar says for a minute: these little guys are the single most reliable sign of a plant's maturity.
This is where you truly get to play scientist and artist, dialing in the final effects of your harvest. To do this right, you’ll need a simple jeweler's loupe (a 30x to 60x magnification is perfect) or a cheap digital microscope that connects to your phone. Trust me, it's a small investment that pays off big time. Trying to eyeball it just won't cut it.
The Three Stages of Trichome Color
As you peer into that microscopic world, you'll see the trichomes change over time. Watching this color shift is how you pinpoint the perfect harvest window for the experience you want.
-
Clear Trichomes: Early on, the resin glands look like tiny glass mushrooms. If you see all clear trichomes, hold off. The plant is still in full production mode, building cannabinoids and terpenes. Harvesting now would mean sacrificing a significant amount of potency and aroma.
-
Cloudy or Milky Trichomes: This is the magic window for many growers. As they mature, the trichomes turn from clear to a cloudy, milky white. This signals that THC levels are at their absolute peak. A harvest at this stage typically produces a more energetic, clear-headed vibe and the fullest, most vibrant aromatic profile.
-
Amber Trichomes: After the peak cloudy stage, those milky glands will start to turn a beautiful amber or deep gold. This color change means the THC is beginning to degrade into other cannabinoids, like CBN, which is known for its relaxing properties. The more amber trichomes you have, the more relaxing and couch-lock-inducing the final product will be.
This quick visual guide shows how checking your resin is the final, most crucial step in the process.
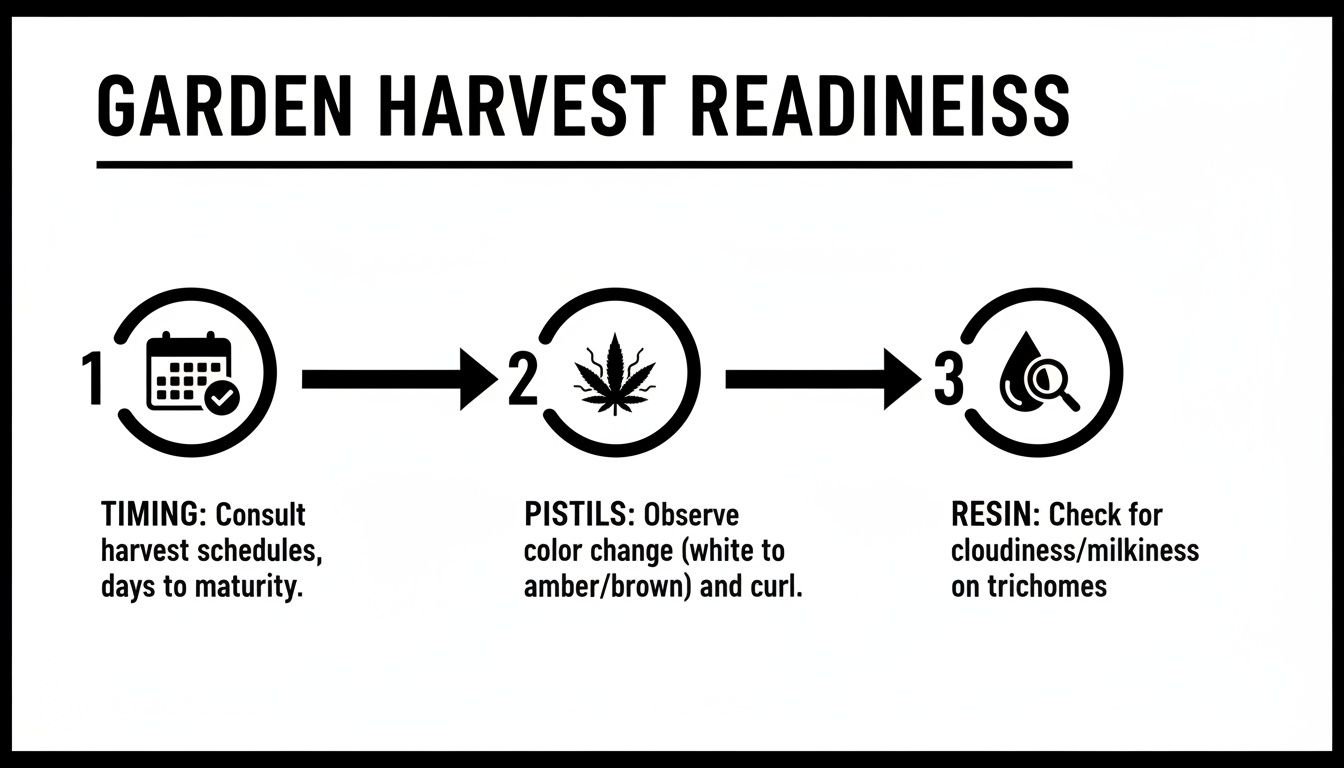
Think of it this way: the breeder's timeline gets you in the ballpark, the pistils tell you you're getting close, but the trichomes let you choose your exact seat.
Timing Your Harvest for Your Preferred Vibe
So, what's the perfect mix? Honestly, it comes down to what you're looking for. There's no single "right" answer, but experience gives us some solid starting points.
For a fantastic all-around effect, I almost always aim for a harvest with mostly cloudy trichomes and just a hint of amber, maybe 10-15%. This creates a beautifully balanced experience that’s potent and cerebral but still has enough body to it, avoiding any raciness. It’s a great middle ground for your personal stash.
As a general rule, you can adjust for the cultivar's genetics. You can find more detailed suggestions on harvest timing at sites like atmosiscience.com. For indica-dominant cultivars where you might want to enhance the relaxing effects, waiting until 70% to 80% of trichomes are cloudy and 20% to 30% are amber is a common target. Conversely, for sativas, you want to capture that bright, uplifting energy by harvesting when the trichomes are almost all cloudy, with very few, if any, amber ones.
At the end of the day, this is your garden. Getting in there daily with your loupe as you approach the finish line gives you complete control. You get to decide the exact character and personality of your flower. That's one of the best parts of growing your own.
Using Pistils and Breeder Timelines as Guides
Before you even break out a jeweler's loupe, your plants will give you a much more obvious signal that harvest is approaching. Just look at the pistils: those tiny, hair-like strands covering the buds. Watching them is the first, and easiest, step in timing your harvest.
When your buds are first forming, these little hairs are a vibrant white, standing straight up as they reach for the light. As the plant shifts its energy into ripening, you’ll see the pistils start to curl in and darken, changing from white to a deep orange, red, or sometimes brown. This color shift is your plant’s way of telling you it's entering the final phase.
Reading Pistil Color Changes
Think of the pistils as a general forecast. They don't give you the exact moment to chop, but they tell you when to start paying very close attention.
- Under 50% Darkened: You’re still in the bulking phase. The plant is packing on weight, and you've got some time to wait. Be patient.
- 50-70% Darkened: This is the magic window to start your daily trichome inspections. Once you see about half to two-thirds of the pistils have changed color, it's time to get your loupe out and start looking closely.
- 90-100% Darkened: At this point, you're on the far end of the harvest window. Most of the THC is at its peak, and some is beginning to convert to CBN, which produces a much more sedative, heavy-lidded effect.
Here's a pro tip: Don't just go by the pistils alone. Some cultivars can throw out new, white pistils late in the flowering stage, which can fool you into thinking they need more time. Pistils tell you when to start looking at trichomes; the trichomes tell you when to actually harvest.
How to Use Breeder Timelines
When you get a pack of our seeds, you'll see an estimated flowering time. It's important to think of this as a guideline, not a guarantee. If a cultivar is listed with an 8-week flowering period, you should start checking for those pistil changes right around week 7.
This timeline from the breeder is a great starting point. However, your unique grow environment is the real boss. Things like the intensity of your lights, your nutrient regimen, and the temperature of your grow space can easily shift the final harvest date by a week or even more.
The best approach is to layer these methods. Use the breeder's timeline to get into the right ballpark. Then, watch the pistils to know when to get your loupe ready. Finally, inspect the trichomes for the final decision. This combination takes away the guesswork and gives you total control, which is especially helpful when growing some of the easiest strains to grow indoors for the first time as you learn their unique rhythms.
Final Steps Before You Chop Your Plants
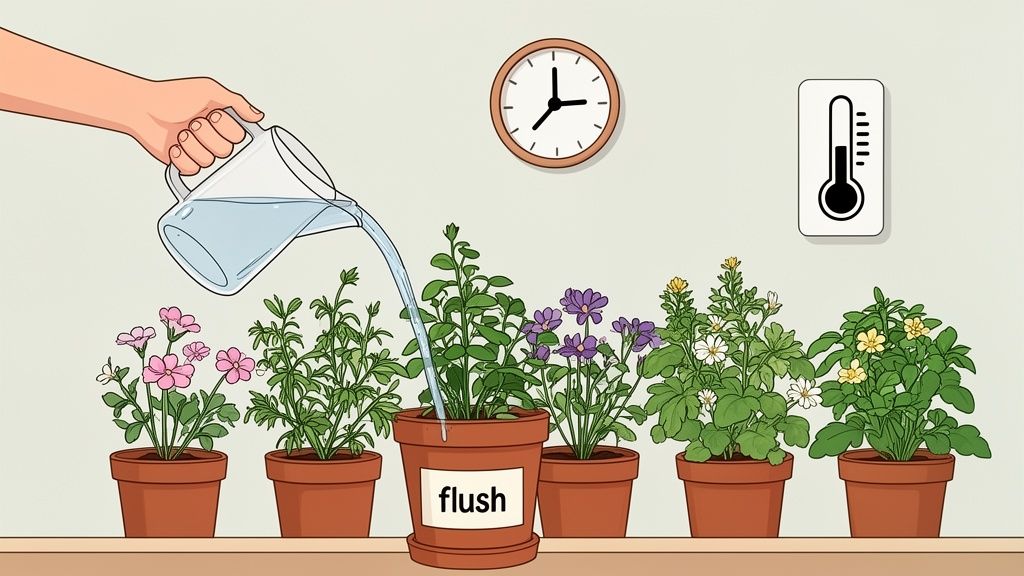
Alright, you've made it to the final stretch. The last week or two of your plant's life is where you can really elevate the quality of your buds. Think of it as the final polish: a few simple techniques to signal the end is near, which encourages one last push of resin and sets you up for a fantastic final product.
The Great Flushing Debate
One of the most talked-about pre-harvest rituals is flushing. If you're new to this, don't worry, it's incredibly simple. All it means is that for the last 7 to 14 days before you plan to chop, you stop feeding your plants any nutrients. Instead, you just give them plain, pH-balanced water.
The theory here is that it forces the plant to consume any leftover nutrients it has stored in its leaves and flowers. While the science is debated in some circles, countless growers will tell you it leads to a noticeably smoother, cleaner-tasting smoke. It costs nothing to try, and the vast majority of experienced cultivators swear by it.
Tweaking the Environment for a Grand Finale
Beyond flushing, you can also use your grow environment to trick the plant into thinking winter is coming. This is where a little "good" stress comes in handy.
- Drop the Humidity: Lowering the humidity in your grow space during the final week can trigger a defensive response. The plant pumps out more resin (trichomes) to protect its precious flowers from drying out.
- The Final Darkness: Some growers give their plants an extended dark period of 24 to 48 hours just before harvesting. The idea is that this last-ditch stressor signals the absolute end, causing the plant to pour all its remaining energy into resin production.
While the extended dark period is optional, the timing of your harvest isn't. Always, and I mean always, chop your plants down right before the lights are scheduled to kick on. This preserves the full spectrum of terpenes, which are most concentrated after the dark cycle and start to evaporate as soon as the lights (and heat) hit them.
Nailing the Exact Time to Chop
When that final day arrives, the time of day you harvest makes a real difference. Cannabinoid production actually ramps up during the dark period. By harvesting in the cool, pre-dawn moments just before your light cycle begins, you're catching the plant when its THC levels are at their absolute peak.
Some community data even suggests this can lead to a 10-20% increase in potency compared to harvesting midday. You can find plenty of growers discussing and sharing their results on forums like ICMag.com.
By flushing your plant, tweaking the environment in your grow tent kit, and timing the chop perfectly, you're not just harvesting, you're optimizing. Now, grab your trimmers. It’s time for the main event.
How to Harvest for Maximum Yield
Alright, the moment of truth has arrived. After all the weeks of careful tending, you’ve checked the trichomes, watched the pistils darken, and your plant is finally ready. It’s time to make the chop, a feeling that’s equal parts thrilling and bittersweet. Don't sweat it, though. This part is surprisingly straightforward.
Before you make that first cut, let’s talk tools. You don't need a lot, but you absolutely need the right stuff. A sharp, sterile pair of pruning shears or micro-tip scissors is a must. Dull blades will crush the stems, making trimming a nightmare and potentially damaging the precious buds you’ve worked so hard for.
Your Two Main Harvesting Options
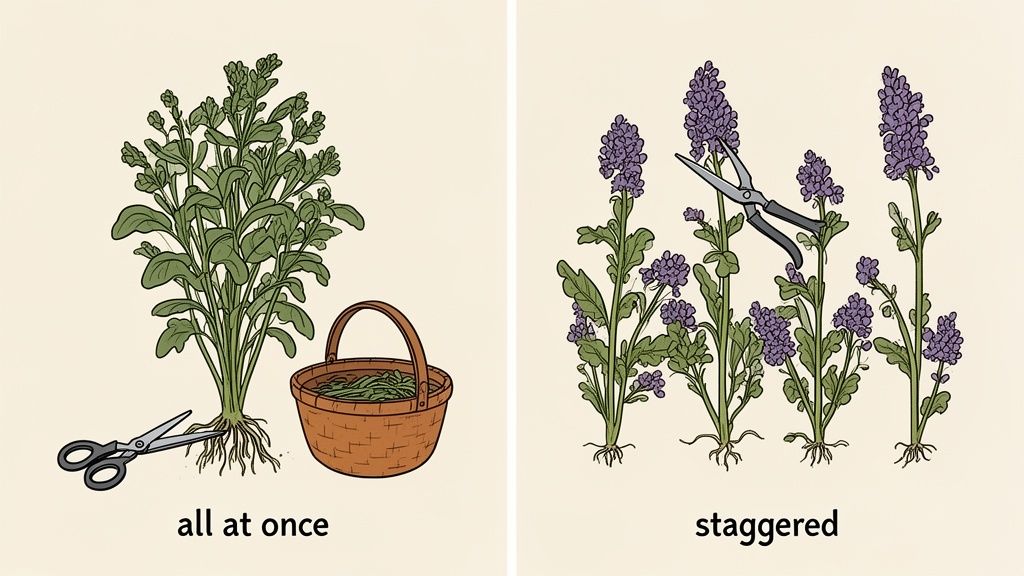
When it comes to the actual act of chopping, you’ve basically got two routes to choose from. There's no single "best" way; it really comes down to the size of your plant, how evenly it has ripened, and what your schedule looks like.
-
Whole Plant Harvest: This is exactly what it sounds like. You cut the entire plant down at its main stalk, right near the soil line. It's the fastest and simplest method, perfect for smaller plants or most autoflower varieties where the buds tend to finish up all at once.
-
Partial or Staggered Harvest: Now this technique is a real game-changer, especially for home growers. It involves selectively cutting only the mature, ripe colas while leaving the less-developed lower buds on the plant for a little longer.
Honestly, a partial harvest is my go-to for any decent-sized plant. It just makes perfect sense. You get to snip the prime colas at their absolute peak while giving the smaller, lower buds a final chance to catch up.
By doing this, you're getting the best of both worlds. You avoid letting your main colas get overripe and you don't have to sacrifice the potential of those lower buds by cutting them too early. It's a simple win-win that lets you squeeze every bit of quality and quantity out of your plant.
How to Pull Off a Partial Harvest
The secret to a great partial harvest is understanding a simple fact: not all buds ripen at the same speed. The top colas, which have been basking in the most intense light, are almost always ready before the smaller buds hiding down in the canopy.
Start by getting your magnifier out and checking trichomes on buds from different parts of the plant. If the top colas are showing that perfect mix of milky and amber trichomes, but the lower ones are still looking a bit too clear, you've got a perfect candidate for a staggered harvest.
Simply take your clean shears and snip the branches holding the ripe colas.
Once you’ve cleared out that top section, the lower buds are suddenly exposed to way more direct light and better airflow. This gives them a powerful final burst of energy to swell up and finish ripening properly. Just give them another week or so, keep a close eye on their trichomes, and harvest them when they tell you they're ready.
This isn’t just grower lore, either. The approach is backed by research showing how cannabinoids can be concentrated in different parts of the plant. For instance, a 2022 study showed that the top third of a plant had significantly higher CBD levels than the middle or bottom. You can find more on these findings in the full study.
Common Harvest Questions Answered
After weeks of careful work, the finish line is in sight. It's totally normal to feel some anxiety about getting the harvest perfect. We've all been there. Let's tackle some of the most common questions I hear from growers to make sure you can harvest with confidence.
Can I Harvest If I Still See White Pistils?
This one trips up a lot of people. You’re checking your buds, the trichomes look just about right, but you suddenly see a bunch of new, bright-white pistils shooting out. What gives?
This is often a late-stage growth spurt called 'foxtailing,' which can be caused by genetics or a little bit of environmental stress. My advice? Ignore those new pistils and trust your trichomes. Those fresh white hairs are not reliable indicators at this stage. The trichomes on the older, more mature parts of the bud are what tell the true story about ripeness.
What Happens If I Harvest My Autoflower Too Late?
Autoflowers are fantastic, but their speed means the harvest window can close before you know it. If you let an autoflower run too long, you’ll see a real drop in quality.
The THC starts breaking down into CBN, a compound known for its heavy, sleepy effects. That energetic vibe you were hoping for? It turns into an accidental nap. The buds can also lose their density and that amazing smell you’ve been enjoying for weeks.
With autos, you have to be vigilant. The moment they hit the breeder's estimated finish date, get your loupe out and start checking those trichomes daily. They move fast, and staying on top of it is the only way to catch them at their peak.
Does Flushing Really Make a Difference?
Ah, the great flush debate. This is one of the most argued-over topics in growing. The theory is that by giving your plants plain water for the last week or two, you wash out excess nutrient salts and force the plant to use up its internal stores. Growers who swear by it say this leads to a noticeably smoother and tastier smoke.
While some studies have challenged how much it actually changes the final chemical makeup, the anecdotal evidence from countless growers is overwhelming. It’s a simple, free step that is widely believed to improve the end product. I always recommend it. It can’t hurt, and it just might make your flower that much better.
Should I Harvest Indica and Sativa Cultivars Differently?
Absolutely. This is where you, the grower, get to play master of ceremonies. You can literally steer the final effects of your flower based on when you choose to chop, and that timing is different for indicas and sativas.
-
For Indica-dominant cultivars: You're likely looking for that deep, relaxing body vibe. To achieve this, you want to let them ripen a little longer. Aim for a mix of mostly cloudy trichomes with a healthy dose of amber, somewhere around 20-30%.
-
For Sativa-dominant cultivars: Sativas are all about that soaring, creative, and energetic feeling. To preserve that, you need to harvest on the earlier side. The perfect moment is when nearly all the trichomes have turned cloudy, but before you see more than a handful of amber ones.
This is the real beauty of growing your own. You get to fine-tune the experience to your exact liking, something you’ll never get from a dispensary shelf.
Ready to find the perfect cultivar for your next grow? The Botanist Seeds comparison tool makes it easy to explore different options and find genetics that match your setup and desired effects.












