





CO2 for Grow Tent: Maximize Your Yields in 2026
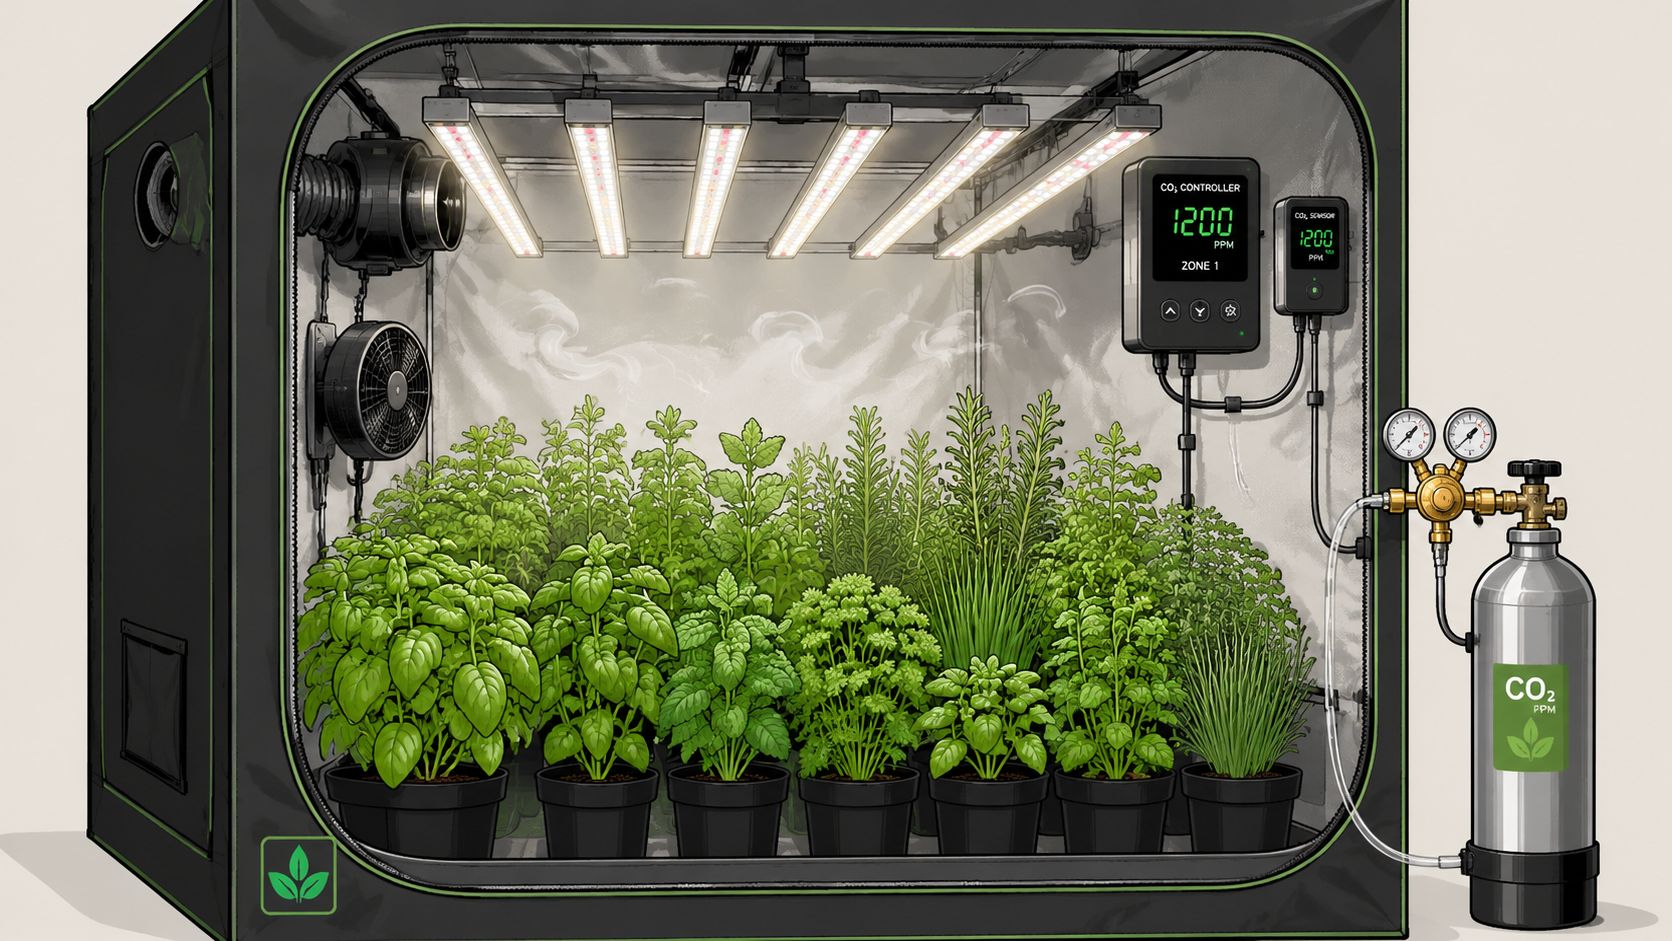
You can buy a CO2 bag, hang it in your tent, and feel like you upgraded your grow. That part is easy.
The harder question is the one most growers skip: will CO2 be effective in your tent, or are you just feeding gas straight into a leak while your light, airflow, and environment are still the primary bottlenecks?
That's where most of the bad advice starts. People talk about CO2 like it's a magic yield button. It isn't. In a home setup, CO2 is an optimizer. It works when the rest of the grow is already tight. If your tent is small, drafty, lightly lit, or running constant exhaust, the smarter move is often to improve the basics first.
Your Guide to CO2 in a Home Grow Tent
A lot of home growers hear the same pitch: add CO2, get bigger plants, pull heavier harvests. There is some truth in that, but only in the right setup. CO2 for grow tent use makes sense when the tent can hold enriched air, the light is strong enough to let plants use it, and the room is controlled well enough that the extra gas doesn't get wasted.
That's the part that matters for hobby growers. Not theory. Not hype. Just whether your tent is ready.
If you're still building your setup, it helps to compare the basics first, especially tent size, ventilation layout, and how much room you have to seal things properly. A solid starting point is this guide to a grow tent kit, because CO2 decisions get a lot easier when the base setup already makes sense.
Practical rule: CO2 is a gas pedal, not a new engine. If the engine isn't sorted, pressing harder doesn't fix much.
A significant advantage is knowing when to skip it, when to try a simple method, and when it's finally worth running a tank, regulator, and controller. That's where most growers save money and frustration.
Is CO2 Supplementation Actually Worth It For You
Most growers shouldn't start with CO2.
That sounds backwards because enrichment gets a lot of attention, but the honest answer is simple: if your tent leaks, your light is mediocre, or your environment swings around all day, CO2 usually isn't the next upgrade. Better light, better sealing, and better climate control tend to matter first.
The quick reality check
Industry guidance is pretty consistent here. CO2 works best in sealed rooms with strong lighting, and it's often low value in small, leaky, or low-light tents. Spider Farmer says supplementation works best with strong lighting of at least 1000 µmol·m⁻²·s⁻¹ PPFD in its guide to adding CO2 to a grow tent.
That one detail changes everything.
If your fixture can't drive strong photosynthesis, added CO2 has less to work with. Plants don't use extra carbon dioxide efficiently just because it's available. They need the light intensity to cash that check.
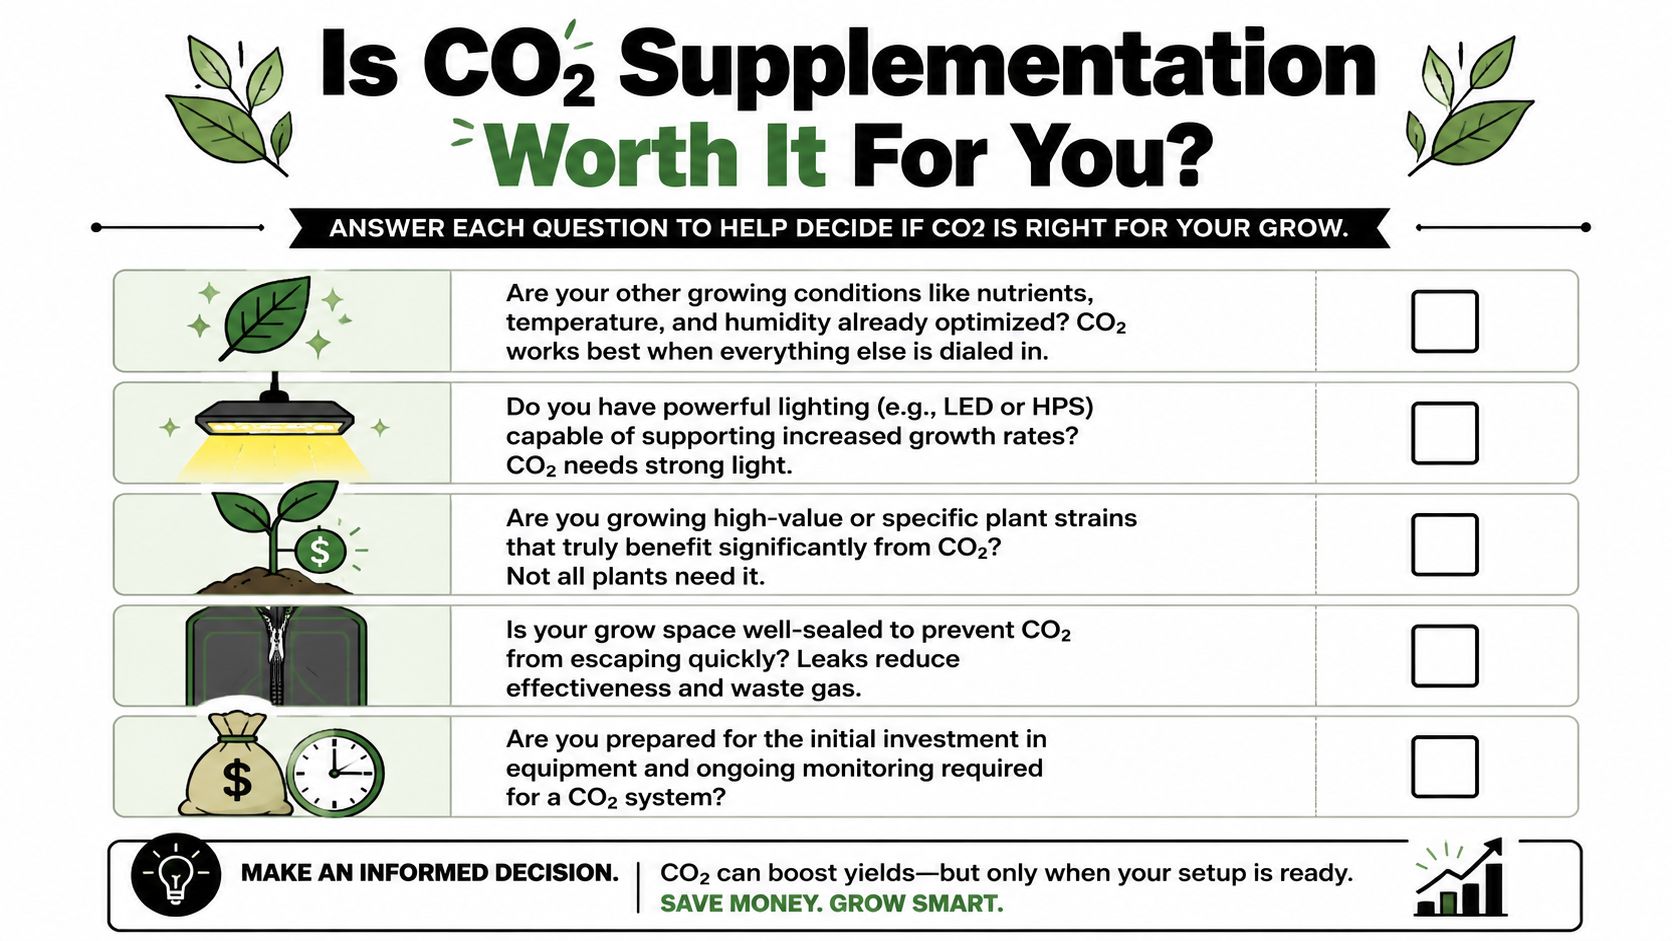
A yes or no checklist
Ask yourself these questions before you spend money:
- Is your tent sealed well enough to hold enriched air? If the walls puff in and out because exhaust is always running, CO2 won't stay put for long.
- Are your temperature, humidity, watering, and nutrients already steady? CO2 helps a healthy grow run harder. It doesn't rescue sloppy conditions.
- Do you have strong lighting? This is the biggest gatekeeper for small home tents.
- Are you willing to monitor the setup regularly? A tank and controller setup isn't hard, but it does ask for attention.
- Is your tent large enough to make retention realistic? Bigger tents generally make more sense than tiny ones because they hold enriched air better.
If your first thought is, “I still need to upgrade my light,” that's probably the upgrade to make first.
When CO2 makes sense
CO2 starts to make sense when you already have a dialed-in room and you're trying to squeeze more performance out of it.
That usually looks like this:
- A sealed environment: You can stop uncontrolled air exchange during dosing.
- Strong light at canopy level: Enough intensity for plants to use the added gas.
- Stable climate control: Temperature and humidity don't drift all over the place.
- Healthy, vigorous cultivars: Plants already growing hard under feminized or autoflower seed runs.
- A realistic goal: You're not chasing hype. You're trying to optimize an already solid setup.
One industry source says crop production and overall size can rise by 20 to 25% during flowering weeks 1 to 5 when CO2 is supplemented in that early flowering window, in a proper setup, according to this article on implementing CO2 in your grow.
That sounds great, and it can be. But the phrase that matters is in a proper setup.
When it probably doesn't
A lot of home tents don't meet the bar yet.
CO2 is usually a weak investment if you're running:
- A 2×2 or 3×3 that leaks easily
- A tent with continuous exhaust
- A light that isn't especially intense
- A grow that still has basic issues like heat, humidity, or watering mistakes
In those cases, adding CO2 is like putting premium fuel into a car with low tire pressure and a clogged air filter. The problem isn't the fuel.
Choosing Your Grow Tent CO2 Method
Once your tent is ready, the next job is choosing a method that fits your space and tolerance for tinkering. There isn't one perfect answer. There's only the option that matches your tent, your habits, and how much control you want.
The fast comparison
| Method | Best For | Control Level | Approx. Cost |
|---|---|---|---|
| CO2 bag | Simpler tent setups, passive supplementation | Low | Lower |
| CO2 tank with regulator and controller | Sealed tents where you want precise dosing | High | Higher |
| DIY fermentation style setups | Experimenters who don't mind inconsistency | Low | Lower |
CO2 bags
CO2 bags appeal to a lot of growers because they're simple. Hang one, leave it alone, and you've technically added CO2.
That can be fine for someone who wants a low-effort trial, but the trade-off is limited control. You don't get precise ppm management, and you don't really know what the tent is holding at canopy level unless you're also monitoring it.
A practical rule of thumb is one CO2 bag per 4×4 area or 4×4 grow tent, and spaces 4×4 or bigger are generally described as more cost-effective for enrichment because they leak less and hold enriched air better, according to CO2Meter's guide on how to implement CO2 in your grow.
Tank, regulator, and controller
This is the serious hobbyist option.
It costs more and takes more setup, but it gives you the thing passive methods don't: control. You can target an actual ppm range, run the gas only during lights-on, and stop wasting CO2 when the tent doesn't need it. If your setup is sealed and your lighting is already strong, this is the method that makes the most technical sense.
If you're comparing larger environment options beyond a single tent, this overview of grow rooms for weed helps frame where a tent setup ends and a room-scale setup starts.
DIY methods
DIY fermentation buckets and other homemade approaches are common because they're cheap and easy to build from spare stuff.
They can produce some CO2, but they're uneven and hard to manage. For a grower who just wants to experiment, that may be enough. For a grower trying to hold a target range reliably, it usually gets old fast.
Straight answer: If you just want to try CO2, a bag is the easy entry. If you want repeatable results, use a tank and controller.
How to Set Up Your CO2 System
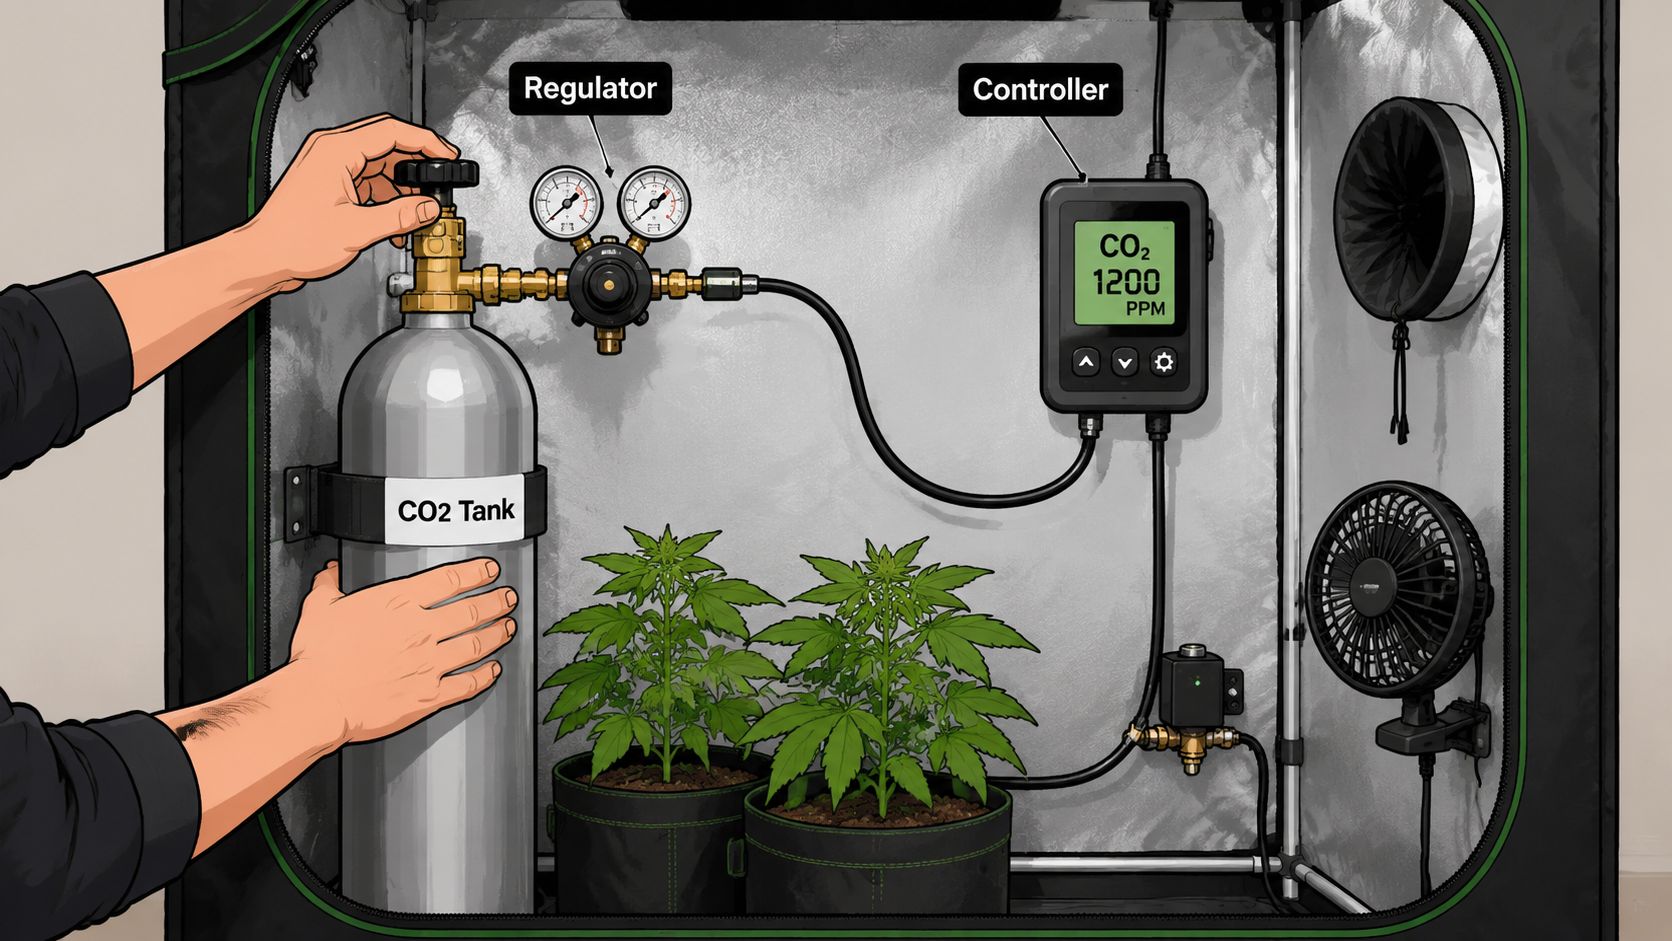
If you're going to do this seriously, a tank, regulator, controller, tubing, and a canopy-level sensor is the setup that gives you real control. The trick isn't just injecting gas. The trick is getting the tent to hold it long enough for the plants to use it.
Start by sealing the tent
This comes before the tank. Always.
The most effective approach is a sealed-space, light-hours-only protocol. That means closing passive vents, stopping continuous exhaust, and dosing only during the photoperiod. A controller with a canopy-level sensor is critical if you aim to hold the setpoint, as explained in HydroBuilder's guide to CO2 for indoor growing.
That means you need to check the obvious leak points:
- Passive intake flaps: Close them during enrichment.
- Duct ports: Tighten around ducting and unused ports.
- Zippers and seams: Look for spots where air is bleeding out.
- Exhaust strategy: Don't run the fan nonstop while dosing.
A lot of failed CO2 setups are really failed sealing jobs.
Put the hardware where it makes sense
The tank needs to sit securely outside the way of daily tent traffic, and the regulator needs a clean, proper connection. Run the tubing so the gas can disperse across the tent instead of dumping into one corner.
Keep the tubing organized and out of the light's hottest path. You want even distribution, not a mess hanging over the canopy.
A simple layout usually works best:
- Secure the tank
- Attach the regulator and solenoid
- Run tubing into the tent
- Position the release point above the canopy area
- Mount the controller sensor at canopy height
That last part matters more than people think.
Sensor placement is not a small detail
Don't put the control sensor on the floor. Don't hang it at the ceiling. Don't tuck it in a corner because the cable is short.
Put it at canopy level.
That's the zone you're trying to control. If the sensor sits too high or too low, the reading can mislead you and the controller will dose poorly. Then you either waste gas or miss the target for the plant's canopy.
A bad sensor location can make a good CO2 system behave like a bad one.
A visual walkthrough helps here:
Rethink your ventilation schedule
Most home growers are trained to run exhaust constantly. That habit works against CO2 enrichment.
When the system is dosing, continuous exhaust just pulls your money out of the tent. The practical fix is to treat enrichment like a managed event during lights-on, then use ventilation strategically rather than nonstop. Internal circulation still matters, so keep air moving inside the tent with recirculation fans. You want the gas mixed around the leaves, not sitting unevenly in pockets.
If you want a packaged option instead of sourcing each part separately, look for an all-in-one CO2 kit from a hydroponics retailer. Otherwise, most growers piece together the usual tank, regulator, controller, or bag options themselves.
Your CO2 Dosing and Monitoring Schedule
Once the hardware is installed, the next question is simple: when do you run it, and how much do you aim for?
The answer is not “all the time.” Plants use supplemental CO2 during lights-on. They do not use it the same way in the dark, so dumping gas into the tent overnight is wasted effort.
The target ranges that matter
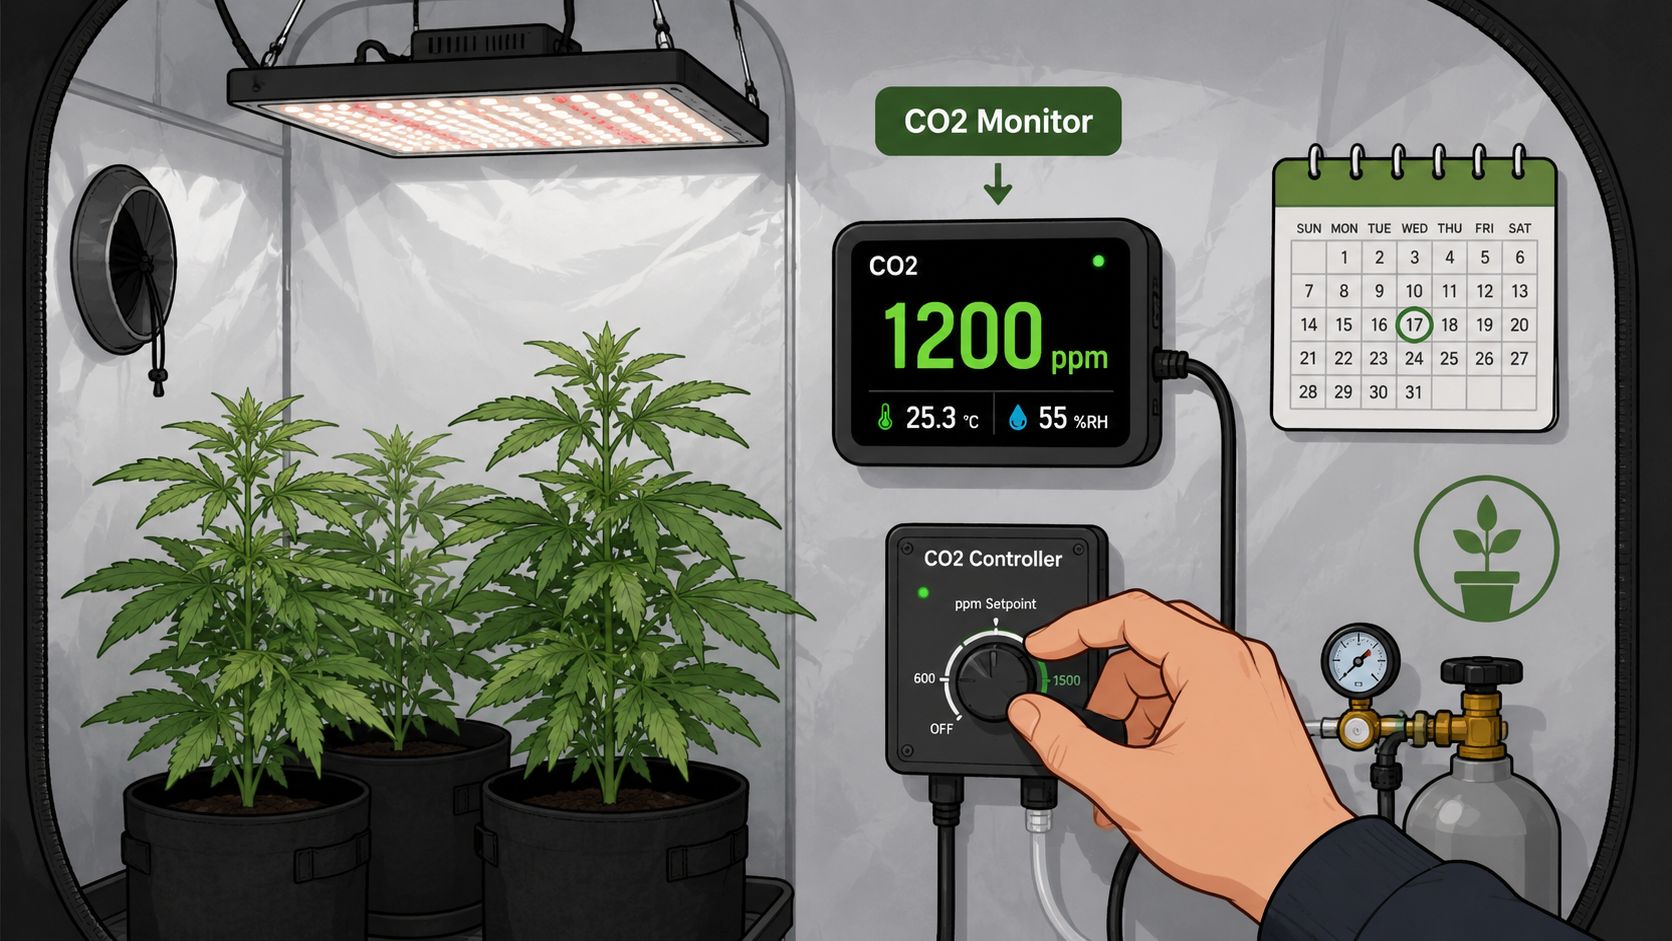
For a grow tent, one practical schedule is to start enrichment about 30 minutes after lights-on and stop about 30 minutes before lights-off, with target ranges of 800 to 1,200 ppm in vegetative growth and 1,000 to 1,500 ppm in early to mid flower, based on HydroBuilder's grow tent guidance covered earlier.
Those ranges are above normal fresh-air conditions, which are commonly described as about 400 ppm in grow guidance already cited earlier. The whole point is to raise available CO2 during the hours when photosynthesis is active and your environment can support it.
Where CO2 tends to pay off most
A long-running indoor growing reference says plants need a baseline atmospheric concentration to photosynthesize, setting a minimum at 330 ppm. The same source states that a 25% drop in natural CO2 can inhibit growth by over 50%, and that daytime enrichment above natural levels can raise growth rates and yields by over 30% when the rest of the environment is optimized. It also ties the most effective use to the vegetative stage and early flowering, when plants can turn extra CO2 into more biomass under strong light, according to this article on CO2 applications in indoor growing.
That lines up with what many growers see in practice. Vegging plants and early flower usually respond better than late flower plants that are already finishing.
A simple daily routine
A useful rhythm looks like this:
- Lights come on: Let the tent stabilize first.
- Begin enrichment shortly after: Don't start dumping gas into a tent that's still shifting.
- Hold the target range during the active light period: Let the controller do the work.
- Stop before lights-out: No point paying for night dosing.
- Check readings regularly: Not obsessively, but enough to catch drift.
Your monitor is doing more than showing a number. It tells you whether the tent is sealed well enough, whether the controller is behaving, and whether your dosing is consistent from day to day.
Monitor the whole environment, not just CO2
CO2 only performs well when the rest of the room is in line. If your humidity or temperature is drifting, or your leaf transpiration is off, the gas won't deliver what you expect. That's why it helps to keep your climate targets aligned with a weed VPD chart instead of looking at CO2 in isolation.
A grower who watches only ppm can still miss the underlying issue.
Extra CO2 with weak environmental control is just a more complicated way to run an average tent.
Safety and common sense
You also need to treat compressed gas with respect. Ventilate the tent before sticking your head in while the system is actively dosing, and don't get casual with fittings, hoses, or tank handling. Home tents are small spaces. Small spaces make mistakes feel bigger, faster.
Another practical point: some guidance notes that concentrations above 2,000 ppm can hinder photosynthesis and plant health, which is one more reason to use a controller instead of guessing, as noted in the earlier CO2Meter reference already cited above.
Common CO2 Issues and Optimization Tips
When growers say CO2 “didn't work,” the problem is usually not the idea of CO2. It's the setup.
The usual trouble spots
If ppm won't stay up, look for leaks first. Check zipper lines, duct ports, loose seams, and any place your exhaust setup is still pulling enriched air out too quickly.
If growth doesn't improve, ask the annoying question before you blame the gas: is the light strong enough, and is the rest of the environment stable? CO2 amplifies a good grow. It also amplifies the limits of a mediocre one.
Easy improvements that help
- Use internal air movement: Oscillating fans help distribute enriched air across the canopy.
- Keep the sensor honest: Recheck canopy height as plants stretch.
- Match the method to the tent: A bag for a casual trial, a controller setup for real precision.
- Don't force it in tiny, leaky tents: Sometimes the smart move is skipping CO2 and spending that effort on better lighting or sealing.
CO2 works best when nothing else in the room is fighting it.
The last piece is genetics. If you're building a cleaner, stronger environment, it makes sense to pair it with cultivars that fit your space, your light level, and your timeline instead of just grabbing whatever sounds cool on the label.
If you're planning your next run, Botanist Seeds is a practical place to compare feminized and autoflower cultivars by growth style, setup fit, and harvest goals. That makes it easier to match the genetics to the tent you have, especially if you're dialing in a more controlled environment with CO2.












